 Try ShortPoint now
In this article, we will show you how you can create a wiki page and wiki page library in SharePoint.
This will become a starting point to try ShortPoint for you if you are using the Classic Experience on SharePoint Online, or if you are using SharePoint On-Premise 2013/2016.
Please follow the steps below.
TABLE OF CONTENTS
Creating a Wiki Page Library
SharePoint Classic site:
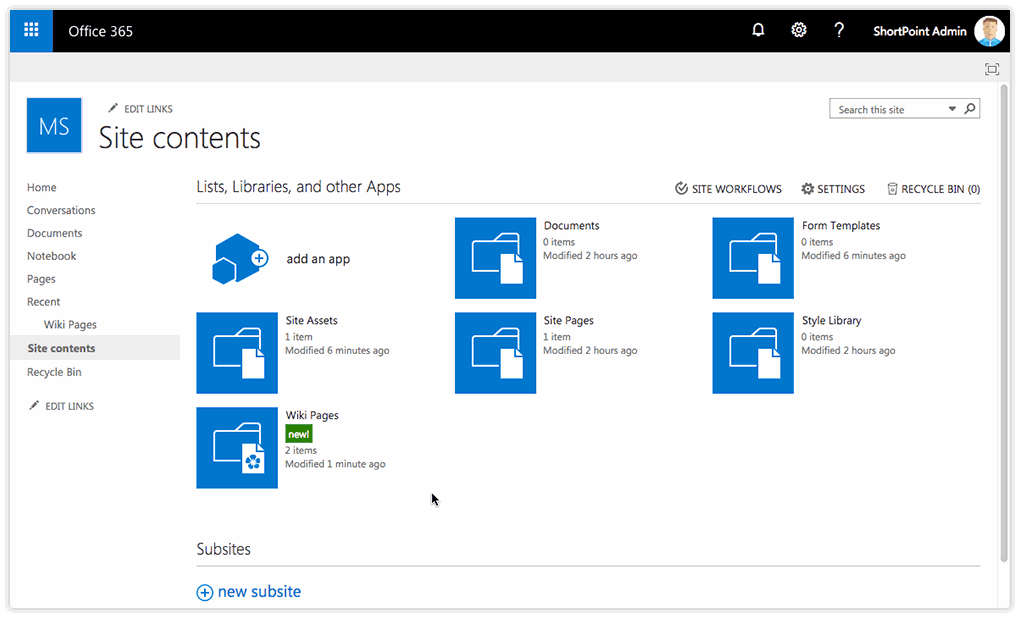
Go to the Site Contents, and click the Add an app button.
Find Wiki page library, click it, and add a name for this library:
SharePoint Modern Team site:
On the main page of your site, please click the button New and select App from the drop-down list. Switch to classic experience by clicking the link. Find Wiki page library, click it, and add a name for it:

Creating a Wiki Page Inside a Library
SharePoint Classic site:
- Open the library and go to the Page tab.
- Find the button called View All Pages and click it to see all the pages in this library.
- Choose Files from the ribbon, and click the button NewDocument.
- Now type the name for your new wiki page, and click the Create button.
- Once you are done, just save the page you created.

Alternatively, you can click the button New with a plus icon on it. Type the name for your new wiki page and click the Create button. Once you are done, just save the page you created.

SharePoint Modern Team site:
- Open the library and go to the Page tab.
- Find the button called View All Pages and click it to see all the pages in this library.
- Click the button New with a plus icon on it, and choose the Wiki Page item from the drop-down menu.
- Now type the name for your new wiki page and click the Create button.
- Once you are done, just save the page you created.
Related articles:
