 Try ShortPoint now
If you’ve ever tried to automate a workflow or use the Microsoft Graph API, you have likely run into a request for a "SharePoint Site ID."
In this article, we will break down exactly what it is, walk you through a few simple ways to find it, explore practical examples of its use, and answer frequently asked questions.
TABLE OF CONTENTS
- What is a SharePoint Site ID?
- Retrieving Site ID
- Practical Use Cases for a SharePoint Site ID
- Frequently Asked Questions
What is a SharePoint Site ID?
A SharePoint Site ID is the digital fingerprint of your SharePoint site. It is a GUID (Globally Unique Identifier) that contains a unique 128-bit text string made up of numbers and letters separated by hyphens. While humans use URLs (like https://yourcompany.sharepoint.com/sites/Marketing) to navigate the web, databases and APIs prefer something much more precise.
Typically, a Site ID looks something like this:
3a1b2c3d-4e5f-6a7b-8c9d-0e1f2a3b4c5d
Even if you rename your specific SharePoint site, change its web address, or move things around, that alphanumeric string remains permanently tied to that specific site. It ensures that background applications never lose track of where your data lives, which is critical for managing your organization's intranet and avoiding broken links.
Retrieving Site ID
Retrieving the Site ID is quite simple. Here are the three most popular methods, ranging from a quick browser window trick to advanced admin tools. Follow the option that best suits your needs:
Option 1: Adding “_api/site/id” to Site URL
You do not need admin access or coding knowledge for this method. Anyone with access to the site can do it right from their web browser.
Step 1: Copy URL
Copy the URL below:
https://yourdomain.sharepoint.com/sites/yoursite/_api/site/id
Then, replace https://yourdomain.sharepoint.com/sites/yoursite with your site’s URL.
Step 2: Paste URL
Paste the URL in the address bar and enter:
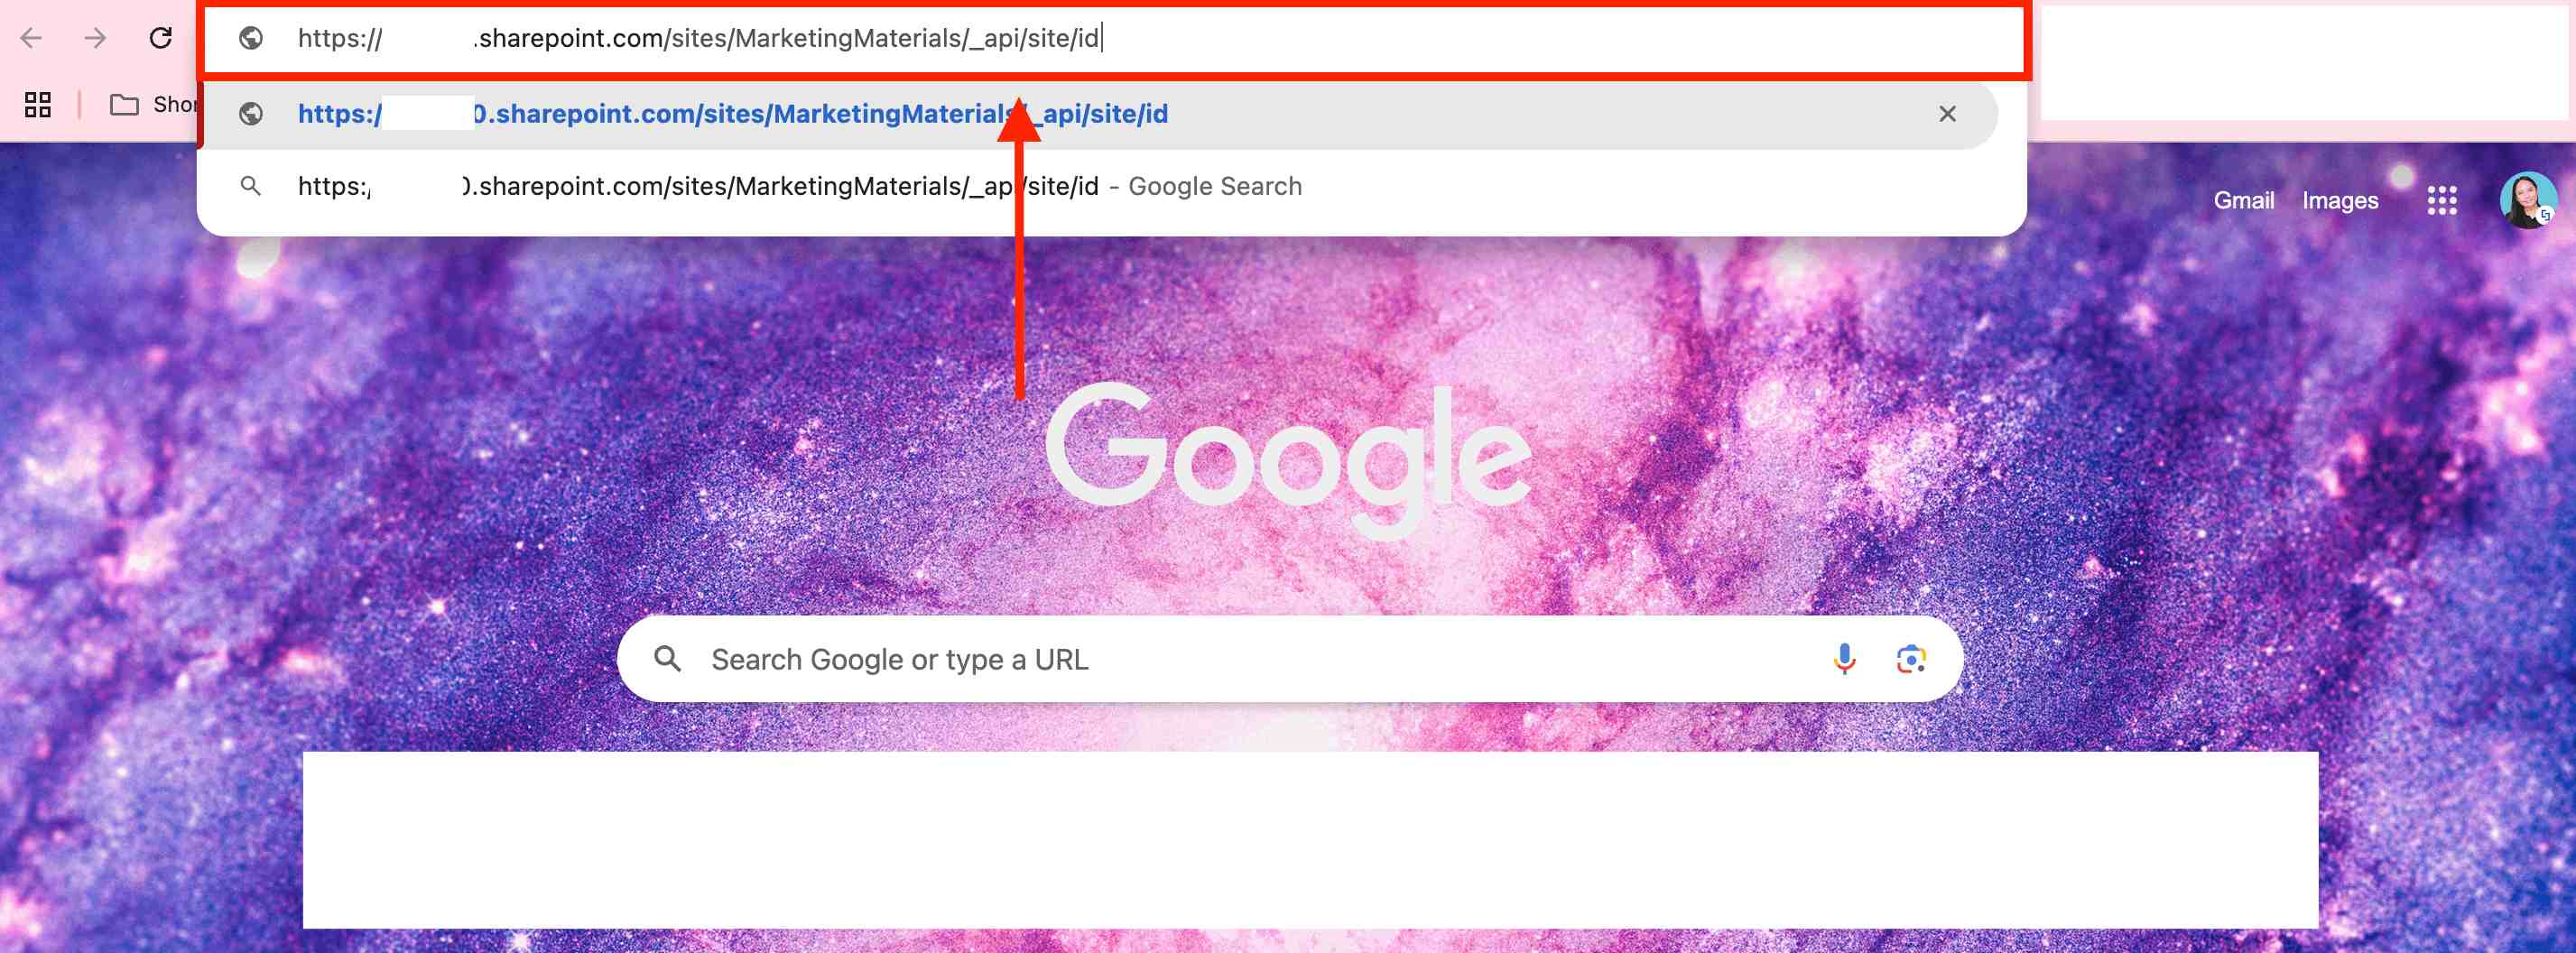
Step 3: Copy Site ID
You will be redirected to the page below. Copy the string of numbers and letters inside “Edm.Guid”>. That’s your Site ID.

Awesome! You now have your Site ID.
Option 2: Using the ShortPoint Microsoft Graph API Connection
You must be a ShortPoint Designer with a Pro or Enterprise License to use this option.
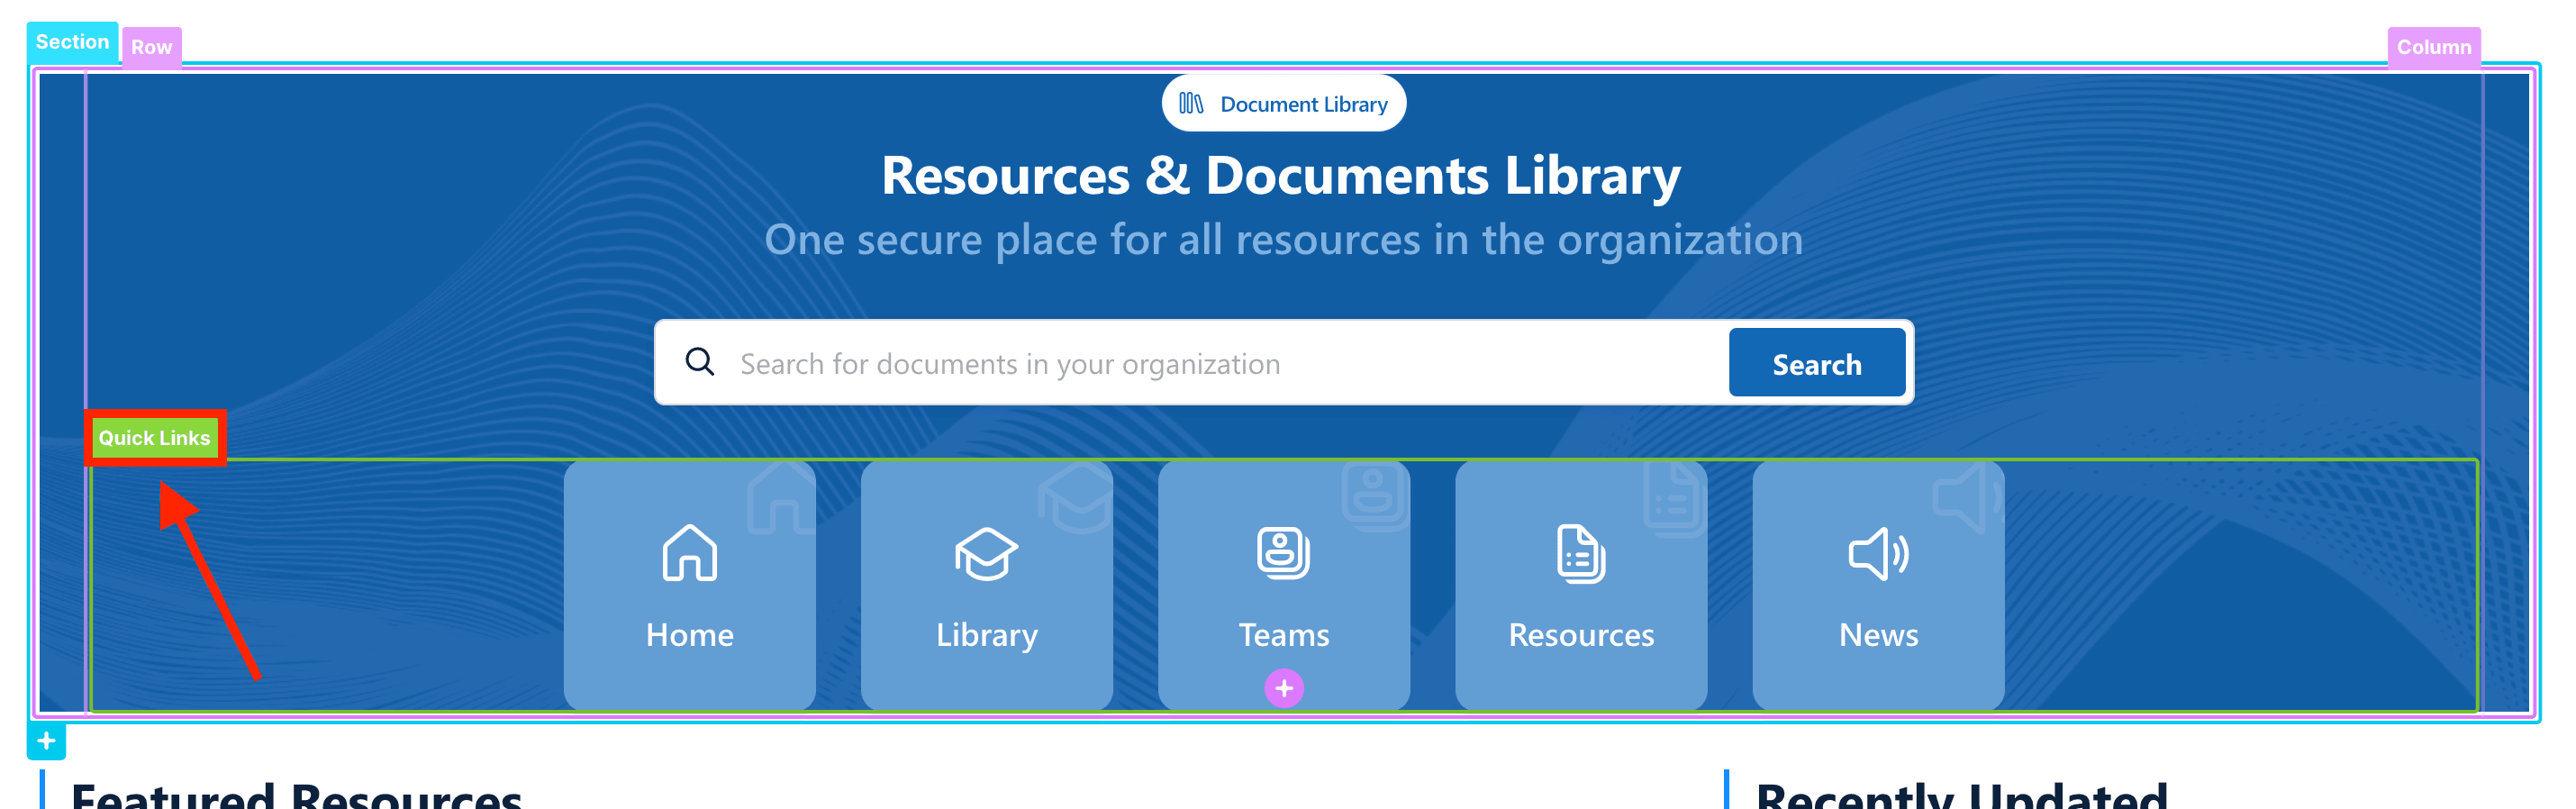
Step 1: Edit a Design Element
While in edit mode, click the EasyPass tag of any Design Element on your page. For this guide, we’ll use Quick Links:
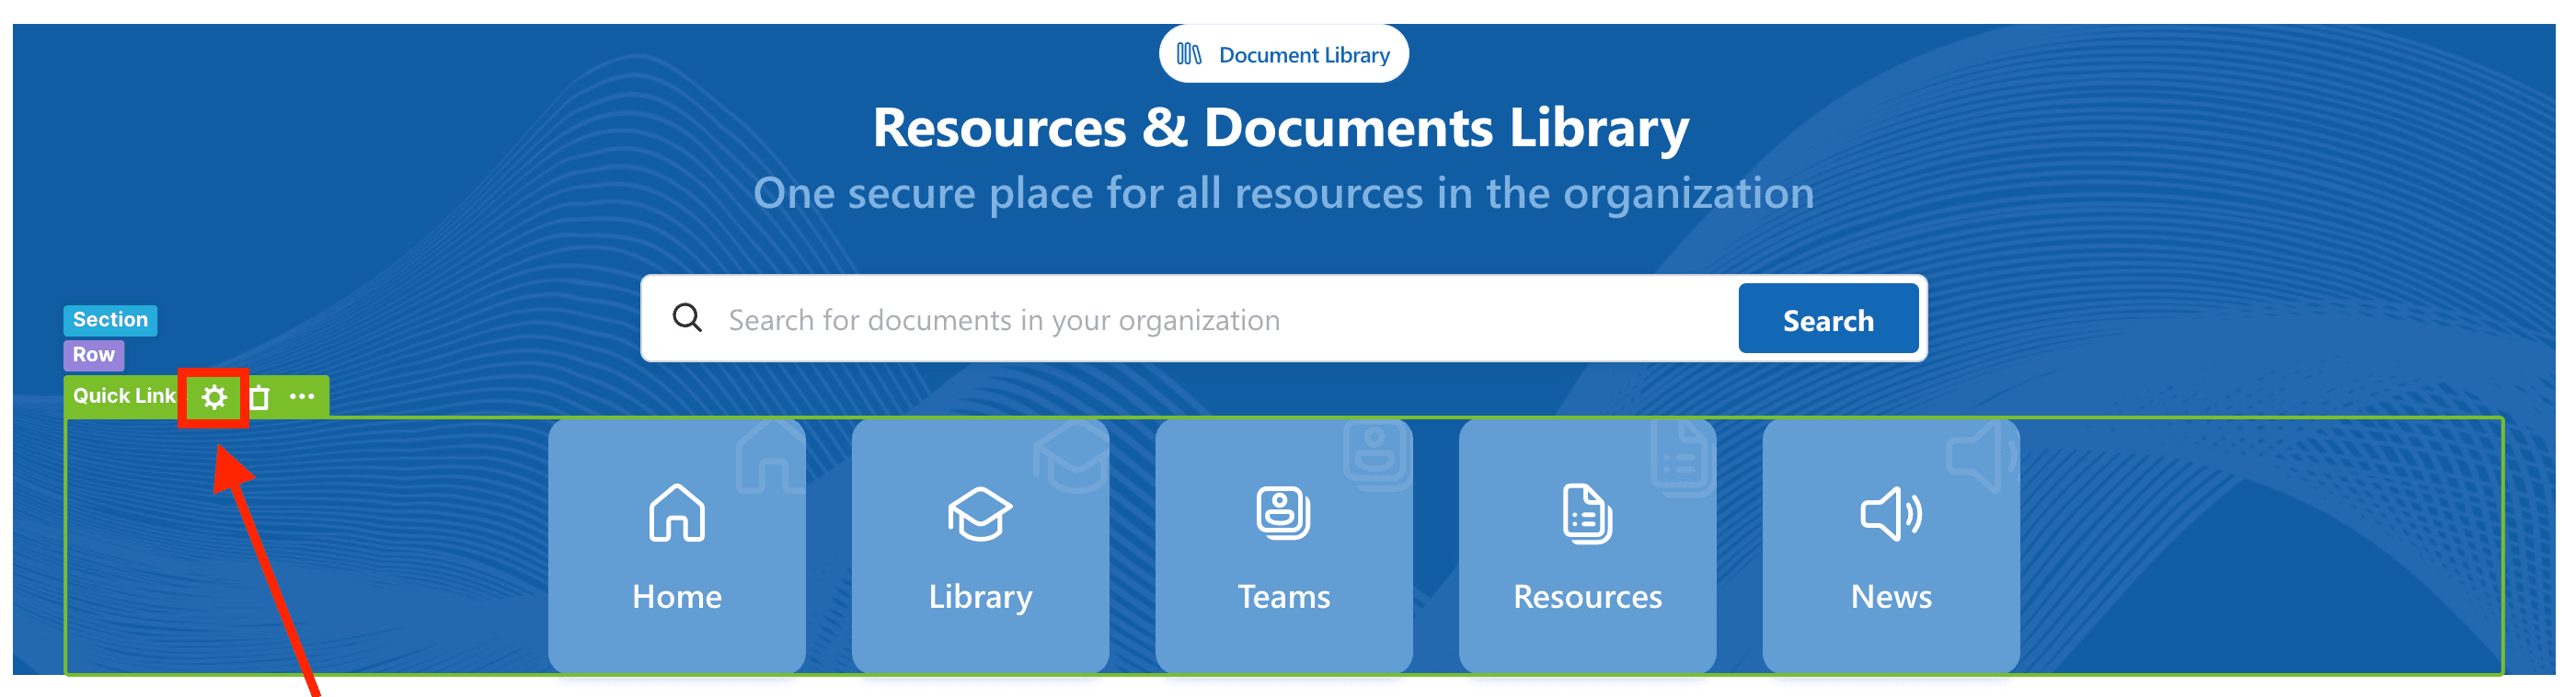
Then, click the cogwheel icon:
Step 2: Run the All SharePoint Sites Use Case
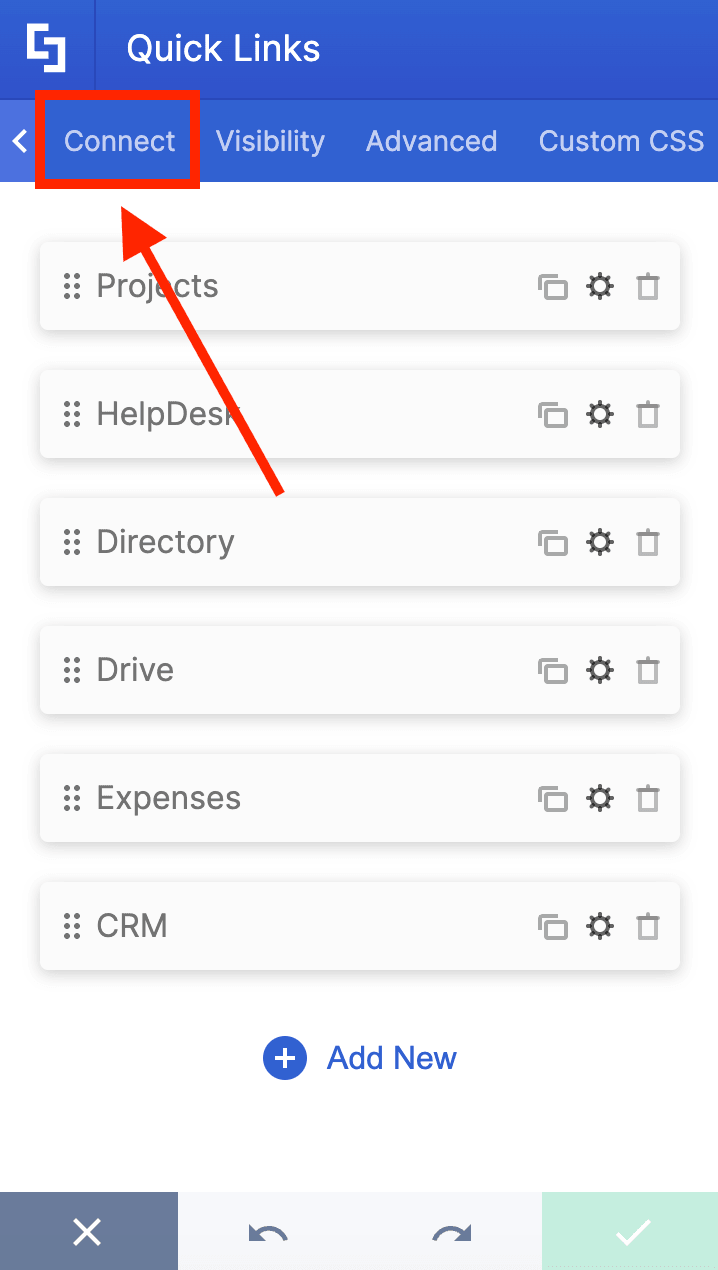
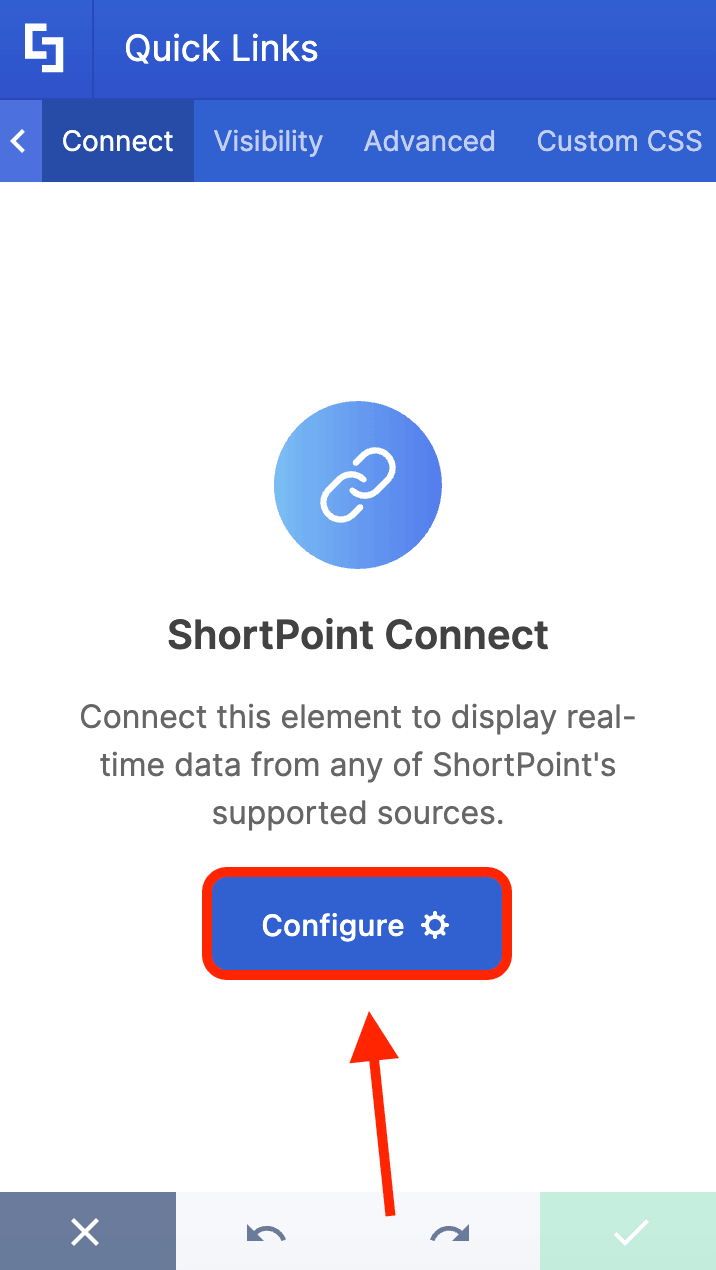
Go to the Connect tab:
Click Configure:
Select Microsoft Graph API:
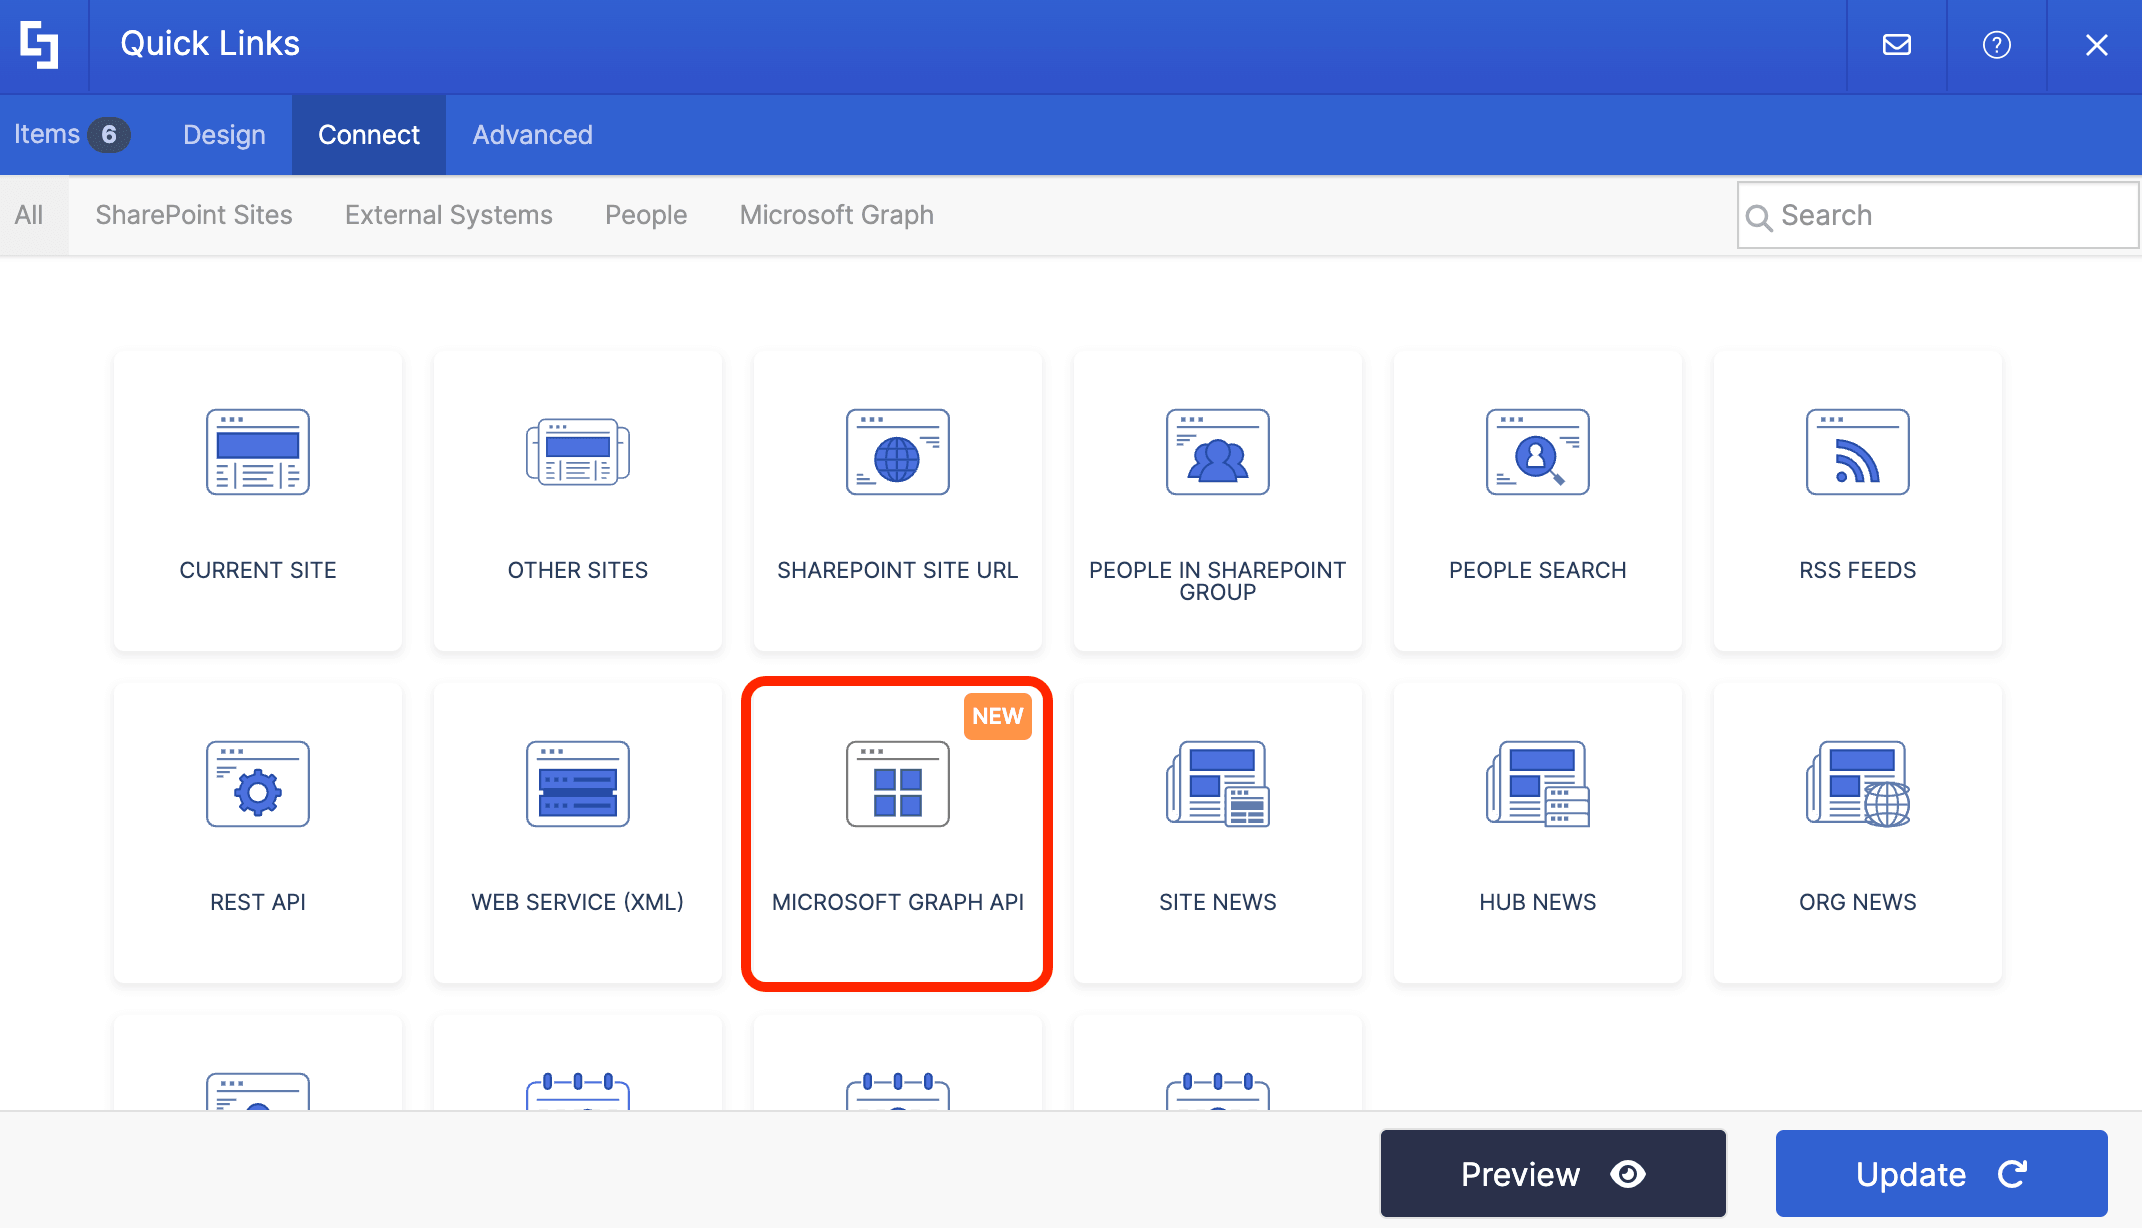
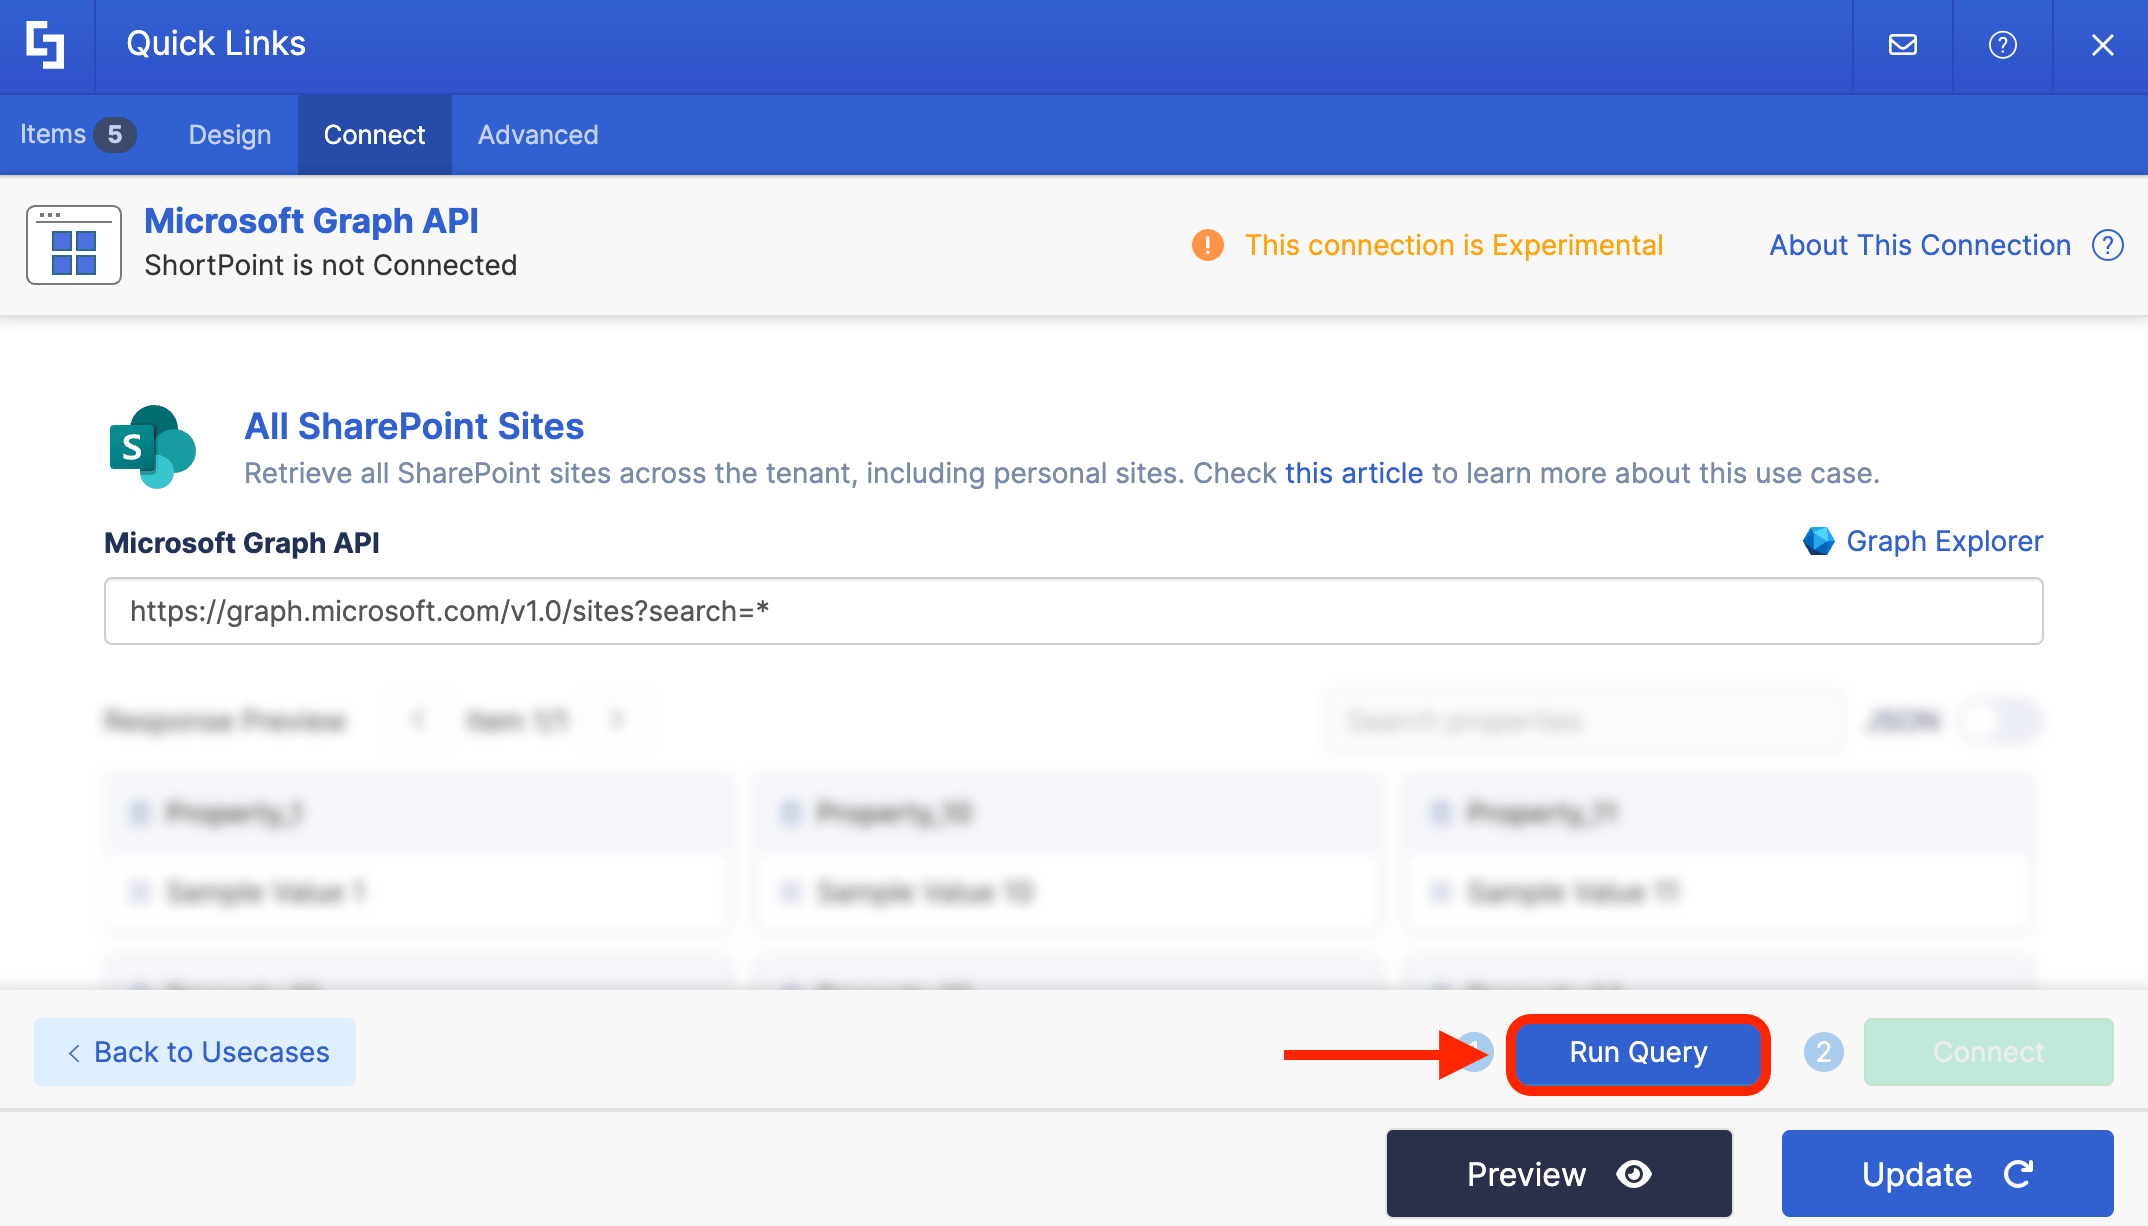
Under the Use Cases section, look for All SharePoint Sites and select it:

Click Run Query:
Step 3: Copy Site ID
Under the Response Preview, look for the display name of the site and copy its ID. In our case, our site name is HR.
That's it! You've successfully copied the Site ID.
Option 3: Using Graph Explorer
If you are working extensively with the Microsoft 365 ecosystem, Graph Explorer is a fantastic tool for fetching metadata.
Step 1: Open Graph Explorer
Go to Graph Explorer:
NOTEBefore proceeding, make sure you log in to Graph Dev Center. You can only access the Graph Explorer if you have the necessary permissions.

Step 2: Copy and modify the GET Query
Copy the GET query below:
https://graph.microsoft.com/v1.0/sites?search=site
Replace site with your site domain.
Step 3: Paste GET Query
Make sure that it is set to GET:
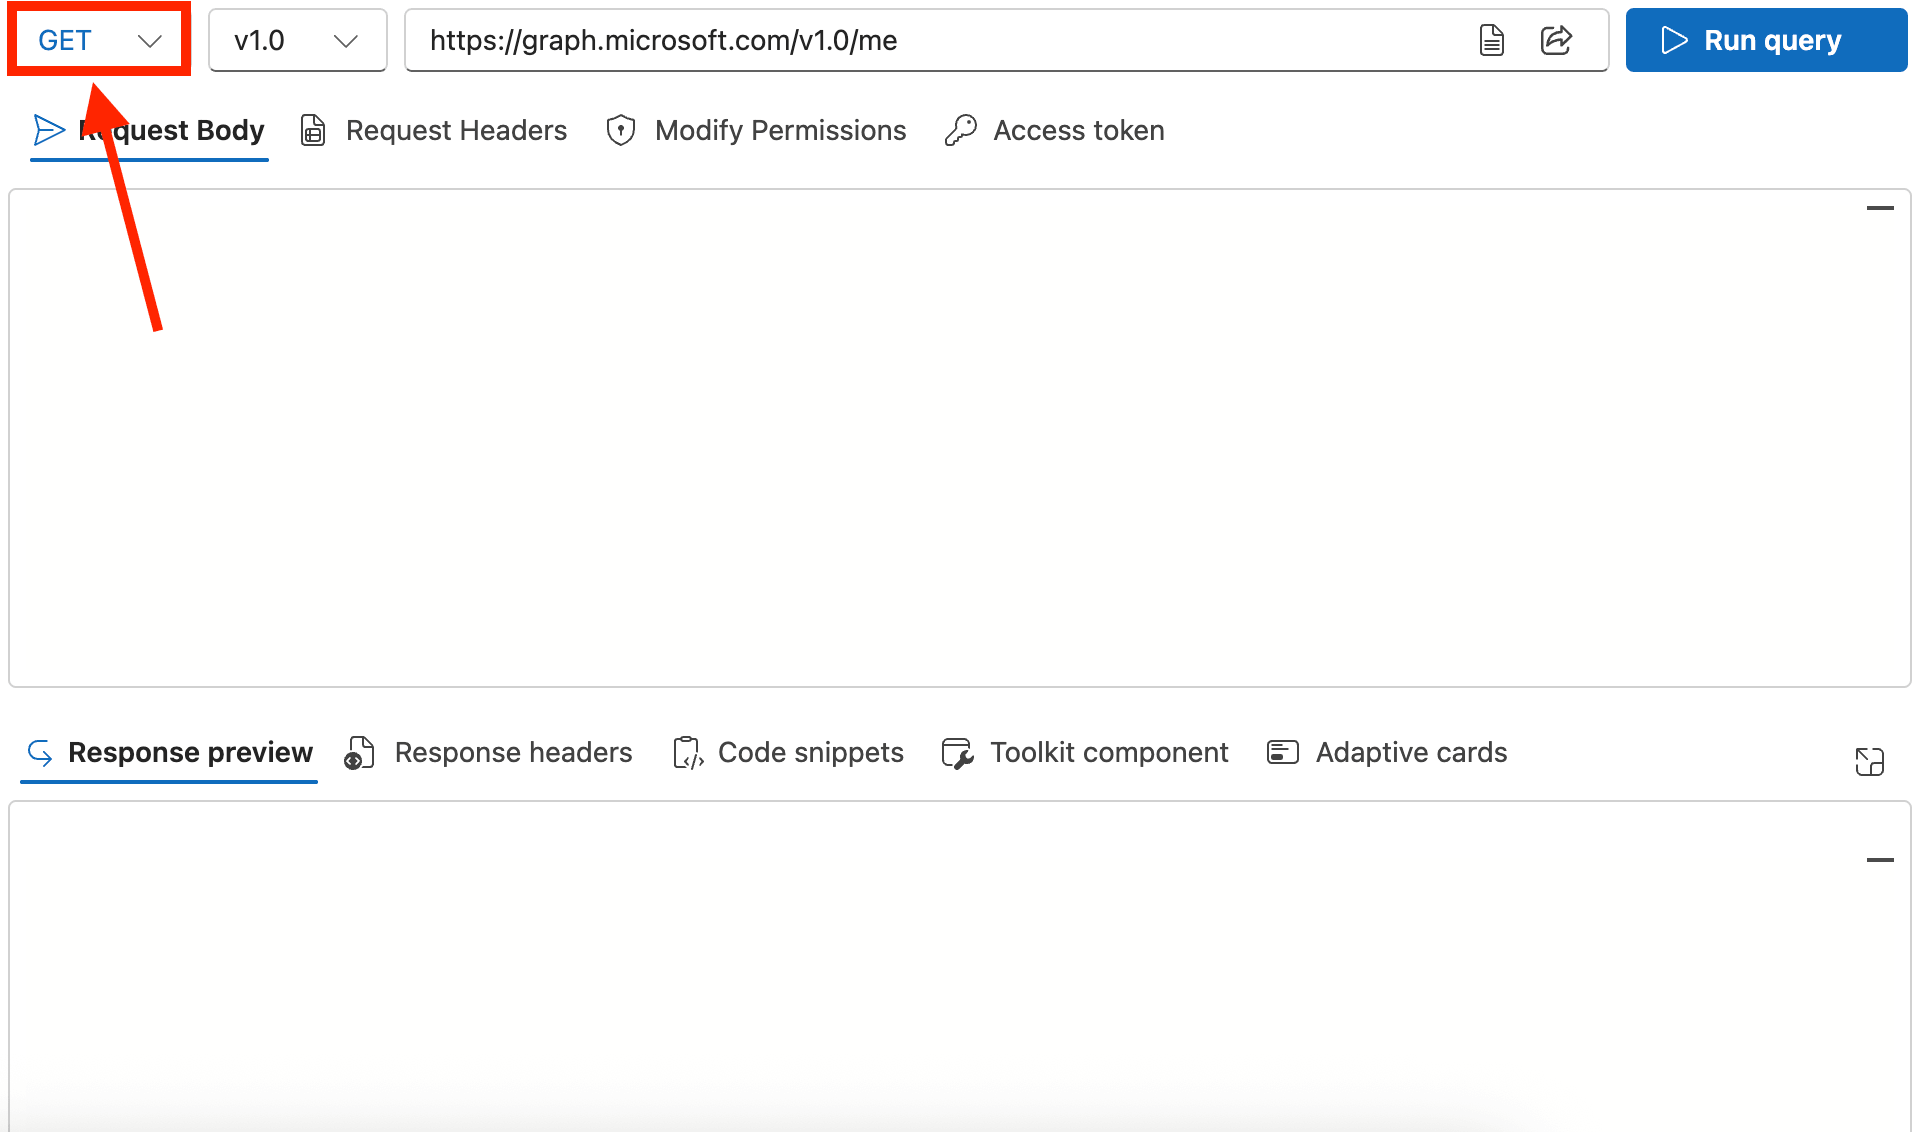
Paste the GET query in the field provided:
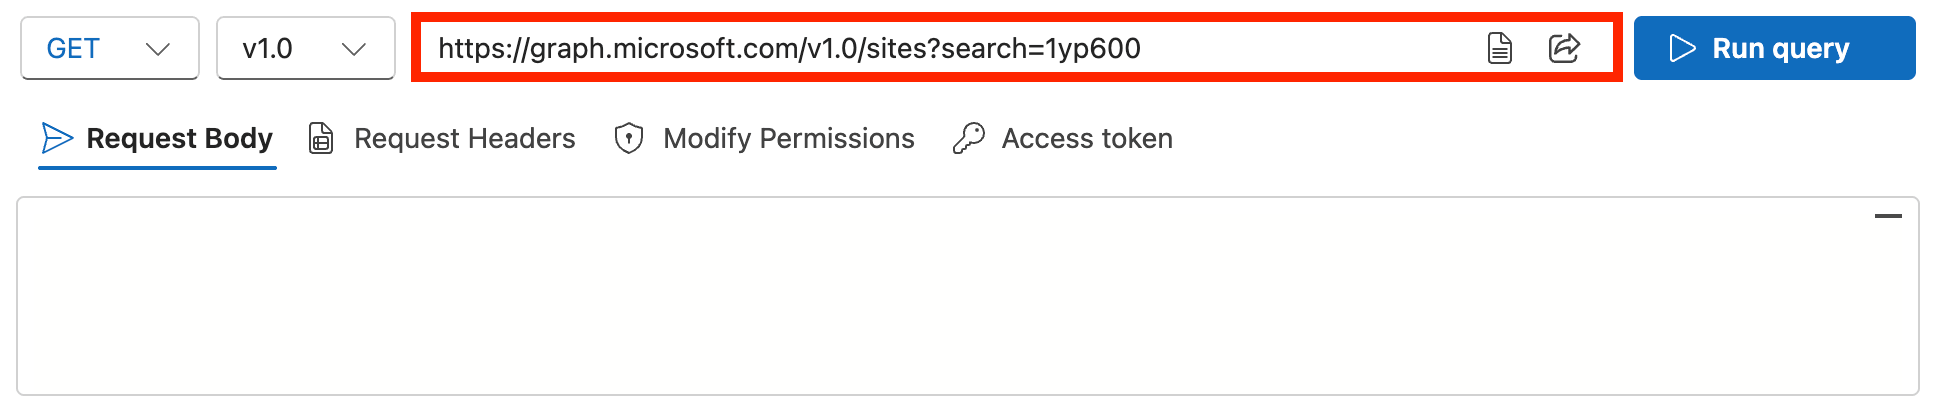
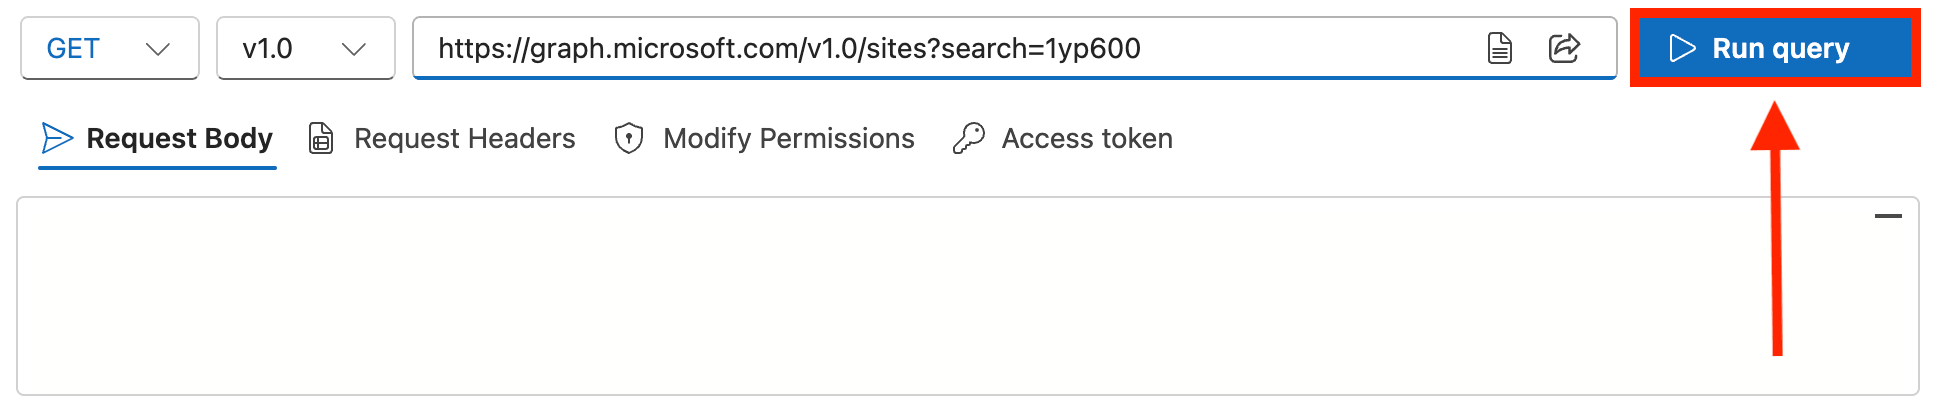
Click Run Query:
Step 4: Copy Site ID
In the Response preview section, look for the name of site:
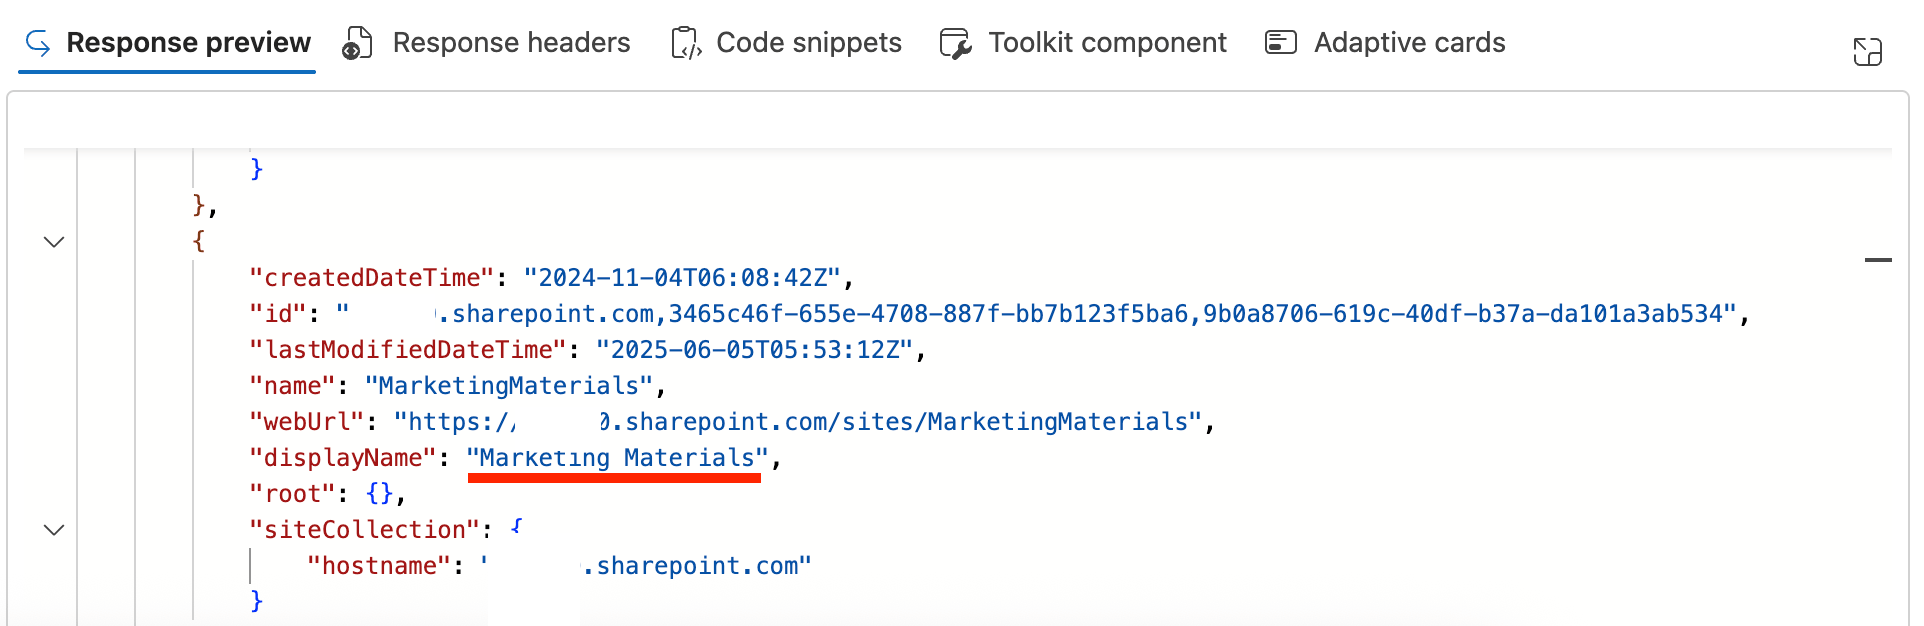
Copy the string of numbers and letters after “sharepoint.com,” and before the second “comma (,)”. That’s your Site ID.
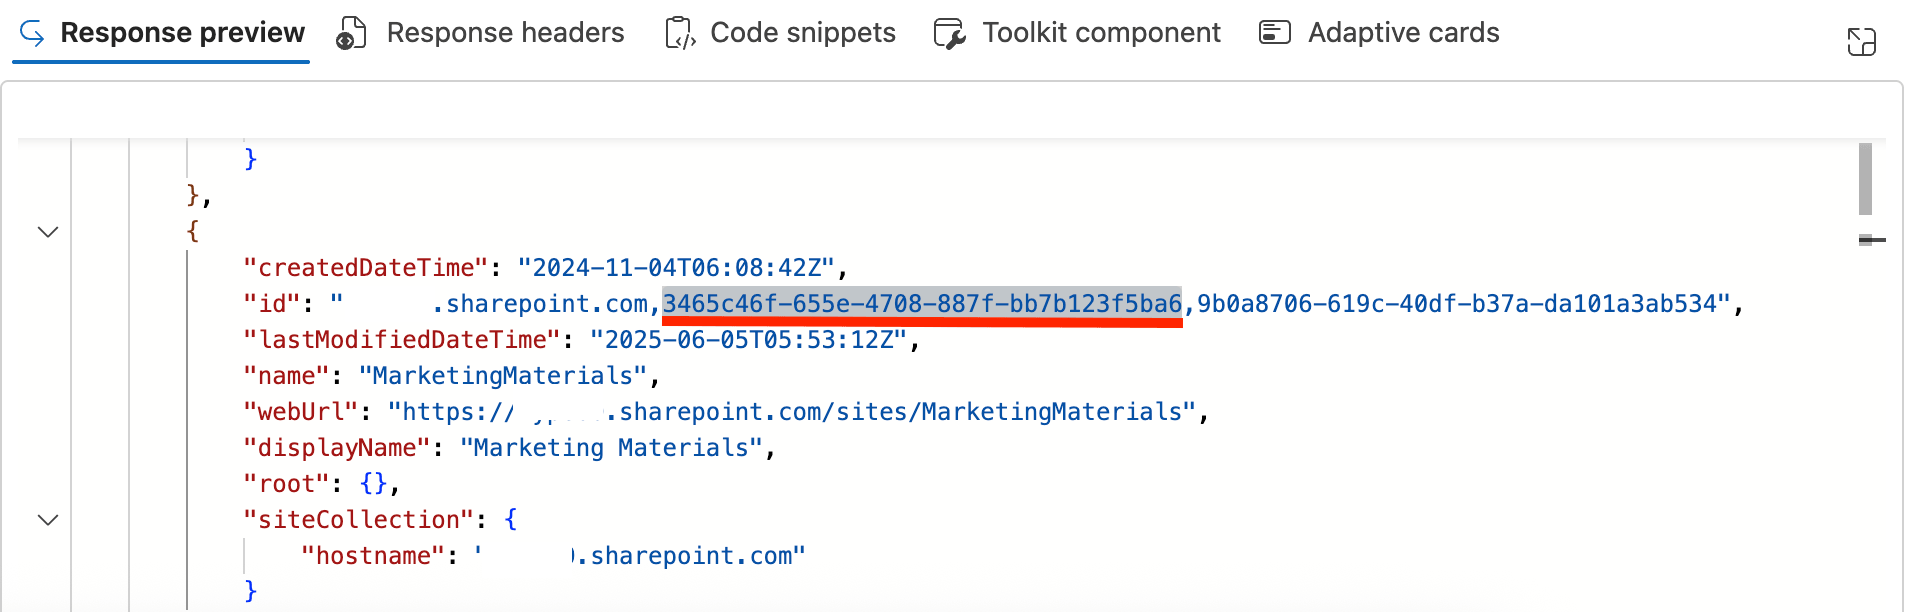
Congratulations! You have successfully retrieved your Site ID.
Option 4: Using Power Automate
If you are already constructing an automated cloud flow, you can query the ID directly inside your automation.
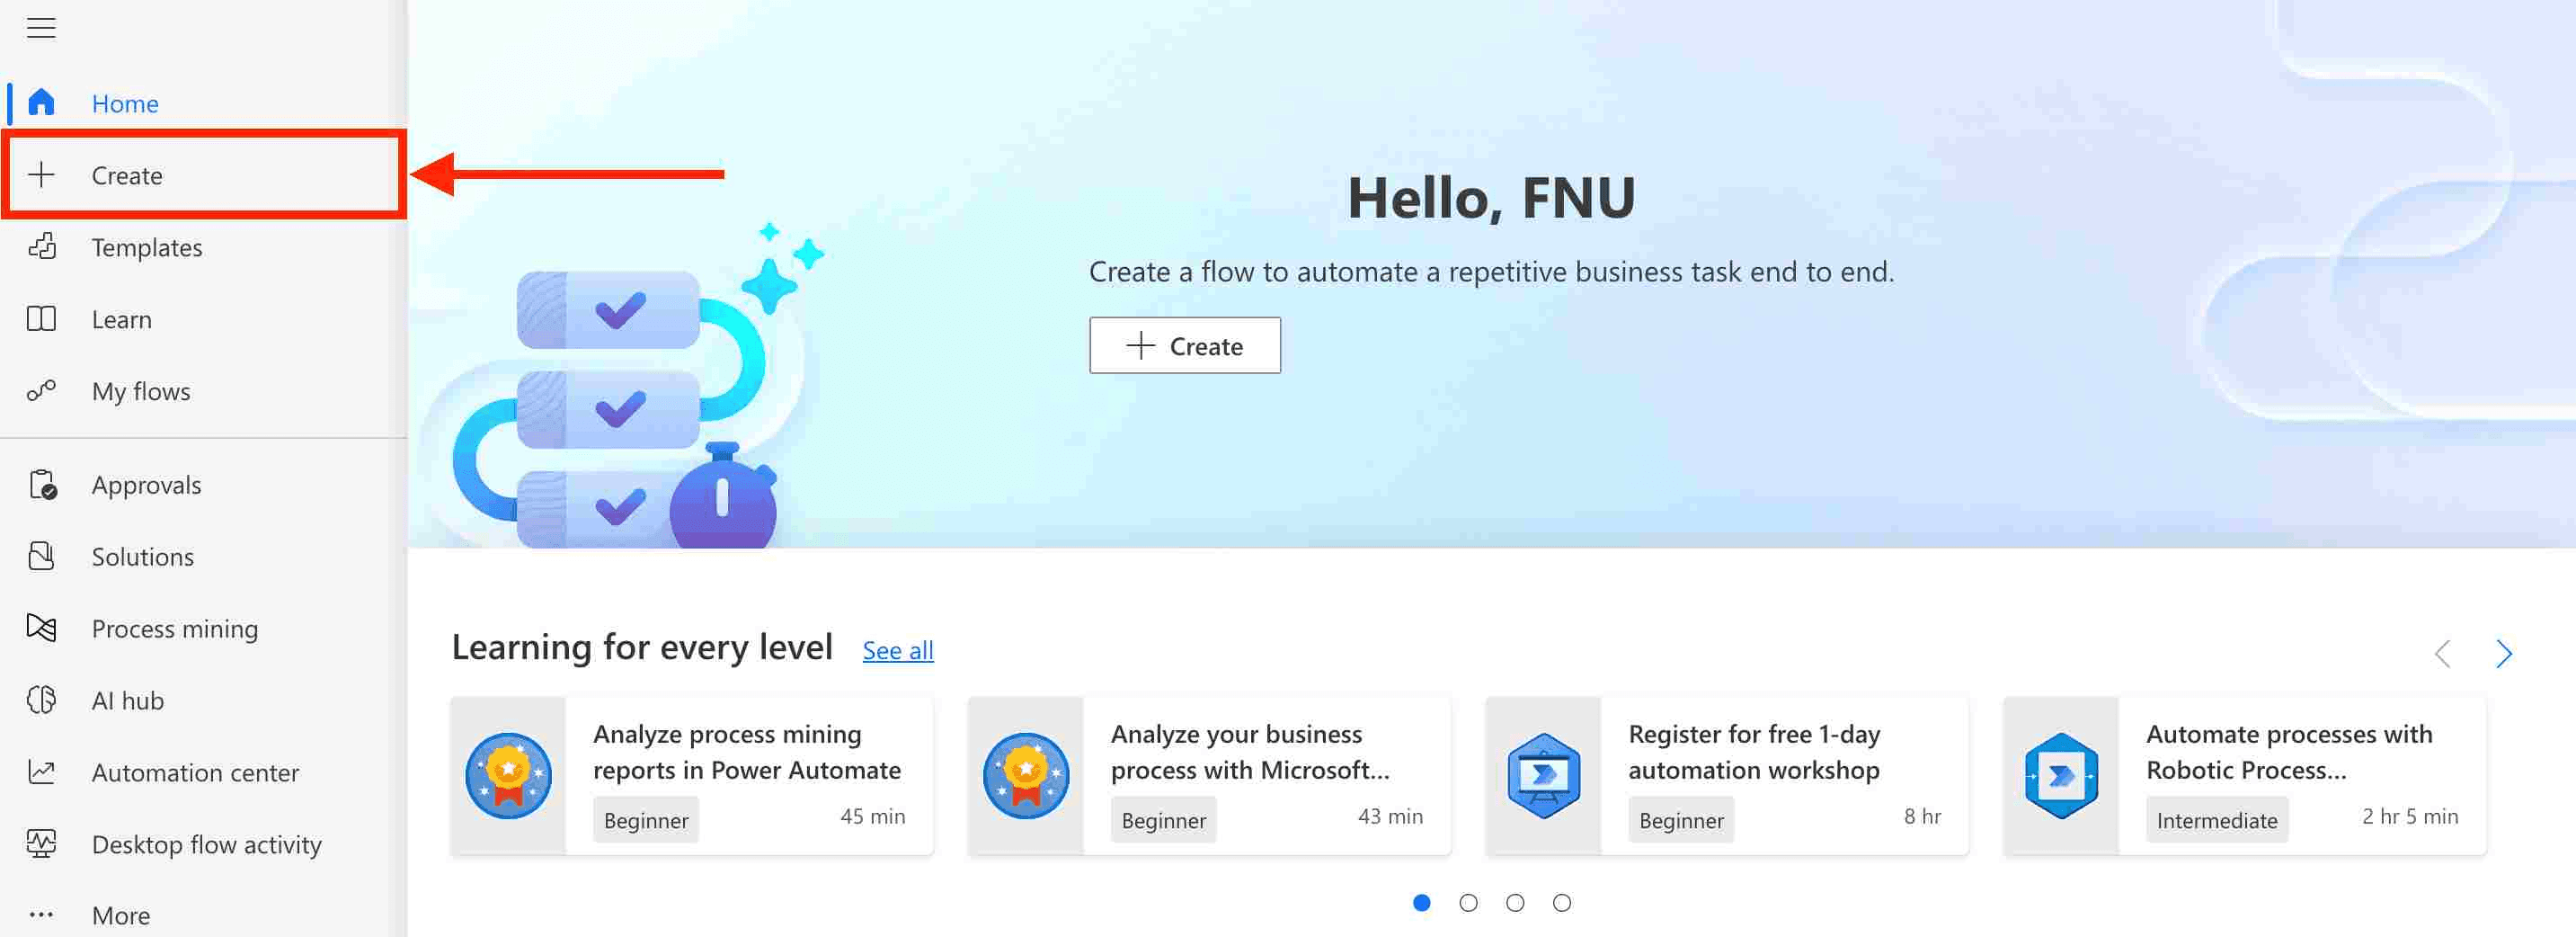
Step 1: Create a Flow in Power Automate
Go to Power Automate:
NOTEBefore proceeding, make sure you log in to Power Automate. You can only access it if you have the necessary permissions.
Click + Create:
Select Instant cloud flow:
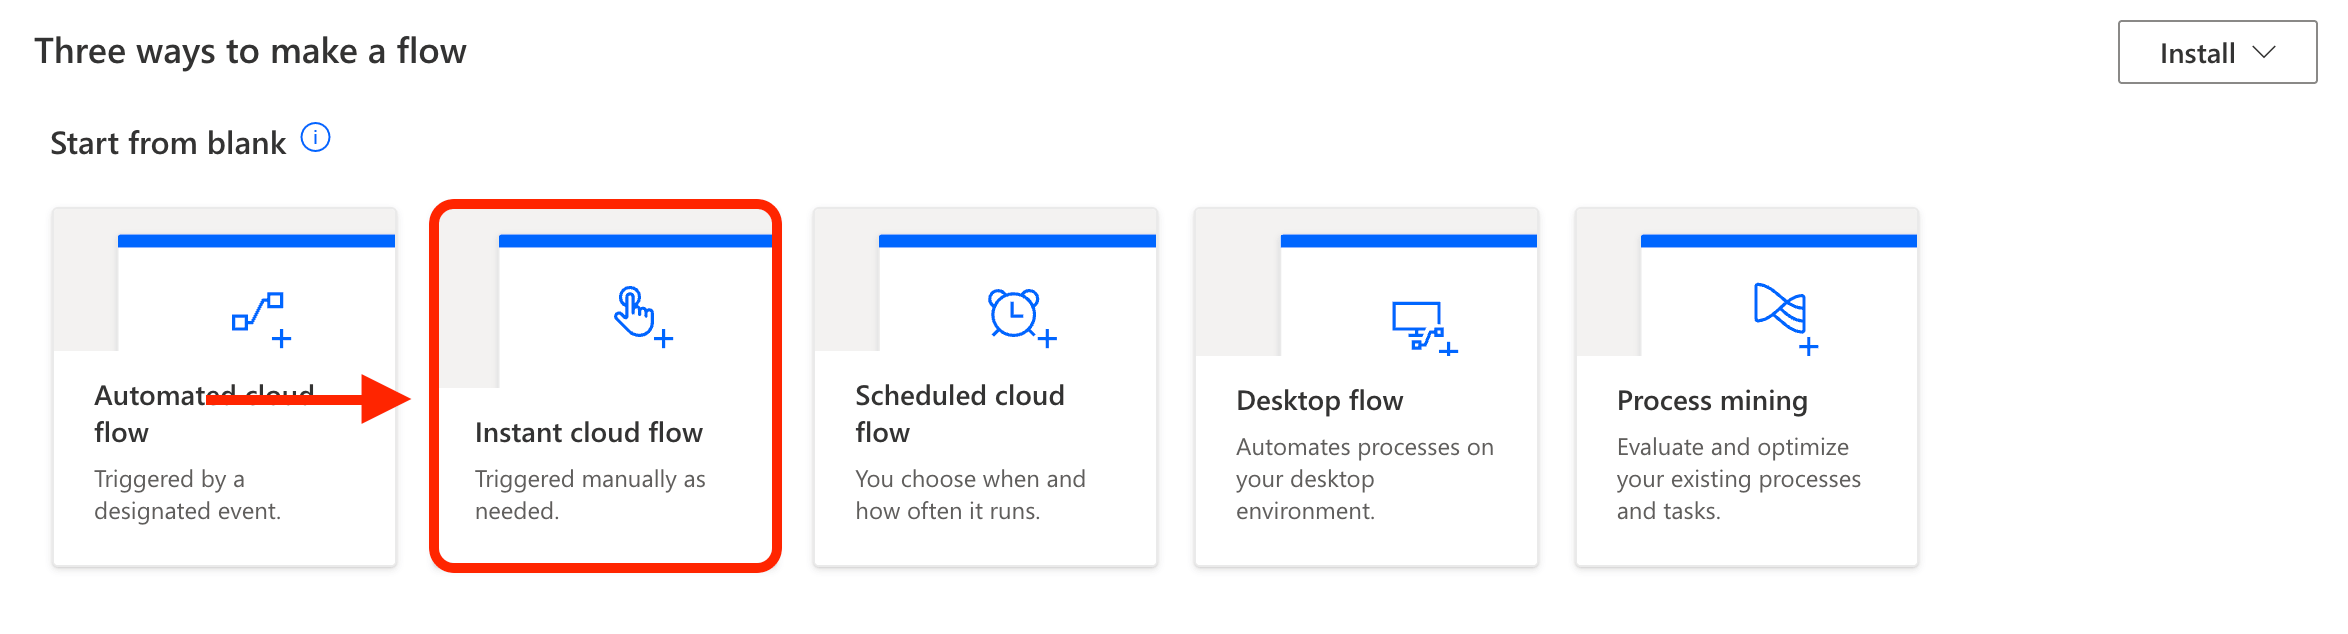
Write the [1] Flow name, select [2] Manually trigger a flow, and click [3] Create:

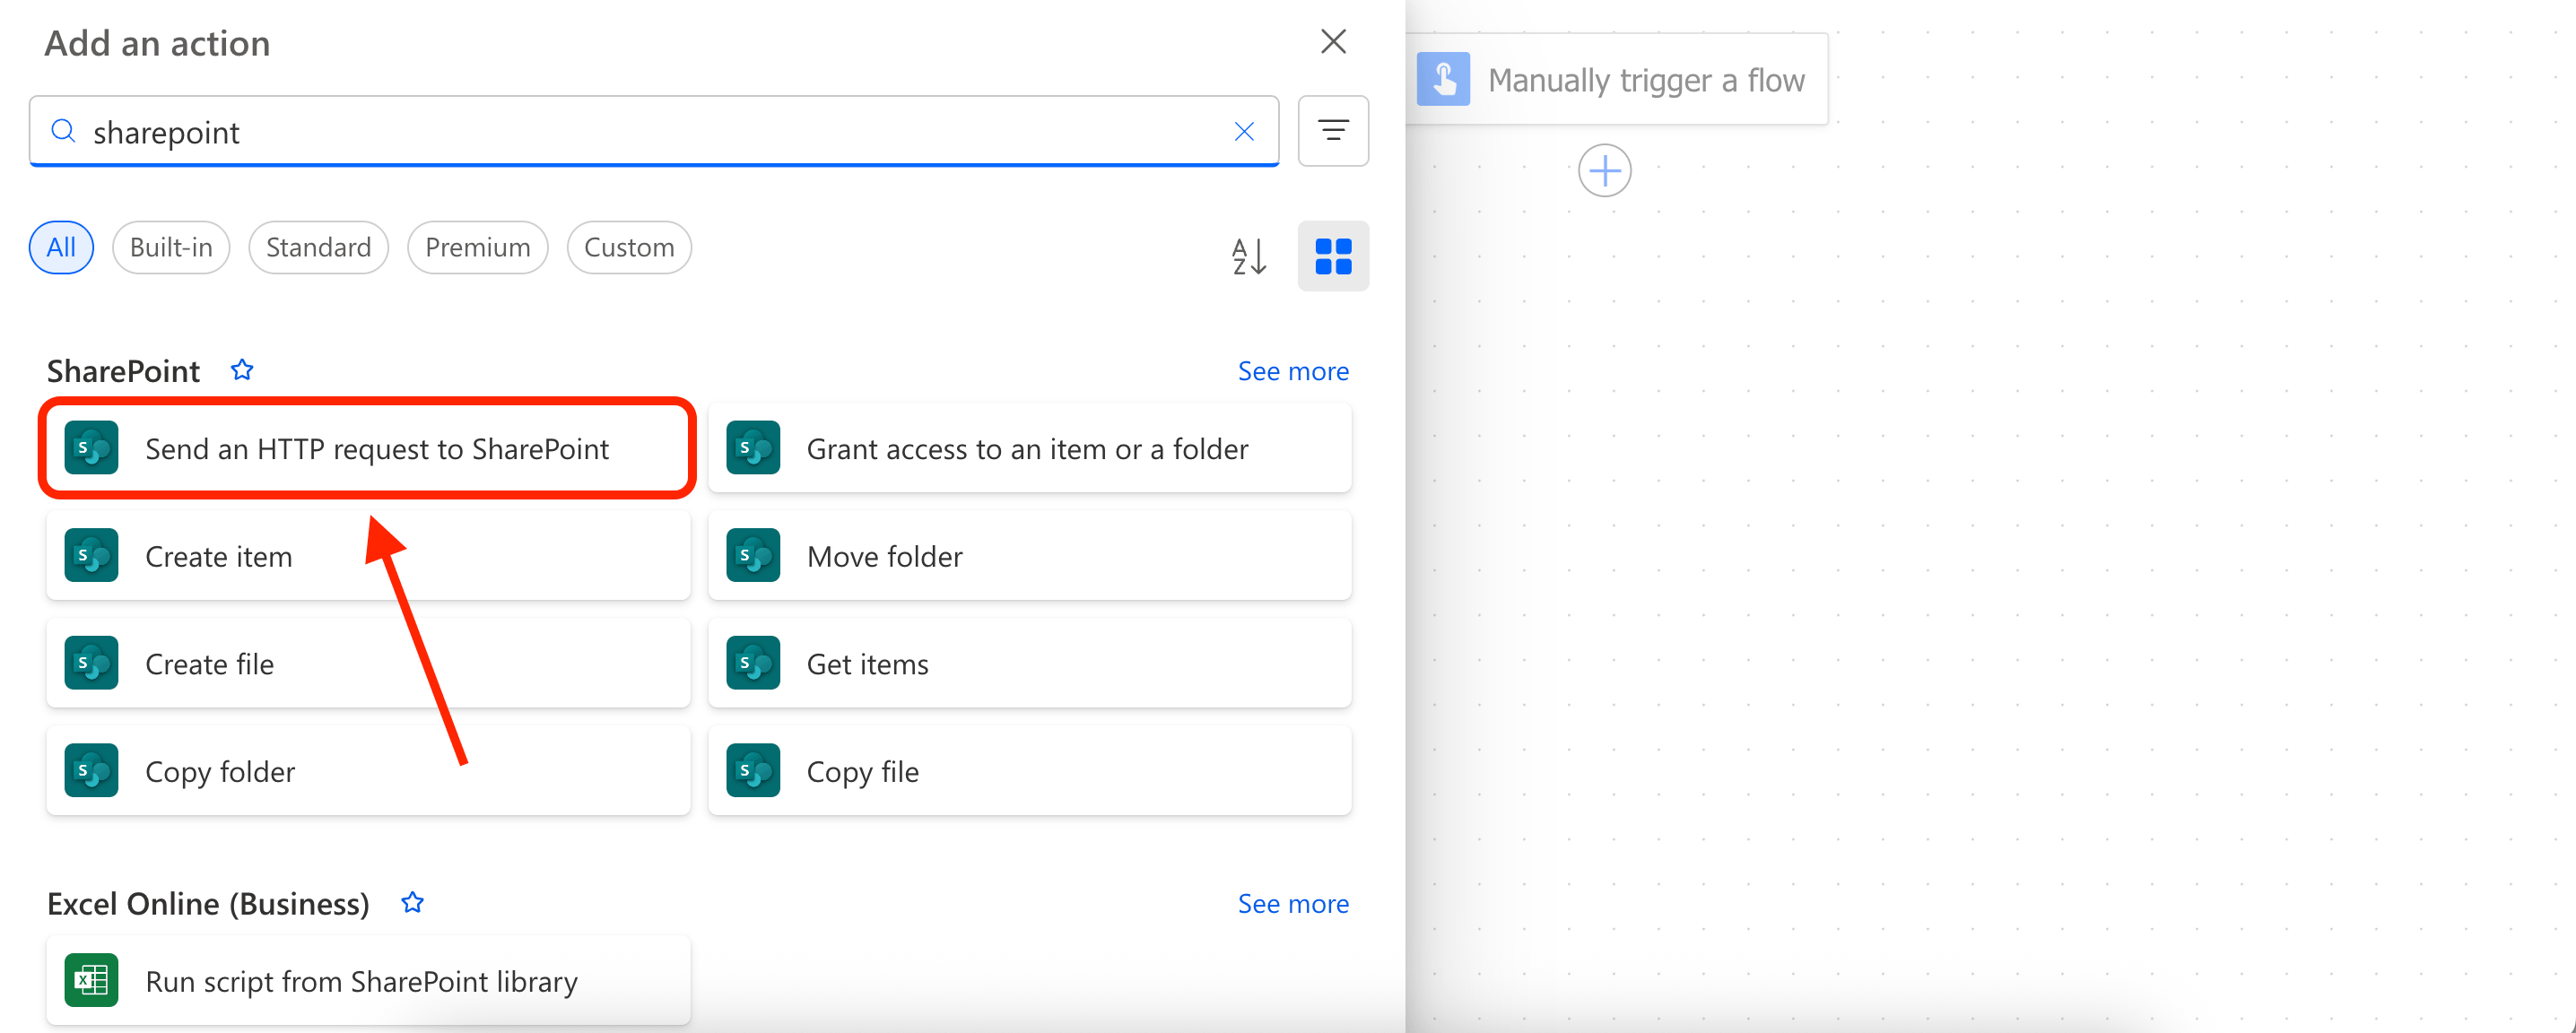
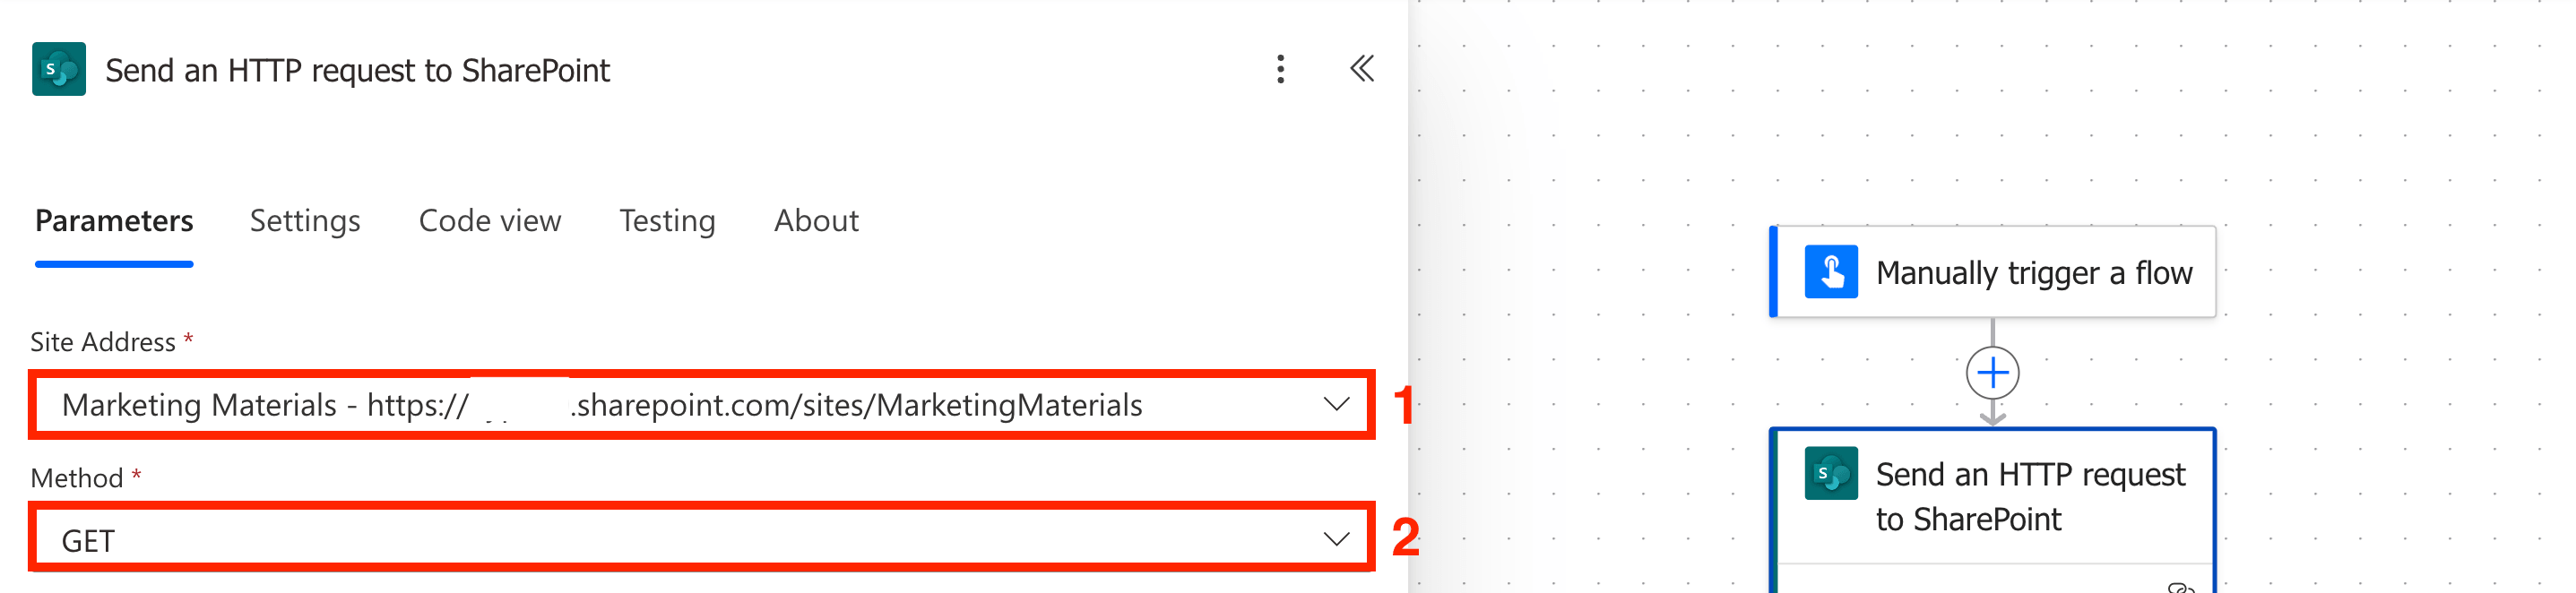
Step 2: Send an HTTP request to SharePoint
Click the plus icon:

Look for Send an HTTP request to SharePoint and select it:
Choose the [1] Site Address of the SharePoint site that you want to get the Site ID of, and select [2] Get as the method:
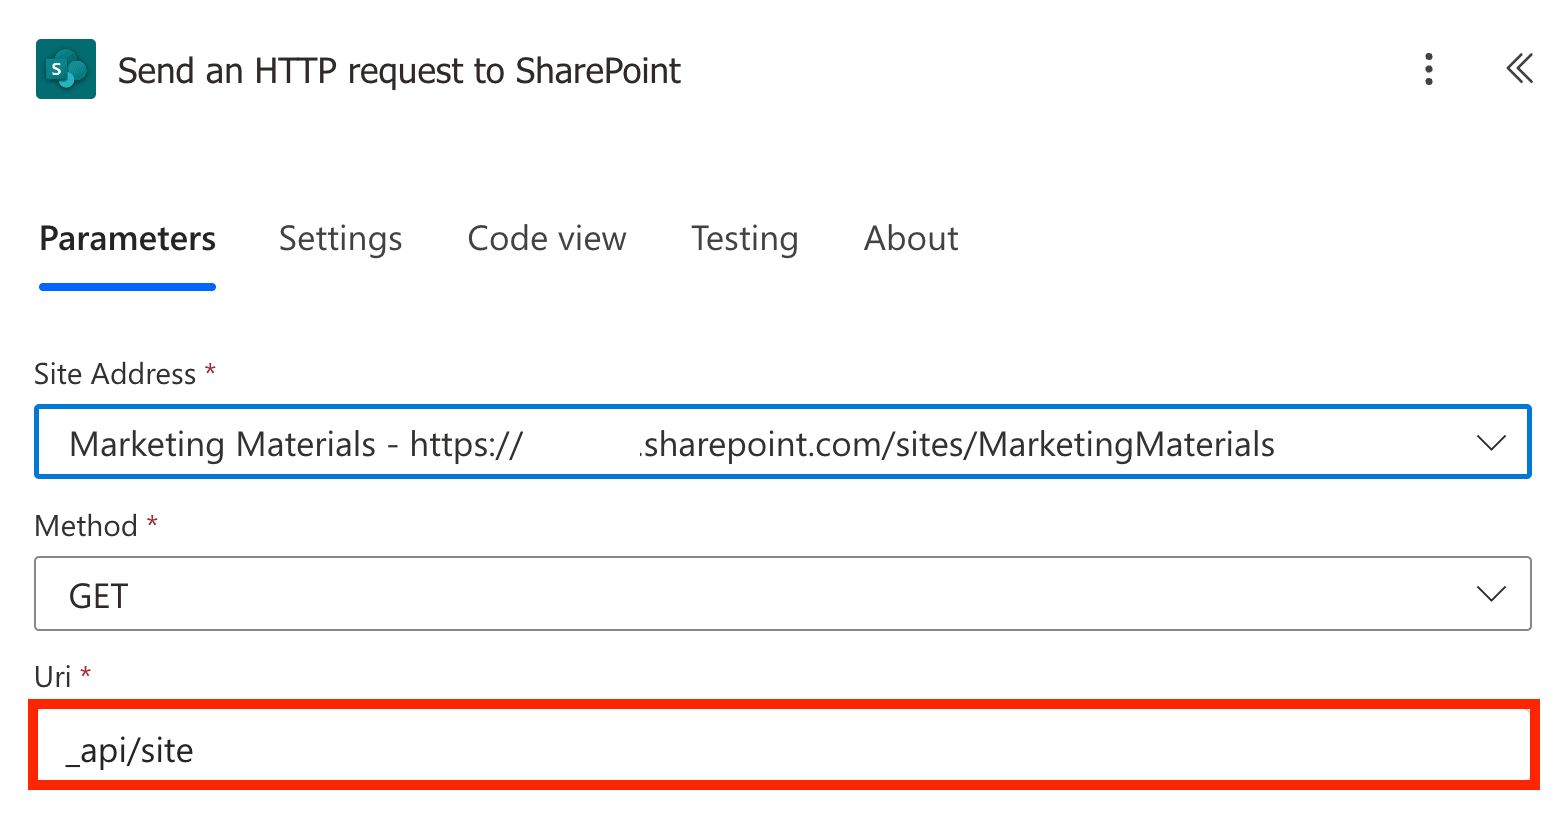
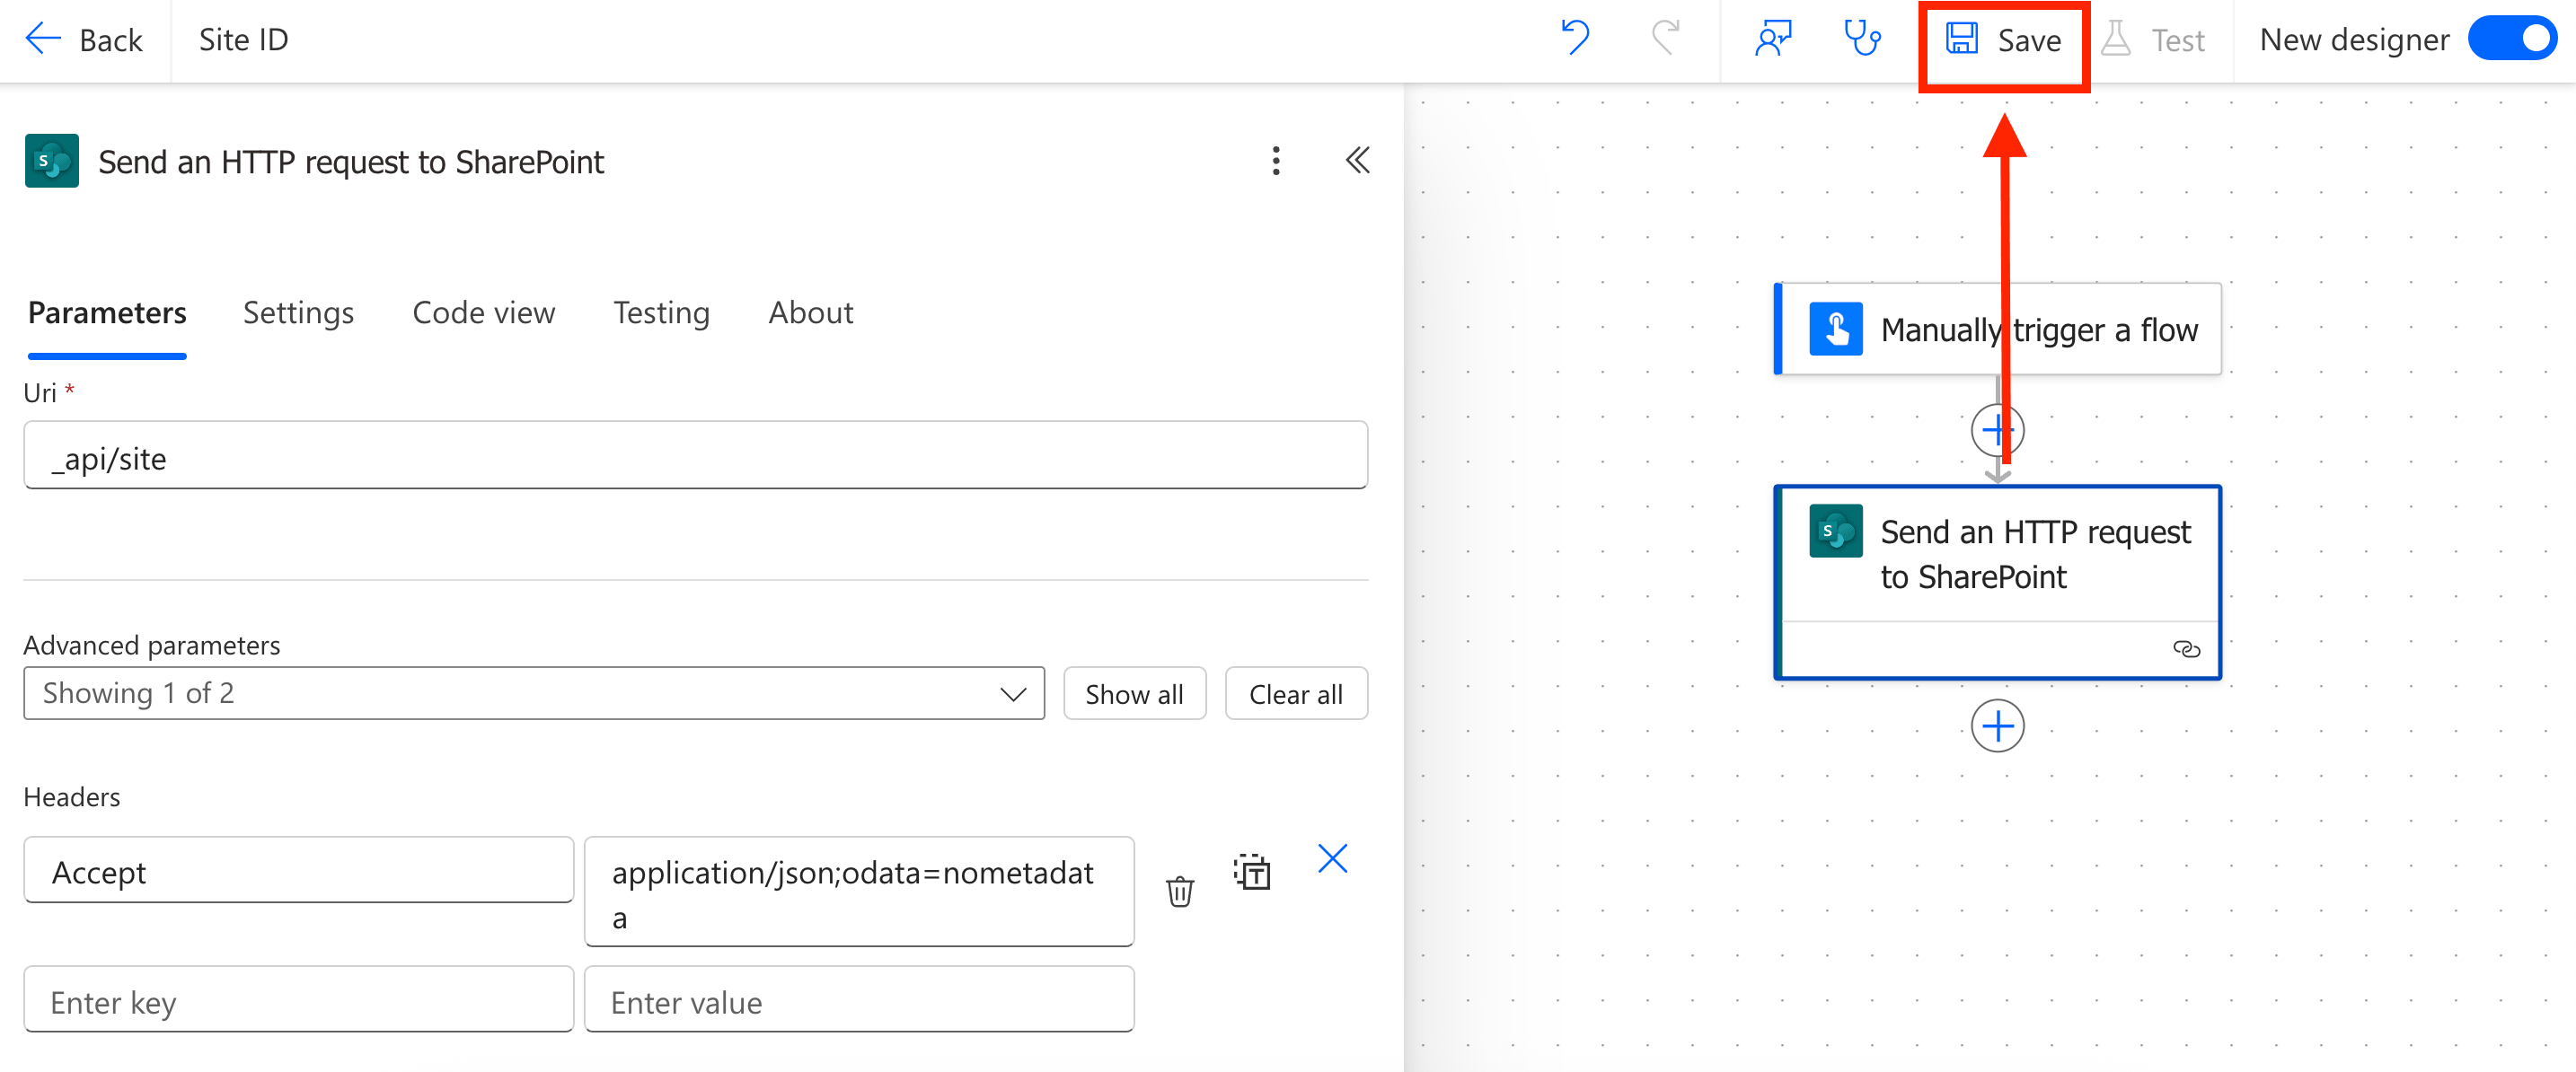
Write _api/site in the Uri field:
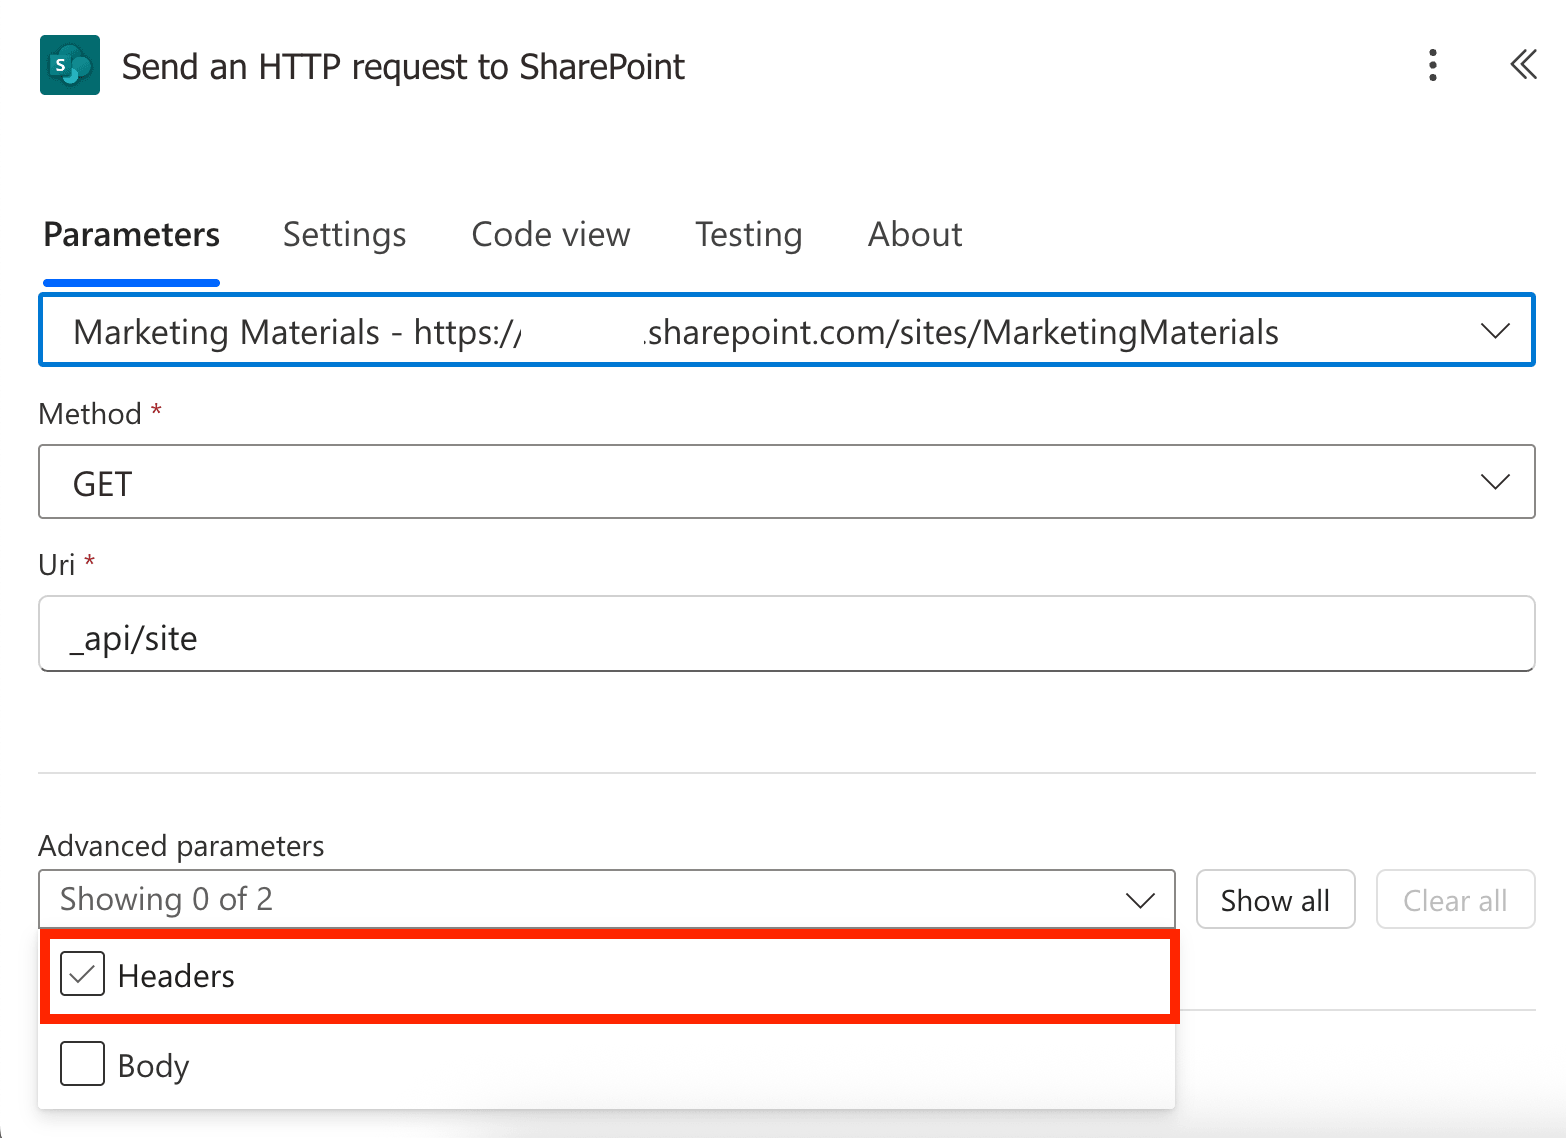
Under Advanced parameters, choose Headers:
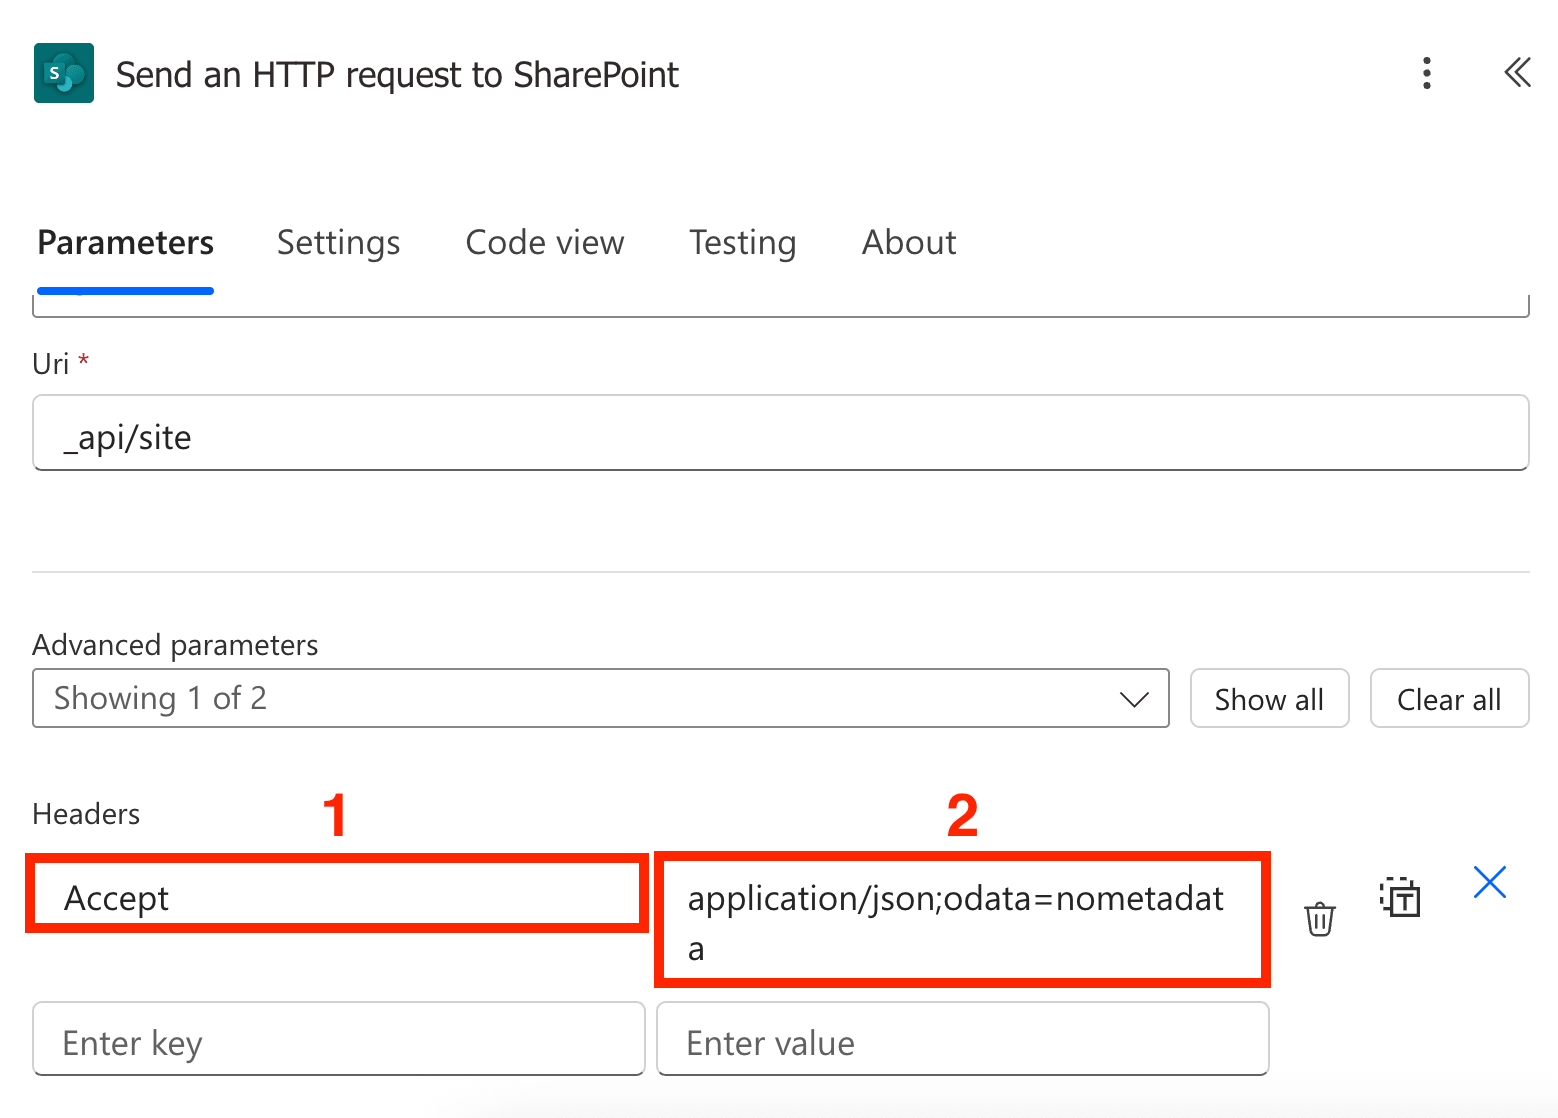
Write [1] Accept as the key and [2] application/json;odata=nometadata as the value:
Once done, click Save:
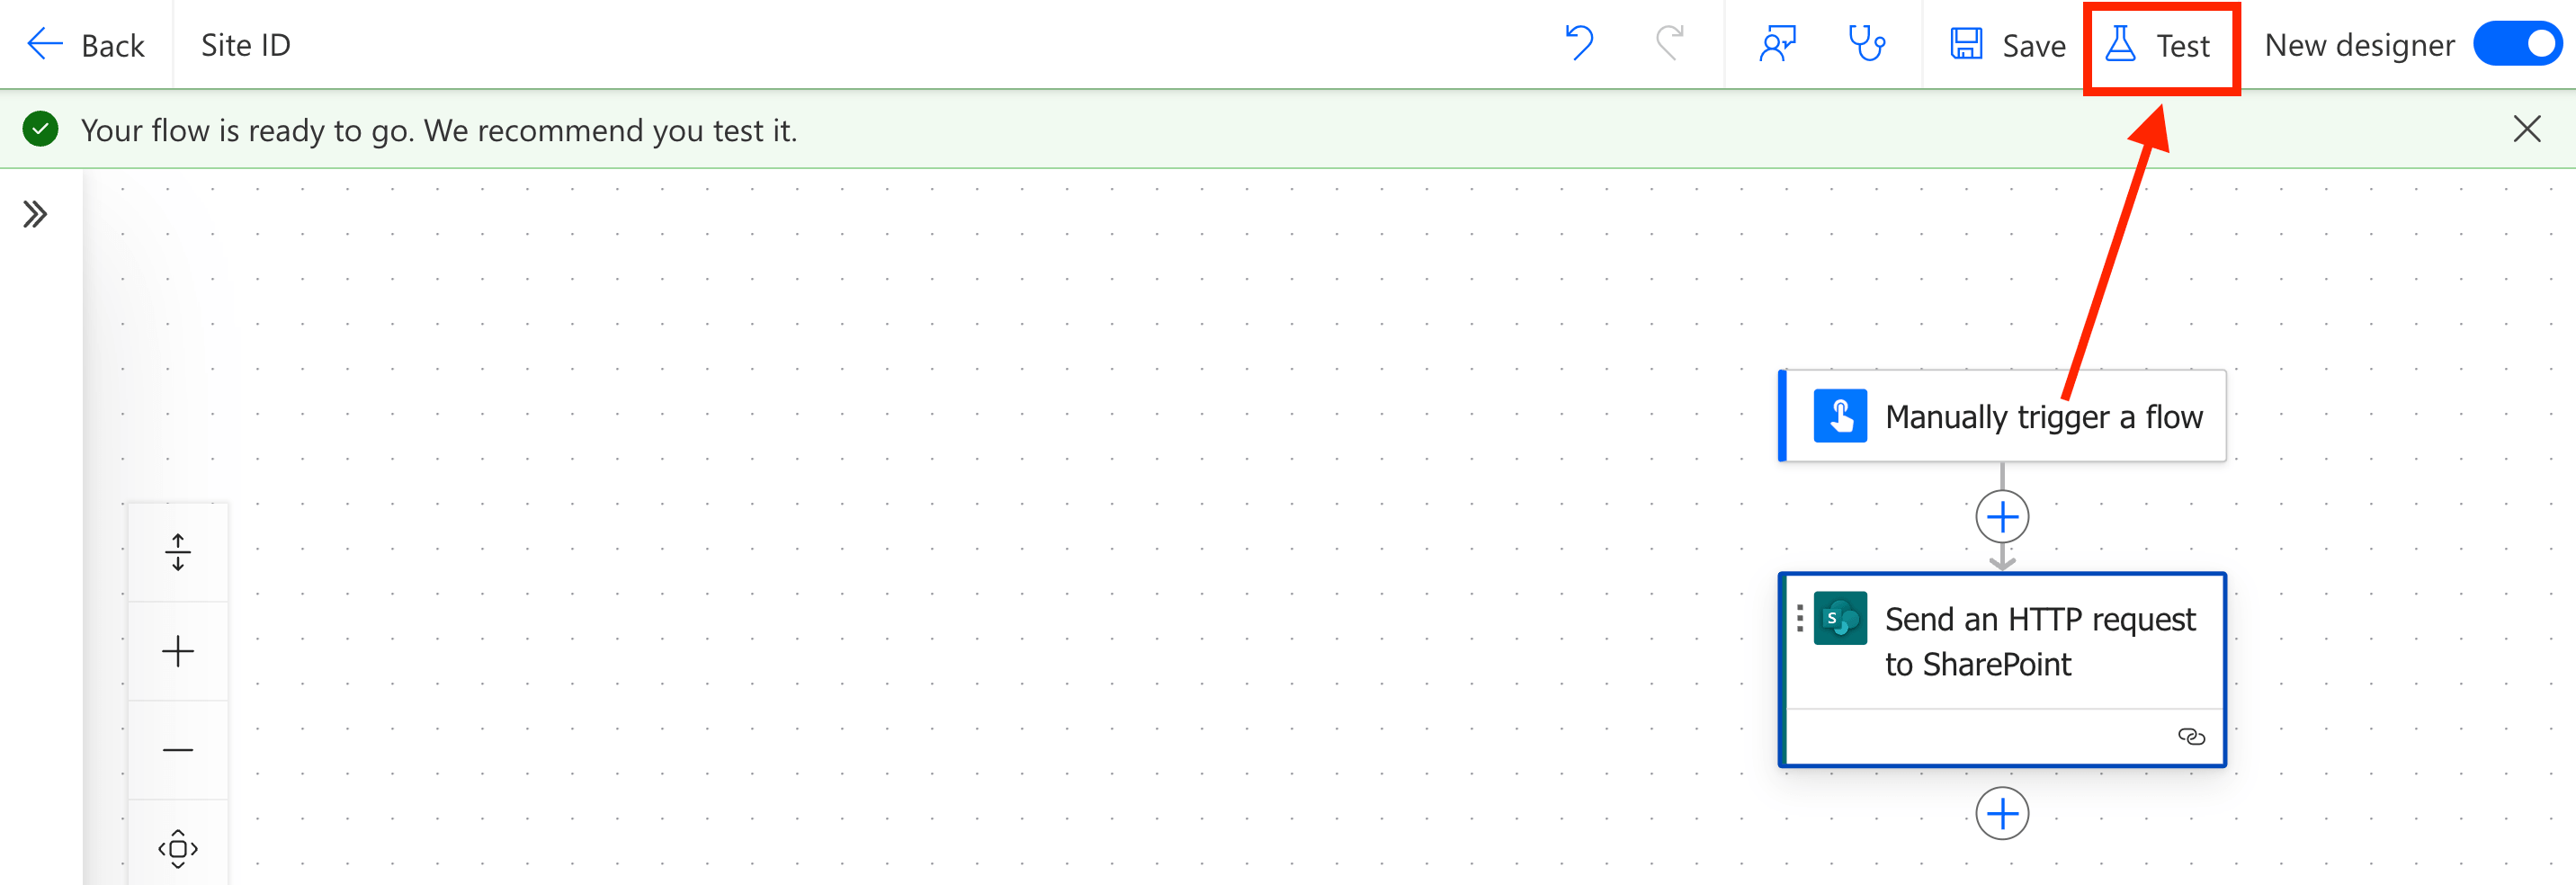
Step 3: Test the flow
Select Test:
Choose [1] Manually and click [2] Test:
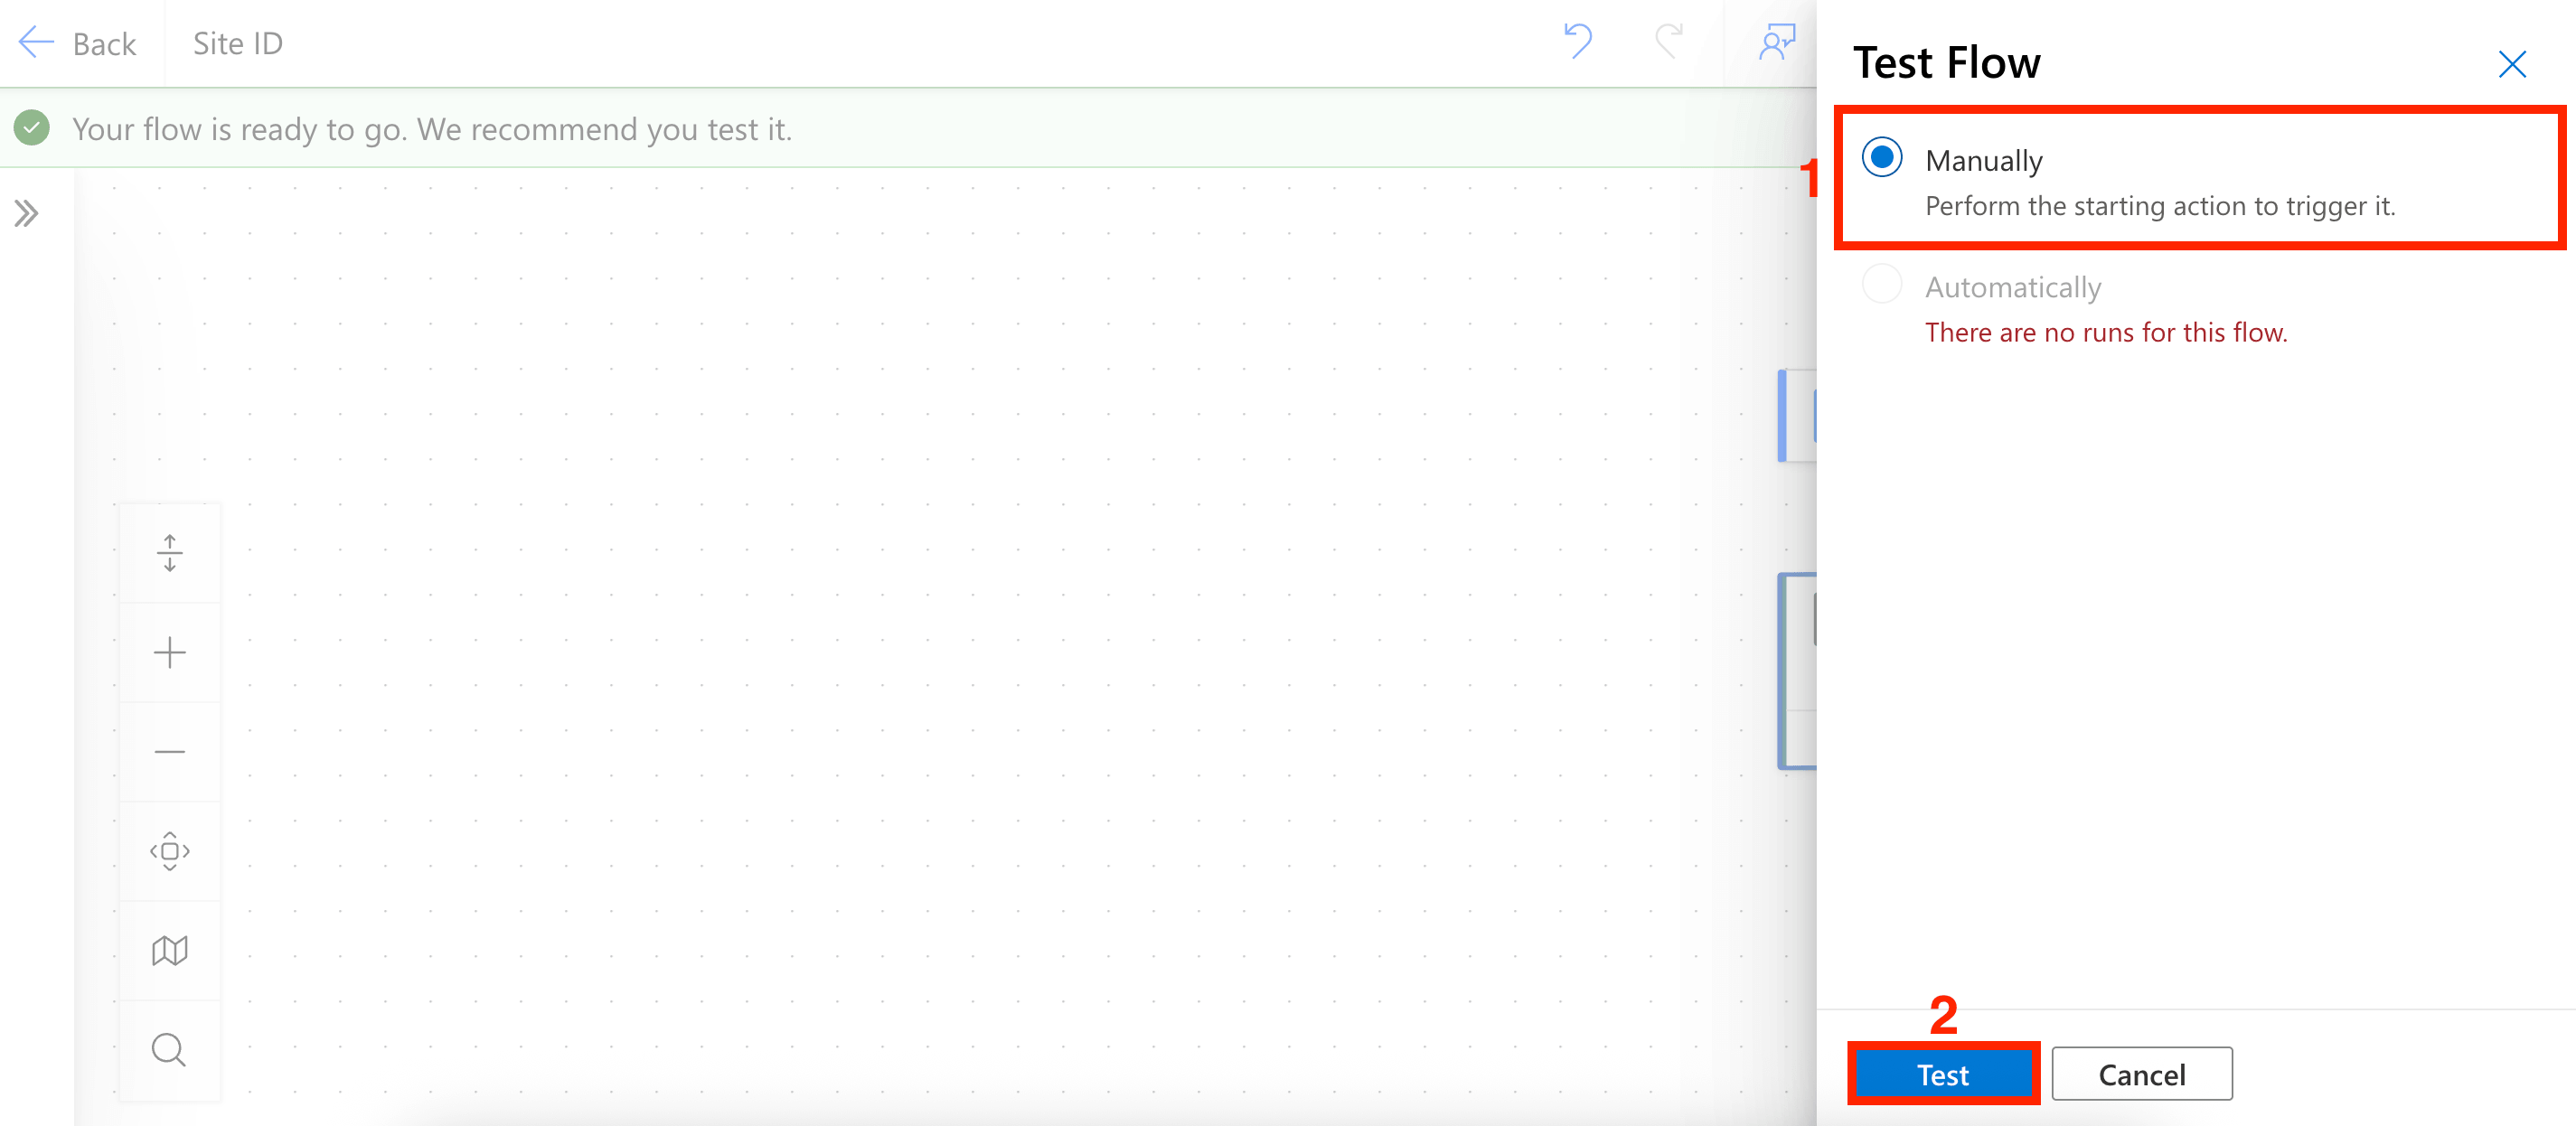
Click Continue:
NOTEIf you aren’t logged in to SharePoint yet, you will be prompted to do so.
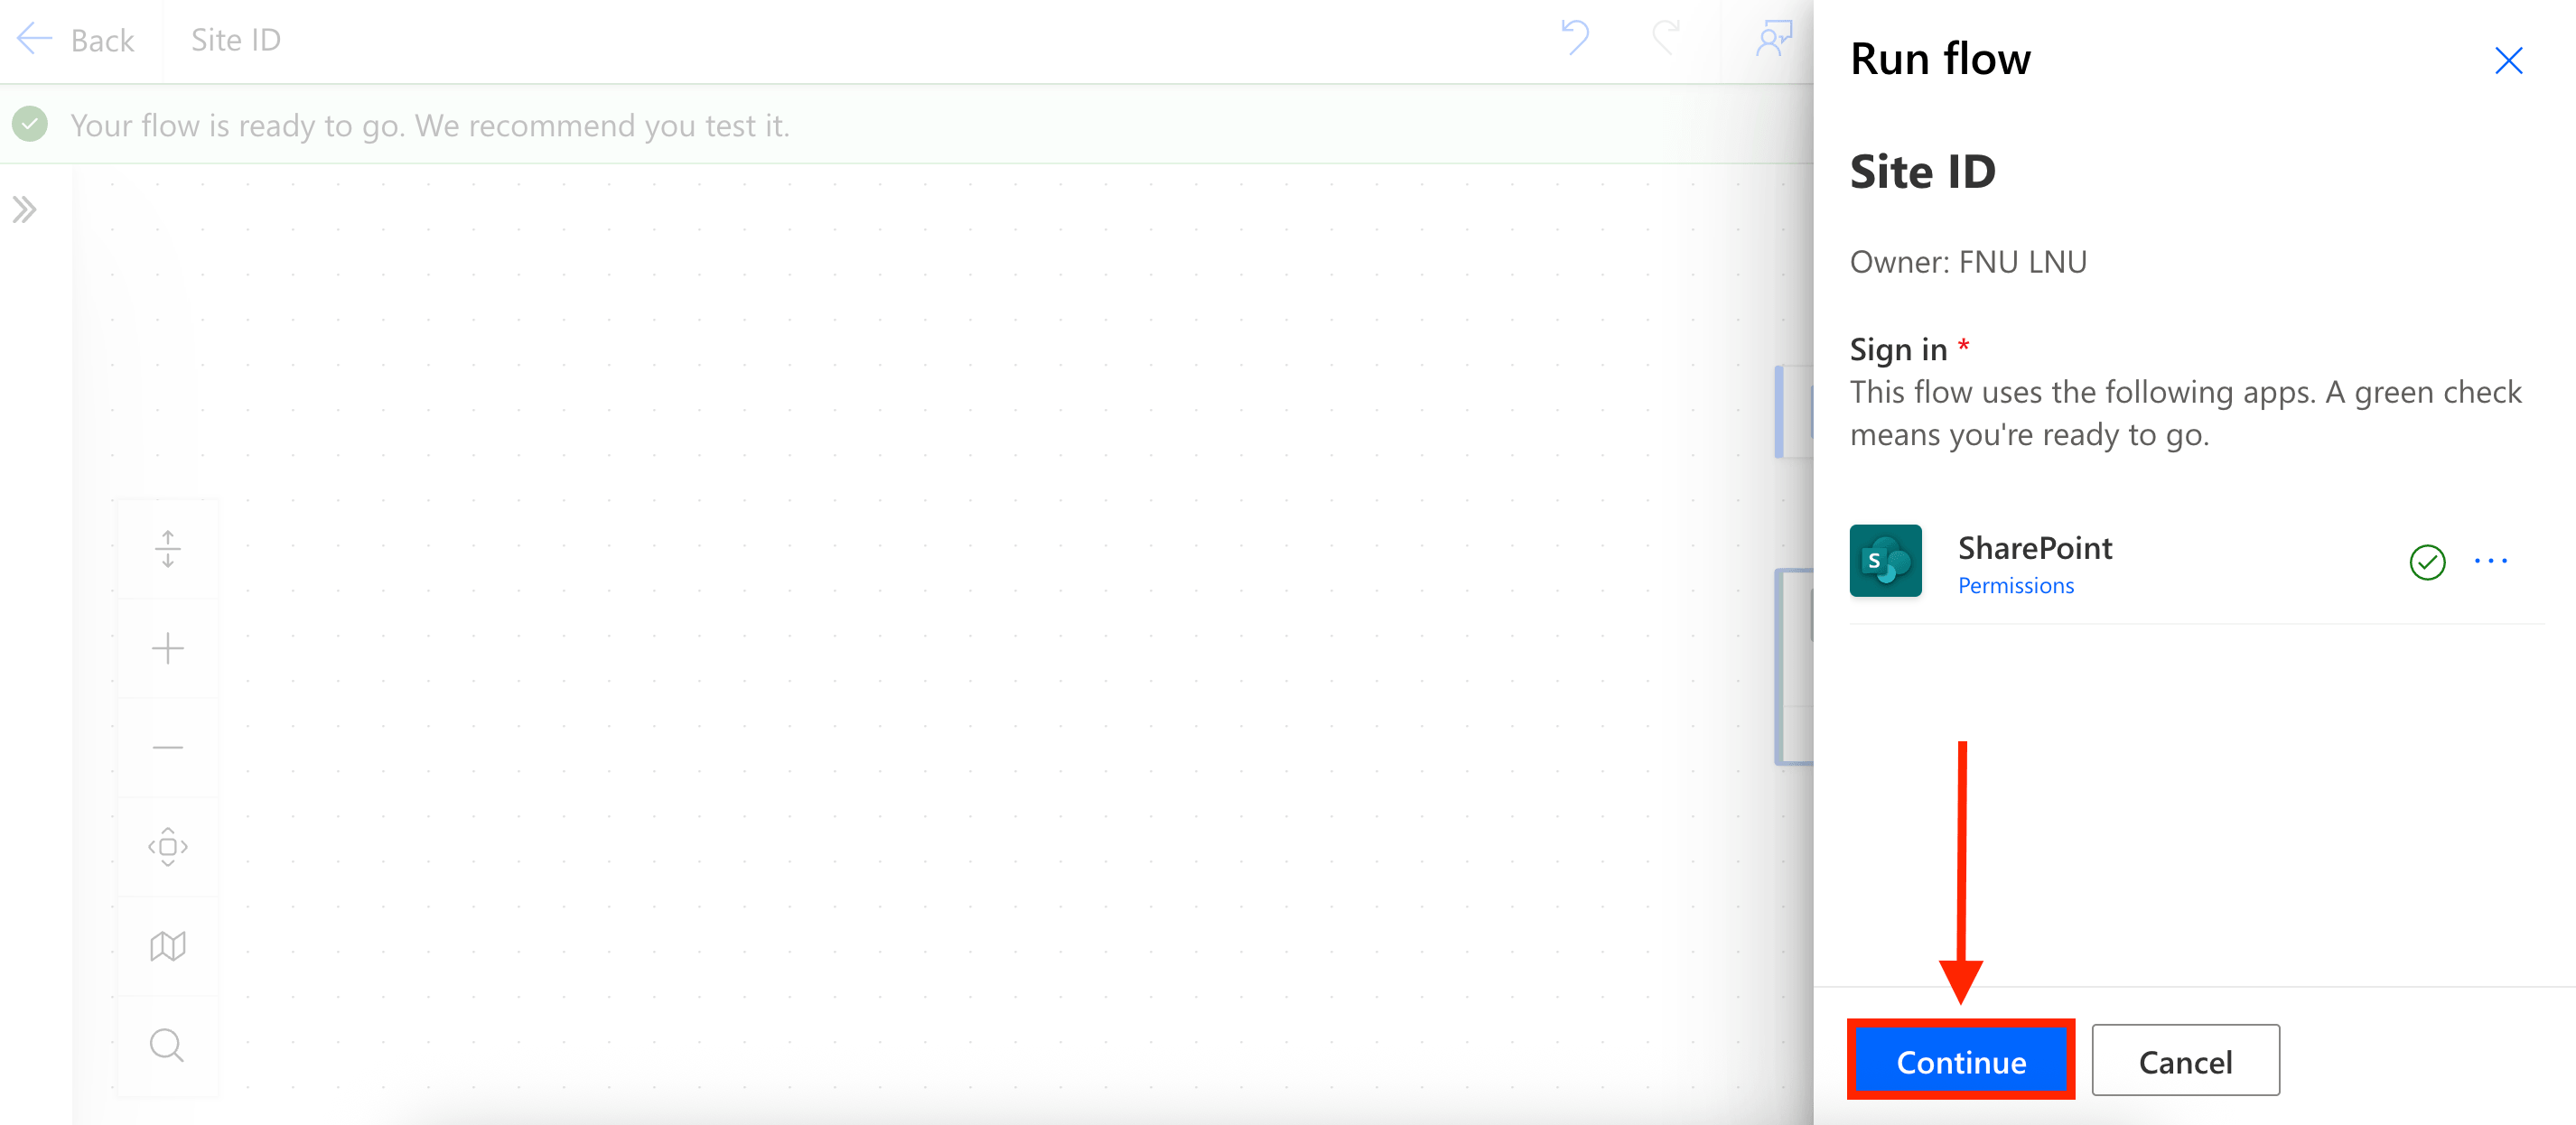
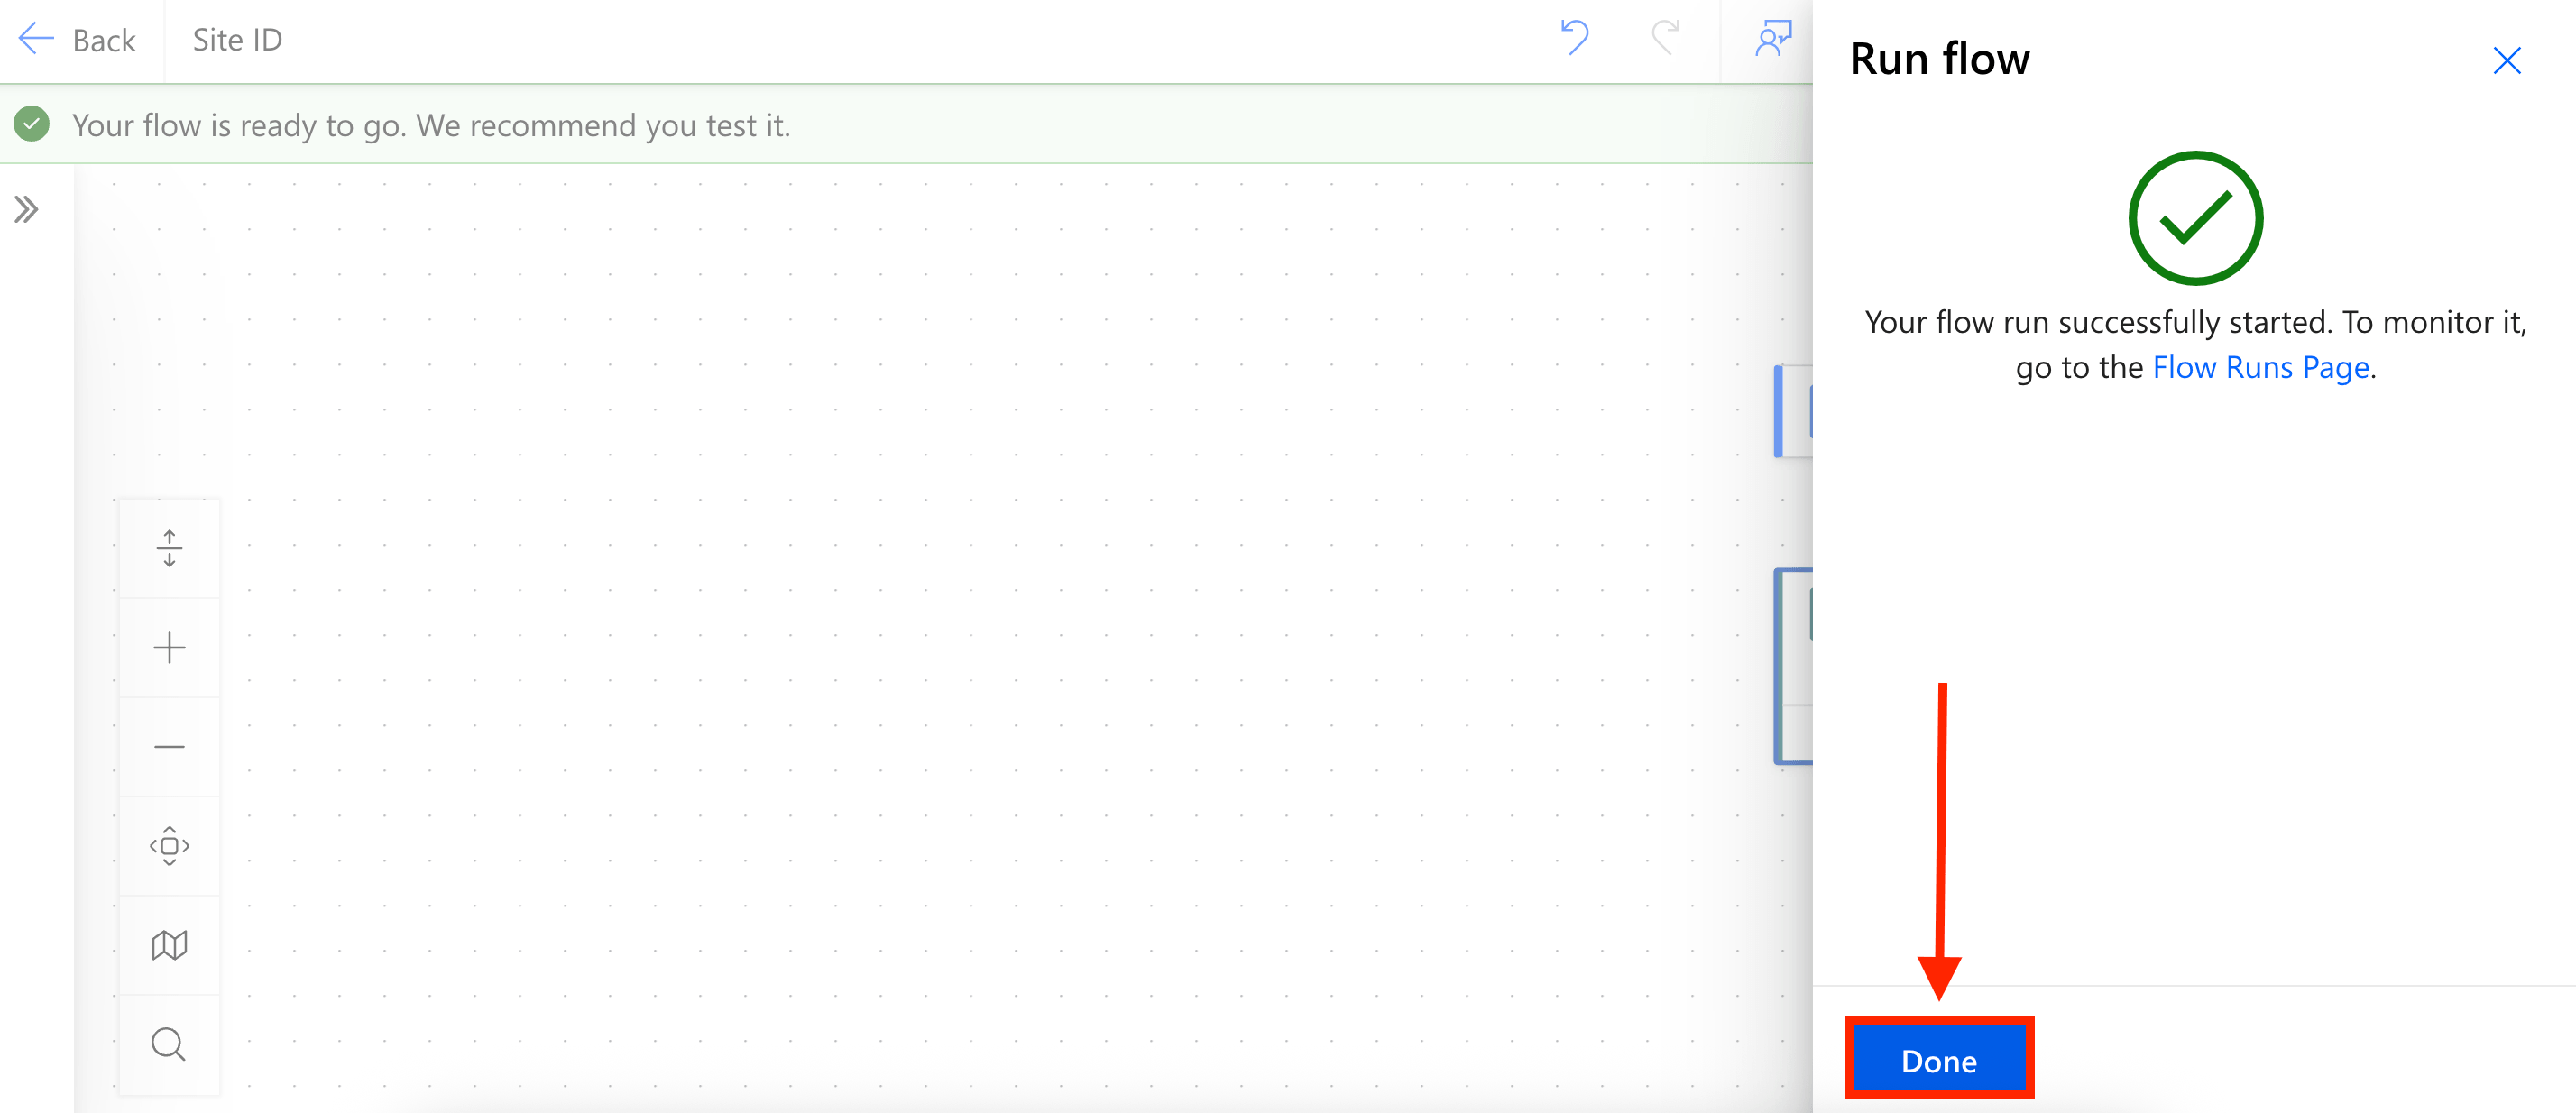
Then, click Run Flow:

Select Done:
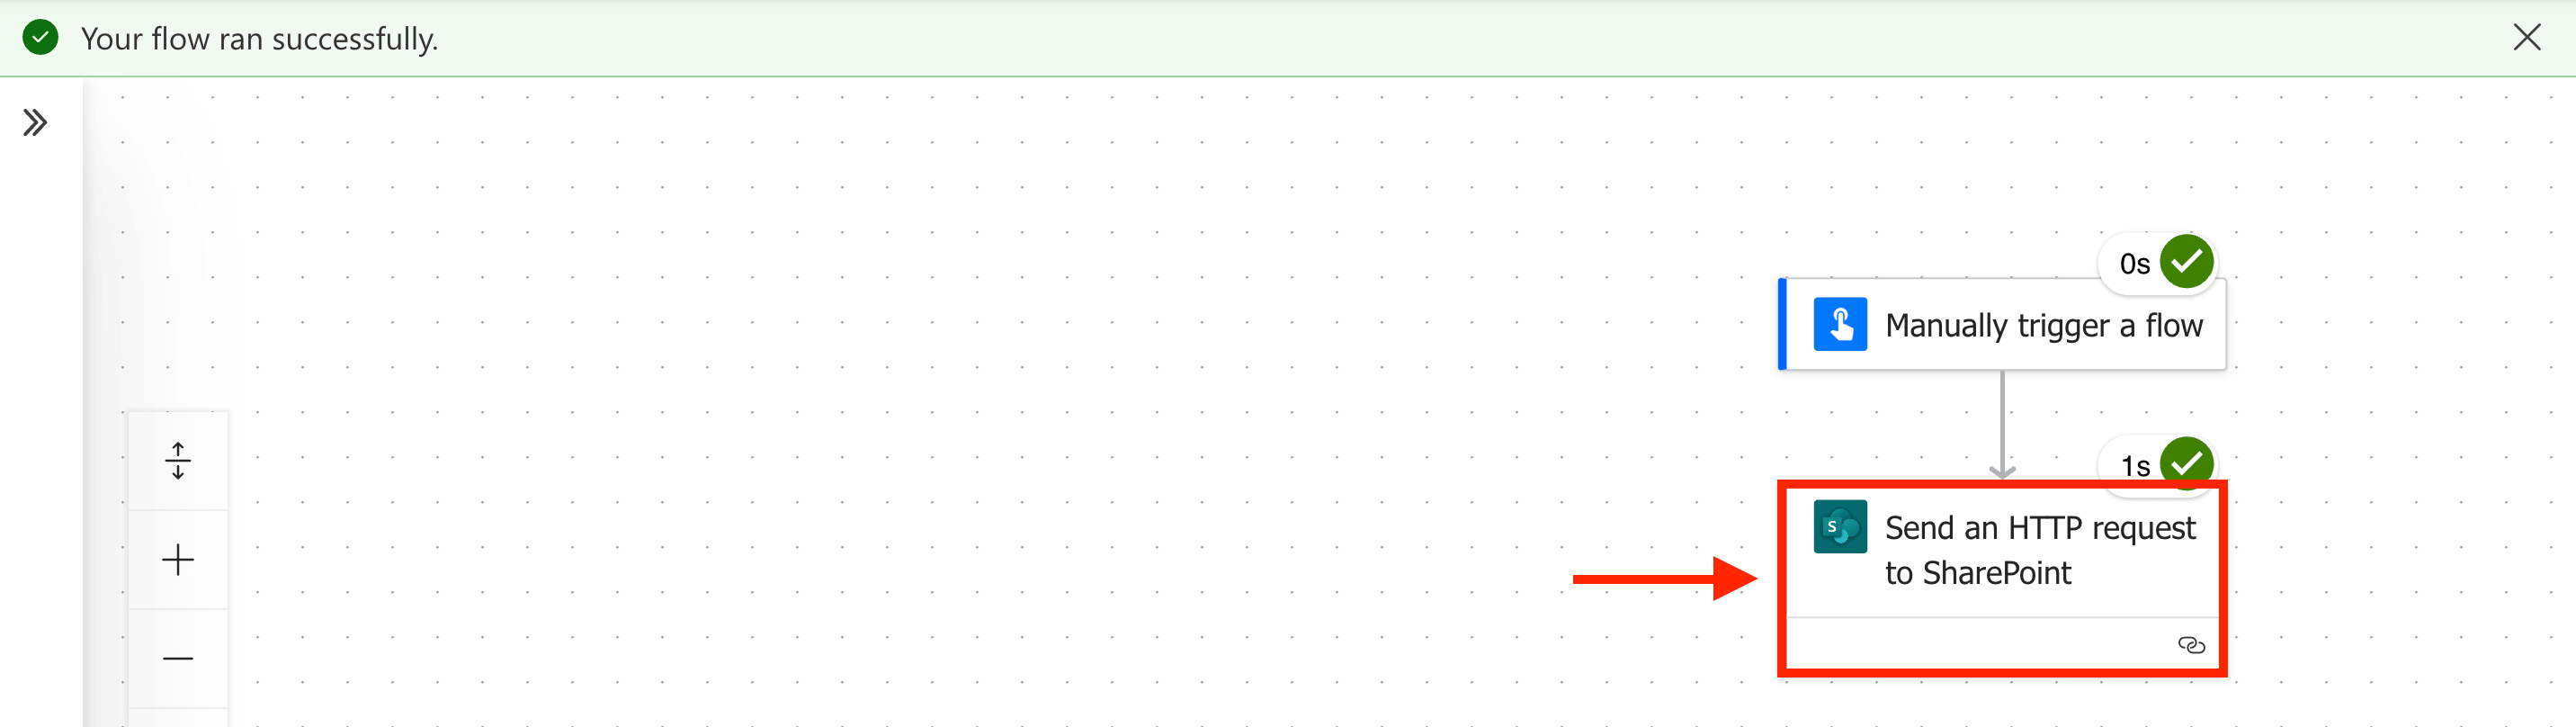
Step 4: Copy Site ID
Click Send an HTTP request to SharePoint:
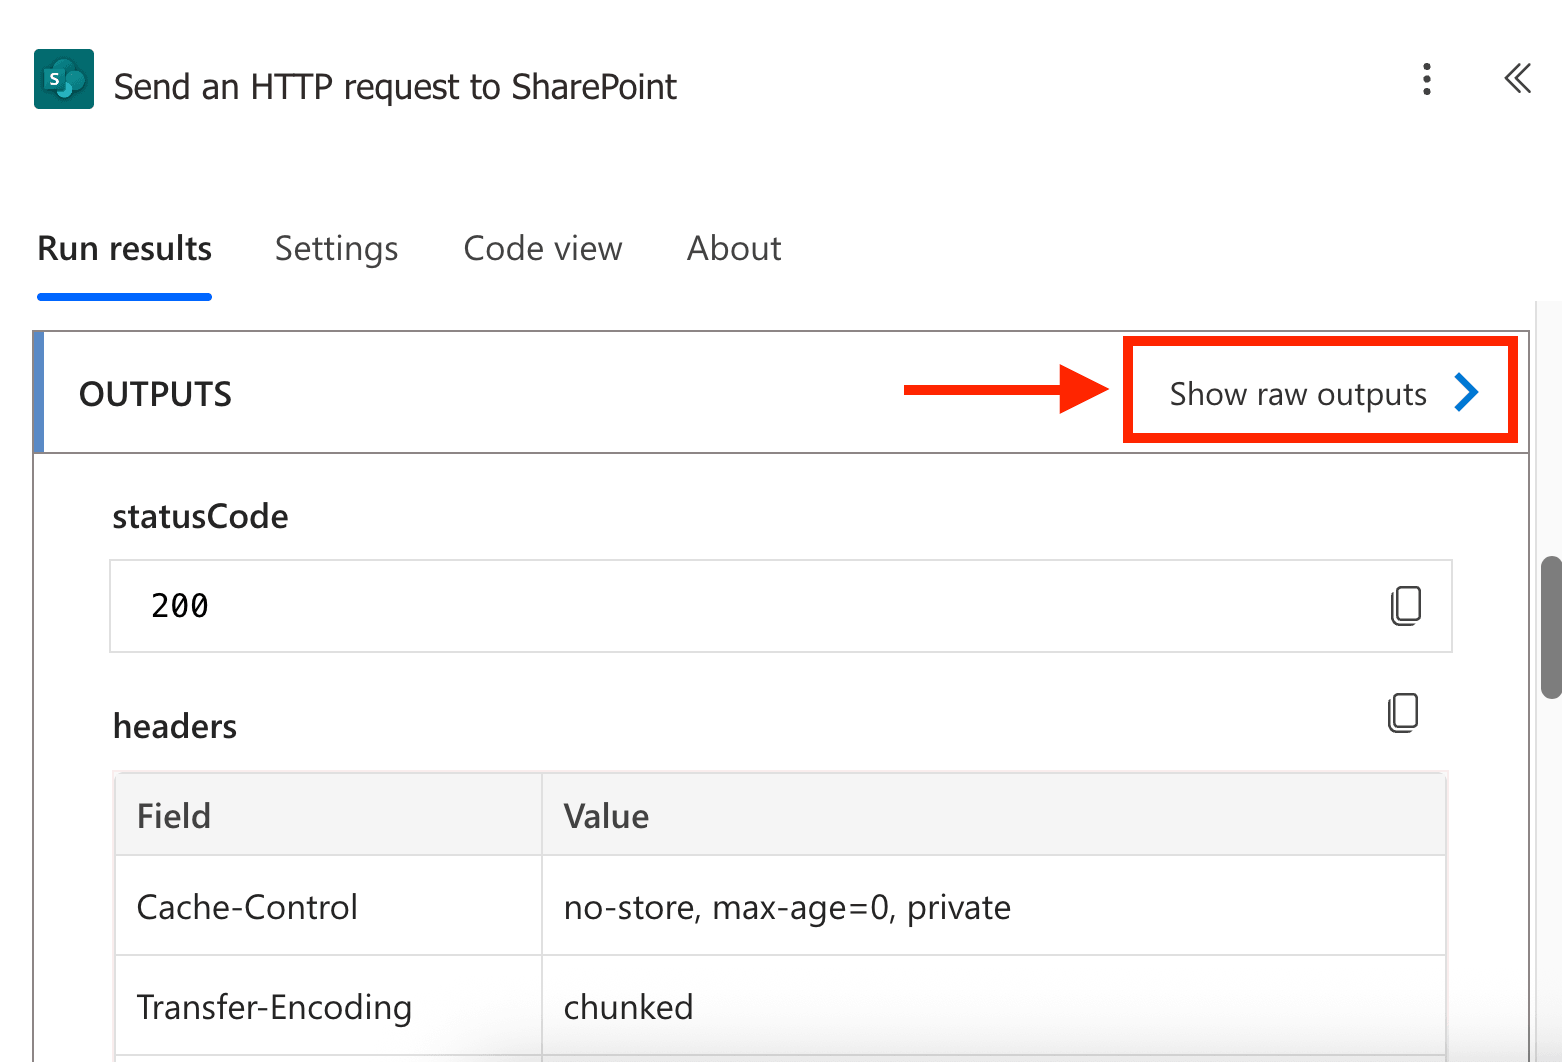
Scroll down to Outputs and click Show raw outputs:
Look for Id. The numbers and letters inside is your Site Id.
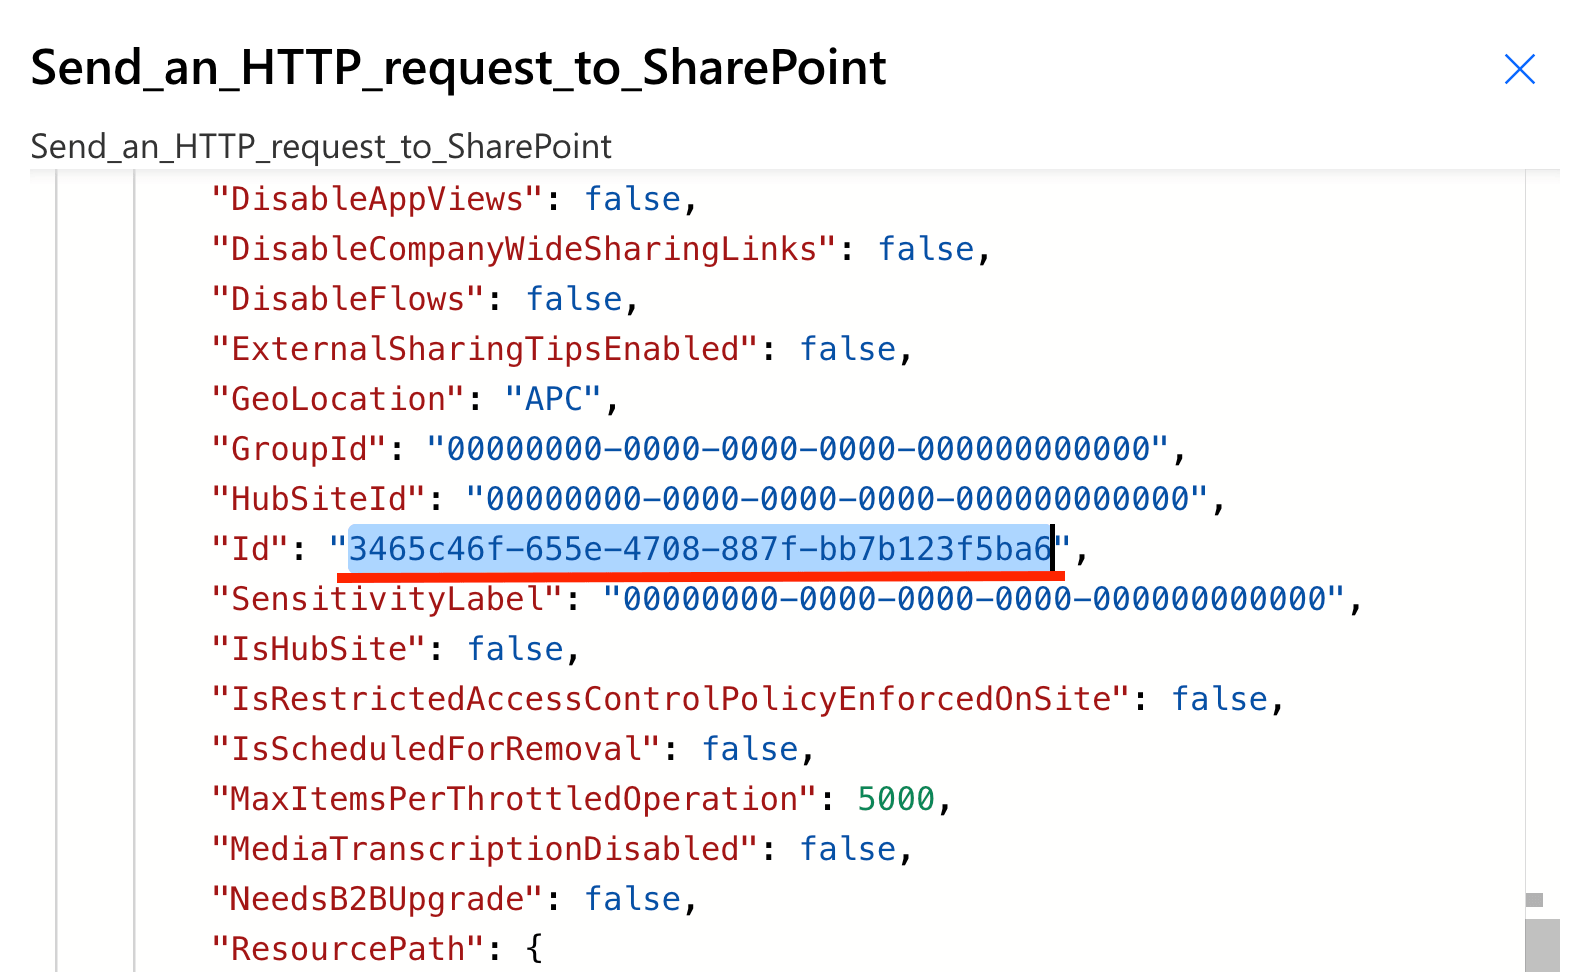
Awesome! You now have the Site ID.
Practical Use Cases for a SharePoint Site ID
Why go through the trouble of finding this ID? Here are everyday scenarios where the Site ID becomes incredibly useful:
Advanced Power Automate and Logic Apps Customization
While Power Automate provides easy dropdown menus to select your SharePoint sites, those dropdowns occasionally fail to load massive sites, or you might need to make the site selection dynamic. Passing a Site ID into your variables or HTTP actions allows you to build highly resilient, dynamic flows that can automatically create folders, move files, or update items without hardcoding brittle URLs.
Microsoft Graph API
Did you know you can use your Site ID to seamlessly display documents, subsites, and many more right in your SharePoint Site? By leveraging the power of the Microsoft Graph API alongside ShortPoint Connect, you can easily bridge the gap between SharePoint, Outlook, and Teams. The best part? ShortPoint Connect handles the heavy lifting, ensuring your data looks beautiful and stays perfectly organized on your pages.

What can you do with your Site ID? Here are a few ideas:
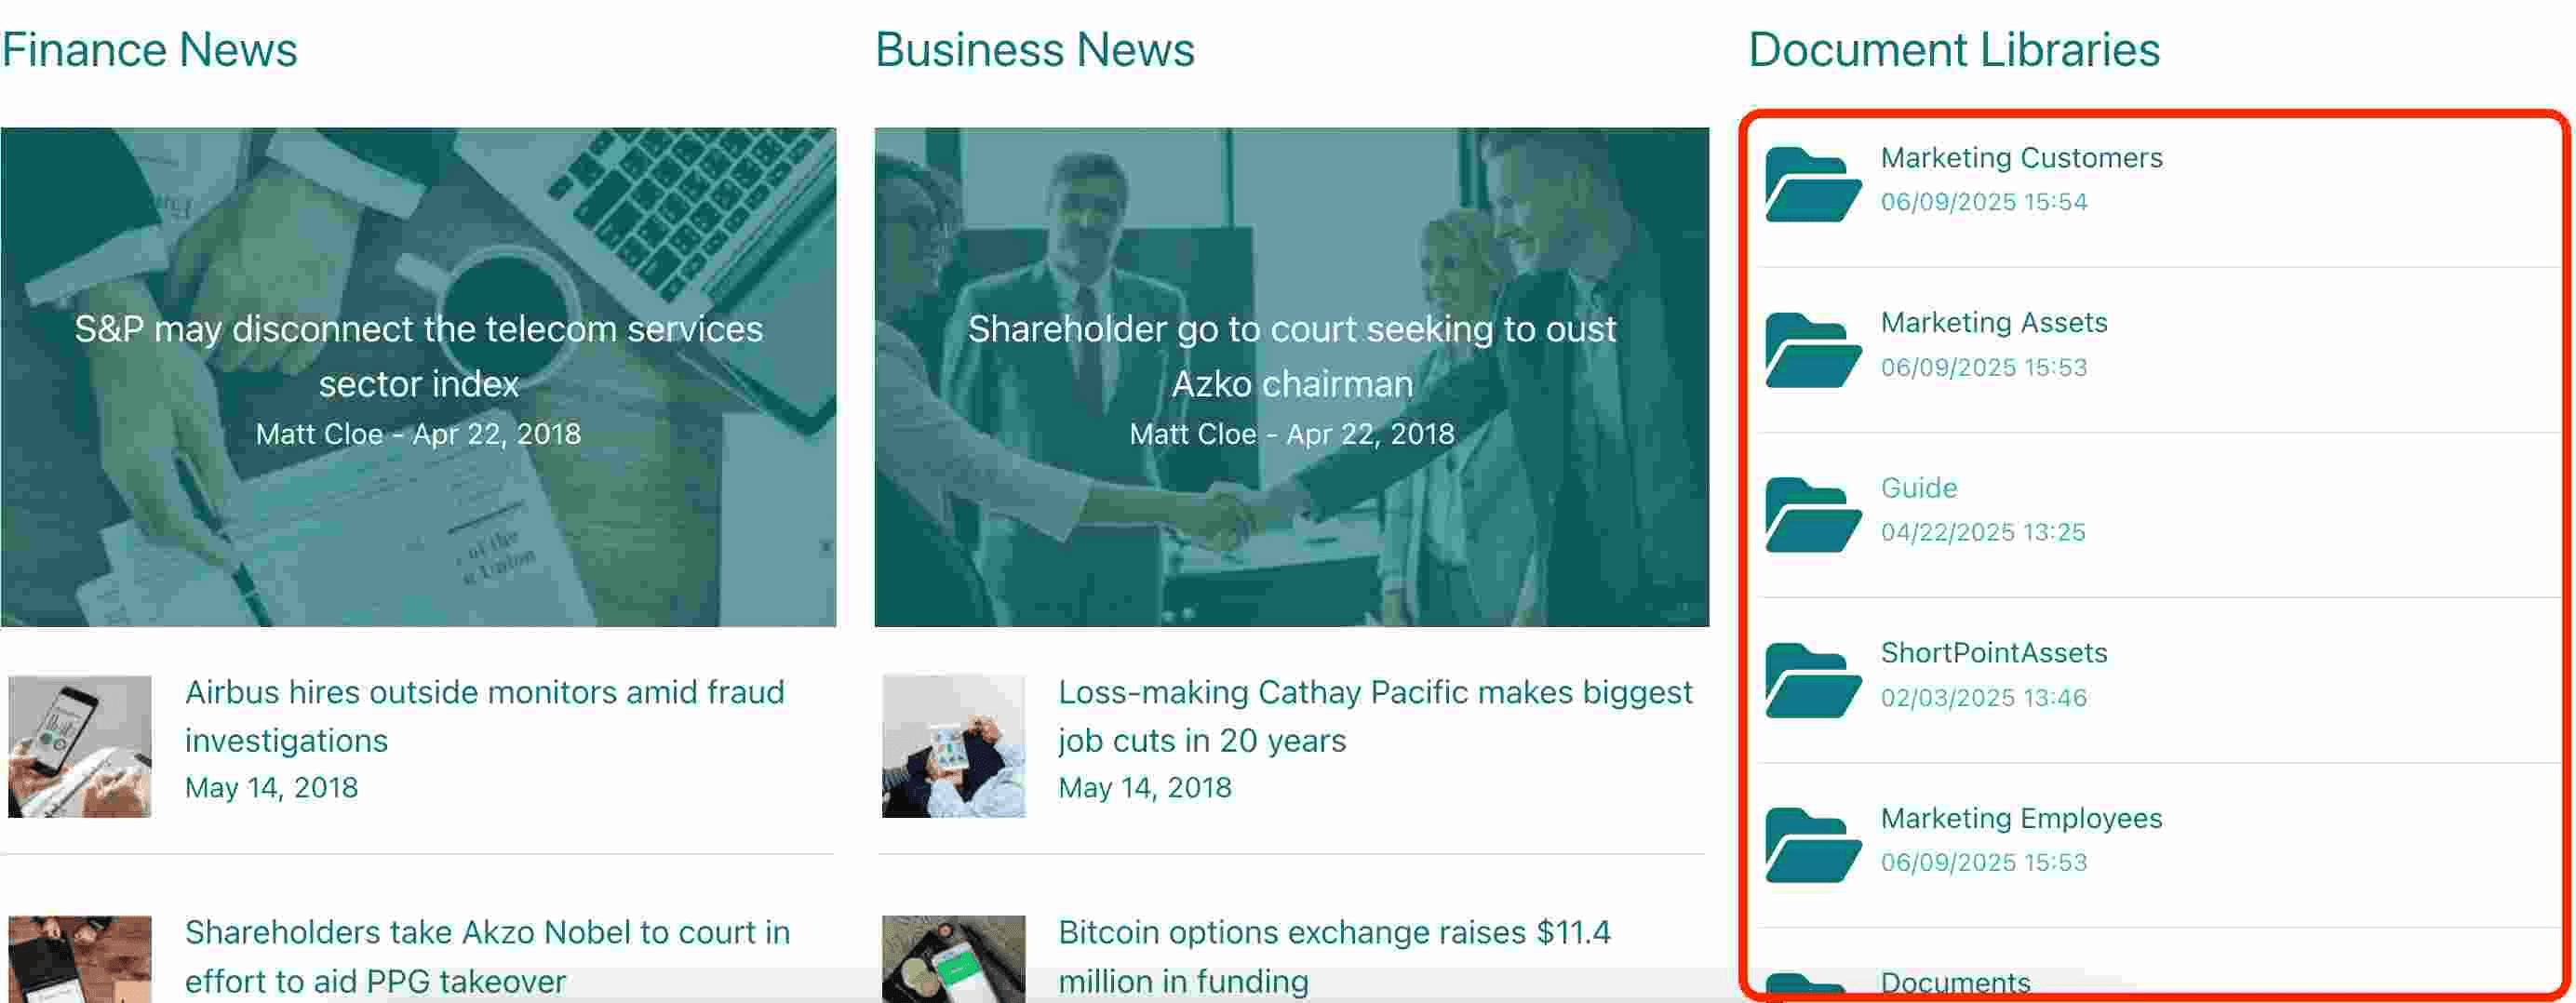
- Document Libraries in a SharePoint Site - Retrieves a list of SharePoint Document Libraries from a specified site.
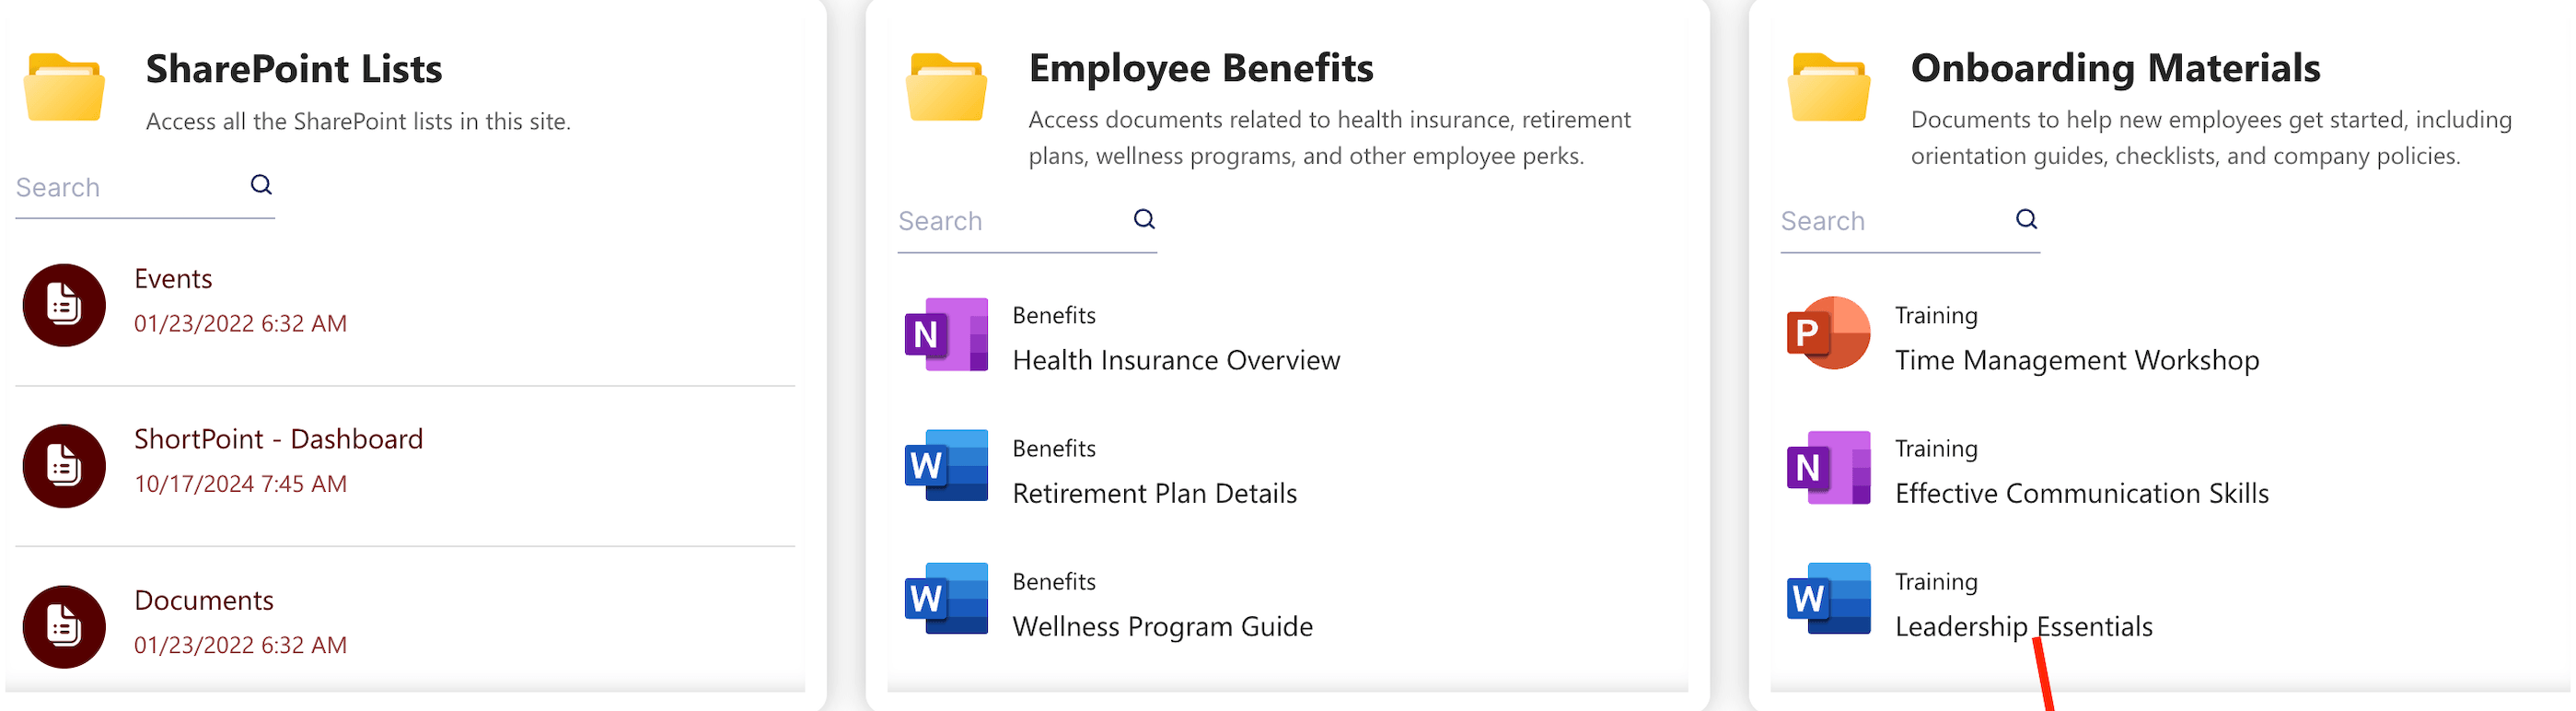
- Lists in a SharePoint Site - Retrieves a list of SharePoint Lists from the selected site.
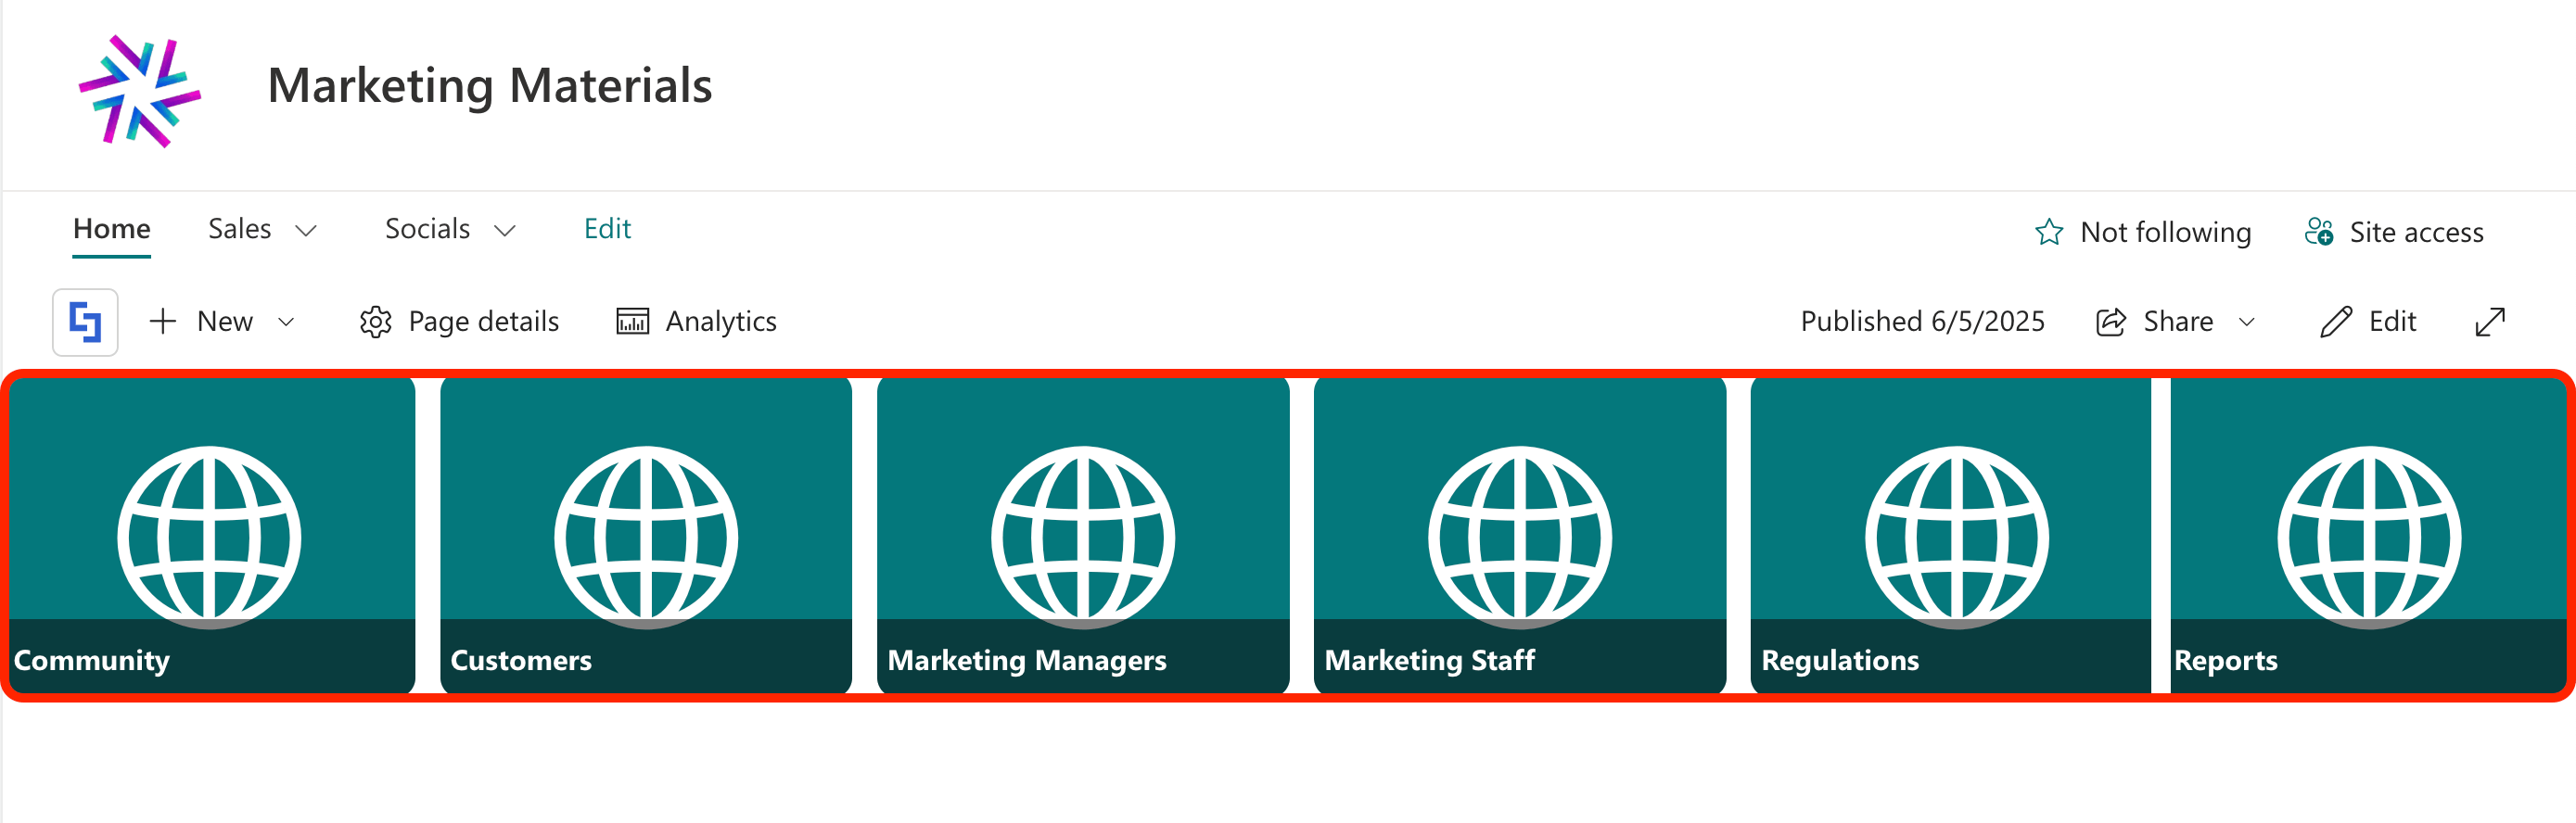
- Subsites of a SharePoint Site - Retrieves a list of SharePoint subsites based on a specified site ID.
Ready to try these use cases? For Existing ShortPoint Customers (Pro or Enterprise), simply ensure you are on version 8.6.0.0 or later, and follow our step-by-step guide on How to Enable Microsoft Graph Integration.
New to ShortPoint? We’d love to help you get set up! Reach out to our expert team today, or sign up for a free 15-day trial to explore everything ShortPoint has to offer.
Frequently Asked Questions
Is a Site ID the same as a List ID or Library ID?
No, they are distinct. A Site ID identifies an entire site collection. Inside that site, you can have multiple document libraries and lists, each of which has its own unique List ID or Library ID. Think of the Site ID as the street address of an apartment building, and the List ID as the individual apartment number.
Can a SharePoint Site ID change?
No. Once a SharePoint site collection is created, its Site ID is permanent. Even if you change the site title, rewrite the URL path, or alter the site's regional configurations, the backend GUID remains exactly the same.
Do I need admin permissions to find the Site ID?
Not for the basic methods! Anyone who has permission to view a SharePoint site can use Method 1 (the _api/site/id URL trick) to see the ID. However, using tools like Graph Explorer or running administrative PowerShell scripts will require appropriate account permissions.
Related articles:
- How to Find a SharePoint List / Library ID (Modern Experience)
- How to Find a SharePoint List / Library ID (Classic Experience)
- Tenant Renaming (Domain Change) and ShortPoint Compatibility
- How to Create a Subsites Navigation in SharePoint
- Connection Type: Microsoft Graph API
- Microsoft Graph API: Use Cases
