Try ShortPoint now
Setting up visibility rules for a Design Element is now a one-stop process in Live Mode. ShortPoint SPFx version 9.3.1.0 moves visibility options directly into the Visibility tab within Live Mode. You no longer need to open a separate settings window: visibility rules are now visible and editable right where you already are.
This builds on the SPFx 8.7.2.0 release, which first gave you quick access to the Visibility window from Live Mode. This update removes that extra click, so configuring who sees a Design Element takes one less step.
This guide walks you through accessing and configuring visibility settings in the updated experience.
TABLE OF CONTENTS
- Prerequisites:
- Interactive Tutorial
- Accessing Visibility Settings Within Live Mode: Step-by-step
- Frequently Asked Questions
Prerequisites:
- You must have ShortPoint SPFx version 9.3.1.0 or later installed on your SharePoint environment.
- You must be a ShortPoint Designer with an active license.
- You have inserted a Design Element and wish to adjust its visibility settings.
Interactive Tutorial
See the updated Visibility tab in action. Follow this walkthrough to try out the new experience for setting Design Element visibility directly in Live Mode.
Accessing Visibility Settings Within Live Mode: Step-by-step
Follow these steps to configure visibility settings in the updated Live Mode experience:
Step 1: Edit the ShortPoint web part
- Click the Edit button on your SharePoint page.
- Select the ShortPoint web part.
- Open the ShortPoint Live Mode editing interface by clicking the Edit properties icon.
Step 2: Open the Design Element settings window
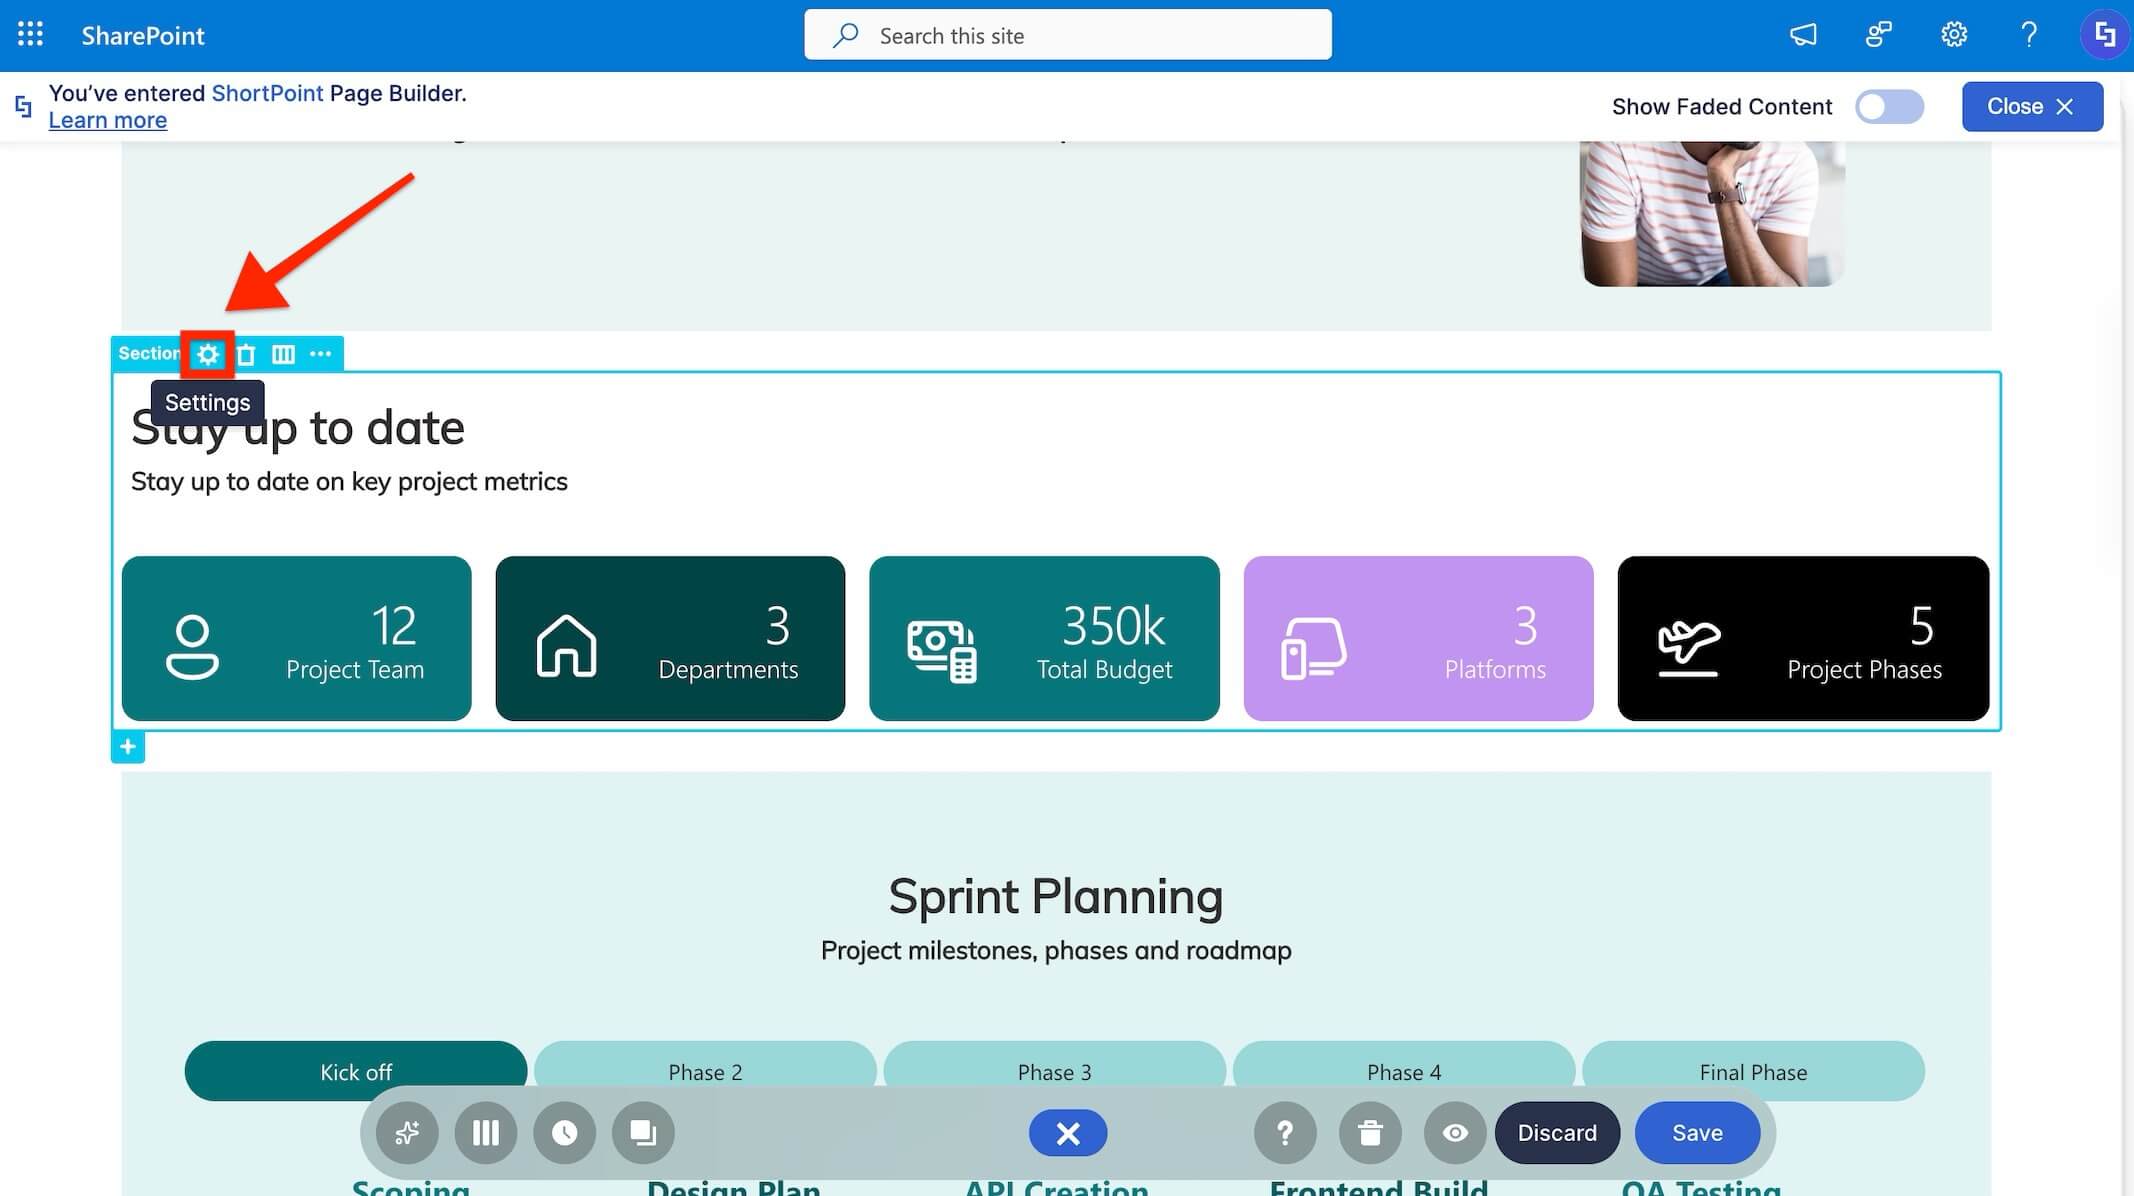
- Click on the Design Element EasyPass tag to modify its visibility.
- Press the cogwheel icon to open the settings window.
Step 3: Access the Visibility
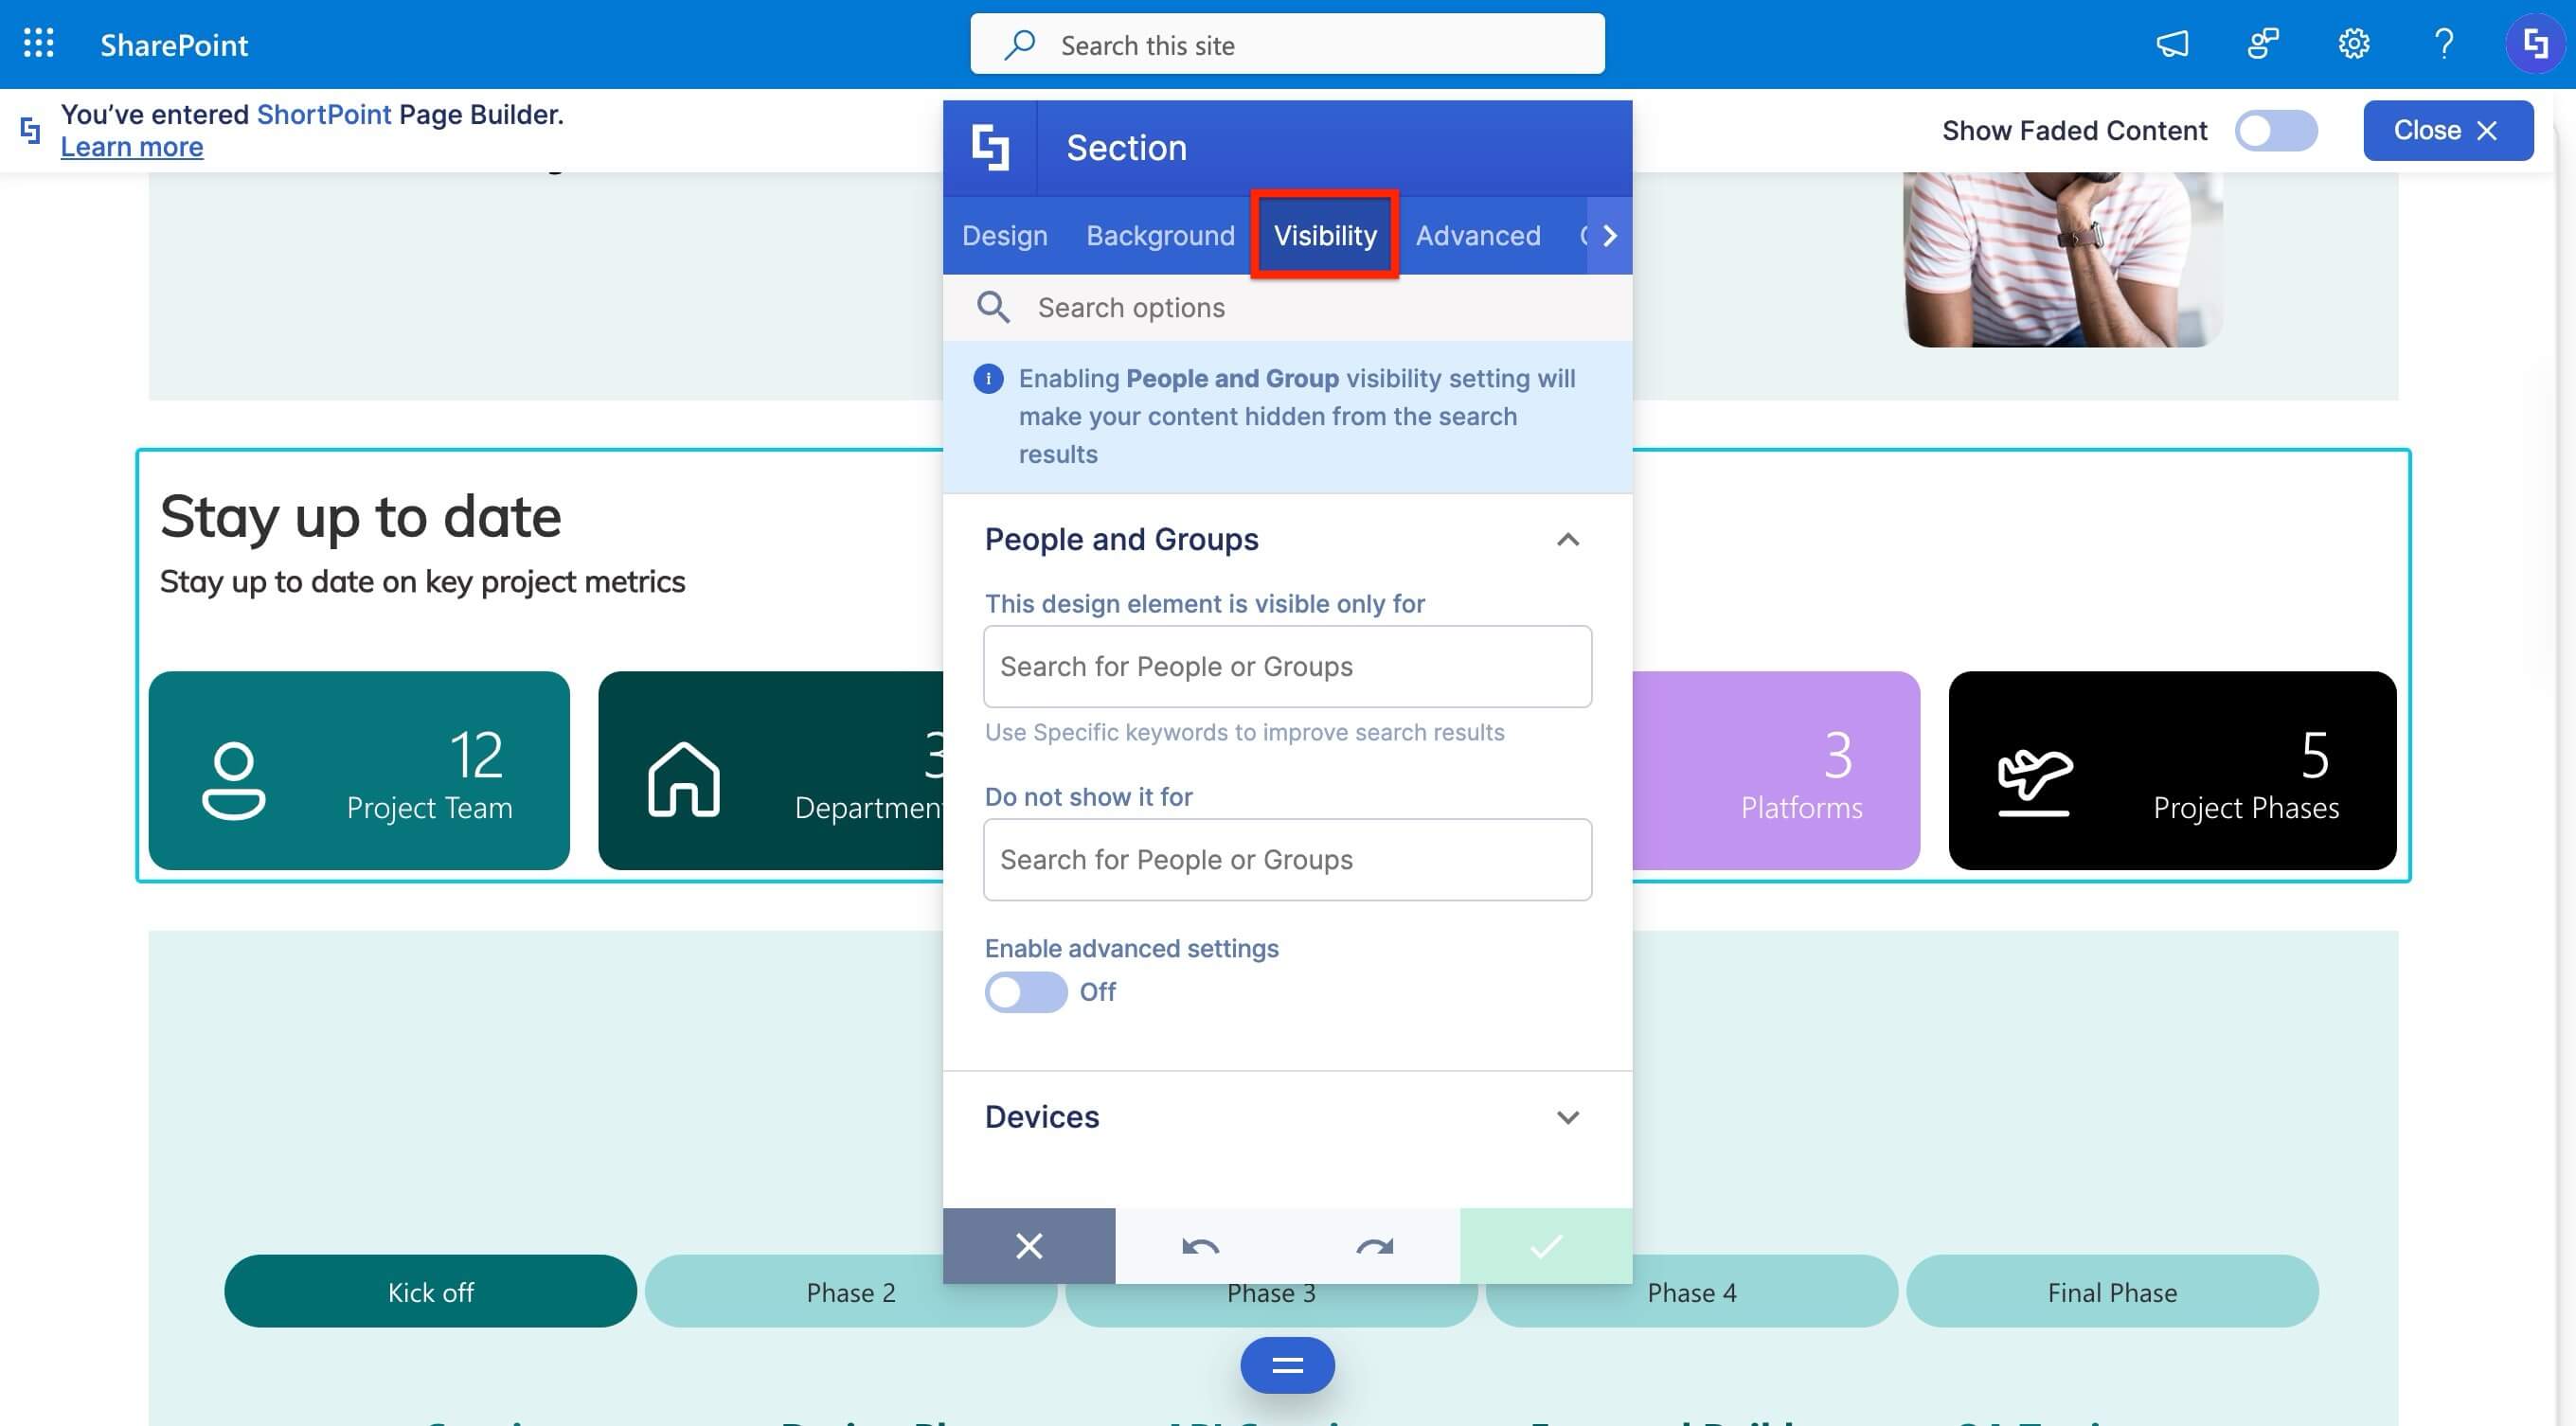
- Switch to the Visibility tab. All visibility settings you can modify for the Design Element now appear directly within this tab, no separate window required.
Step 4: Adjust visibility settings
- Make the required changes to your visibility rules directly within the Visibility tab.
- Once you are done, press the green checkmark button to apply all your visibility changes to the design element.
Step 5: Preview visibility settings and publish
- In Edit Mode, design elements with visibility settings applied will now show an eye icon on their EasyPass tag.
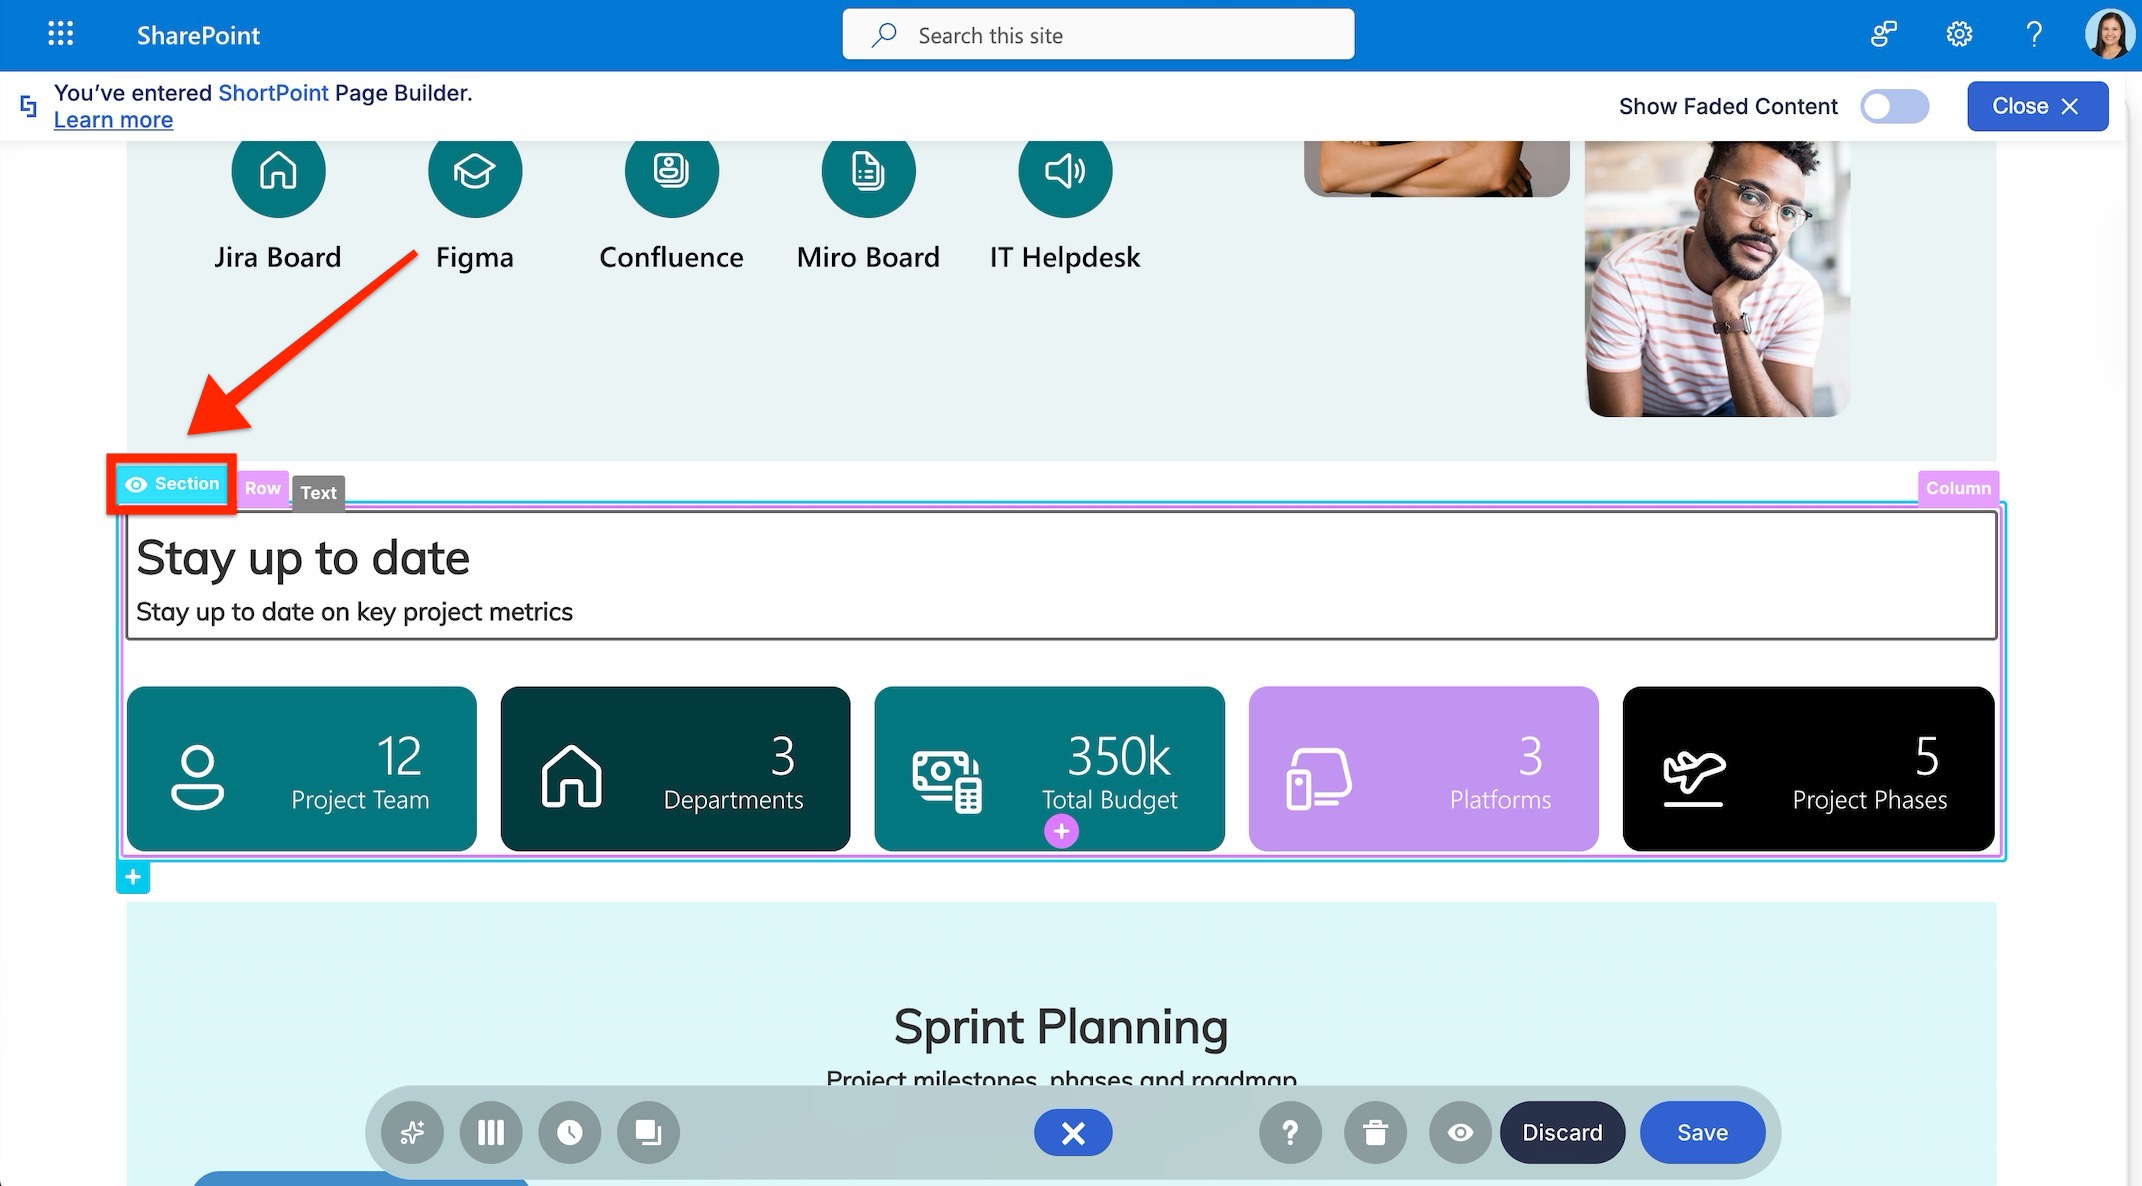
- Press the eye icon on the Action Toolbar to enter Preview mode.

- Check how the page will look with visibility settings applied by clicking the Preview pages as buttons. You can preview the page as a selected person or group.
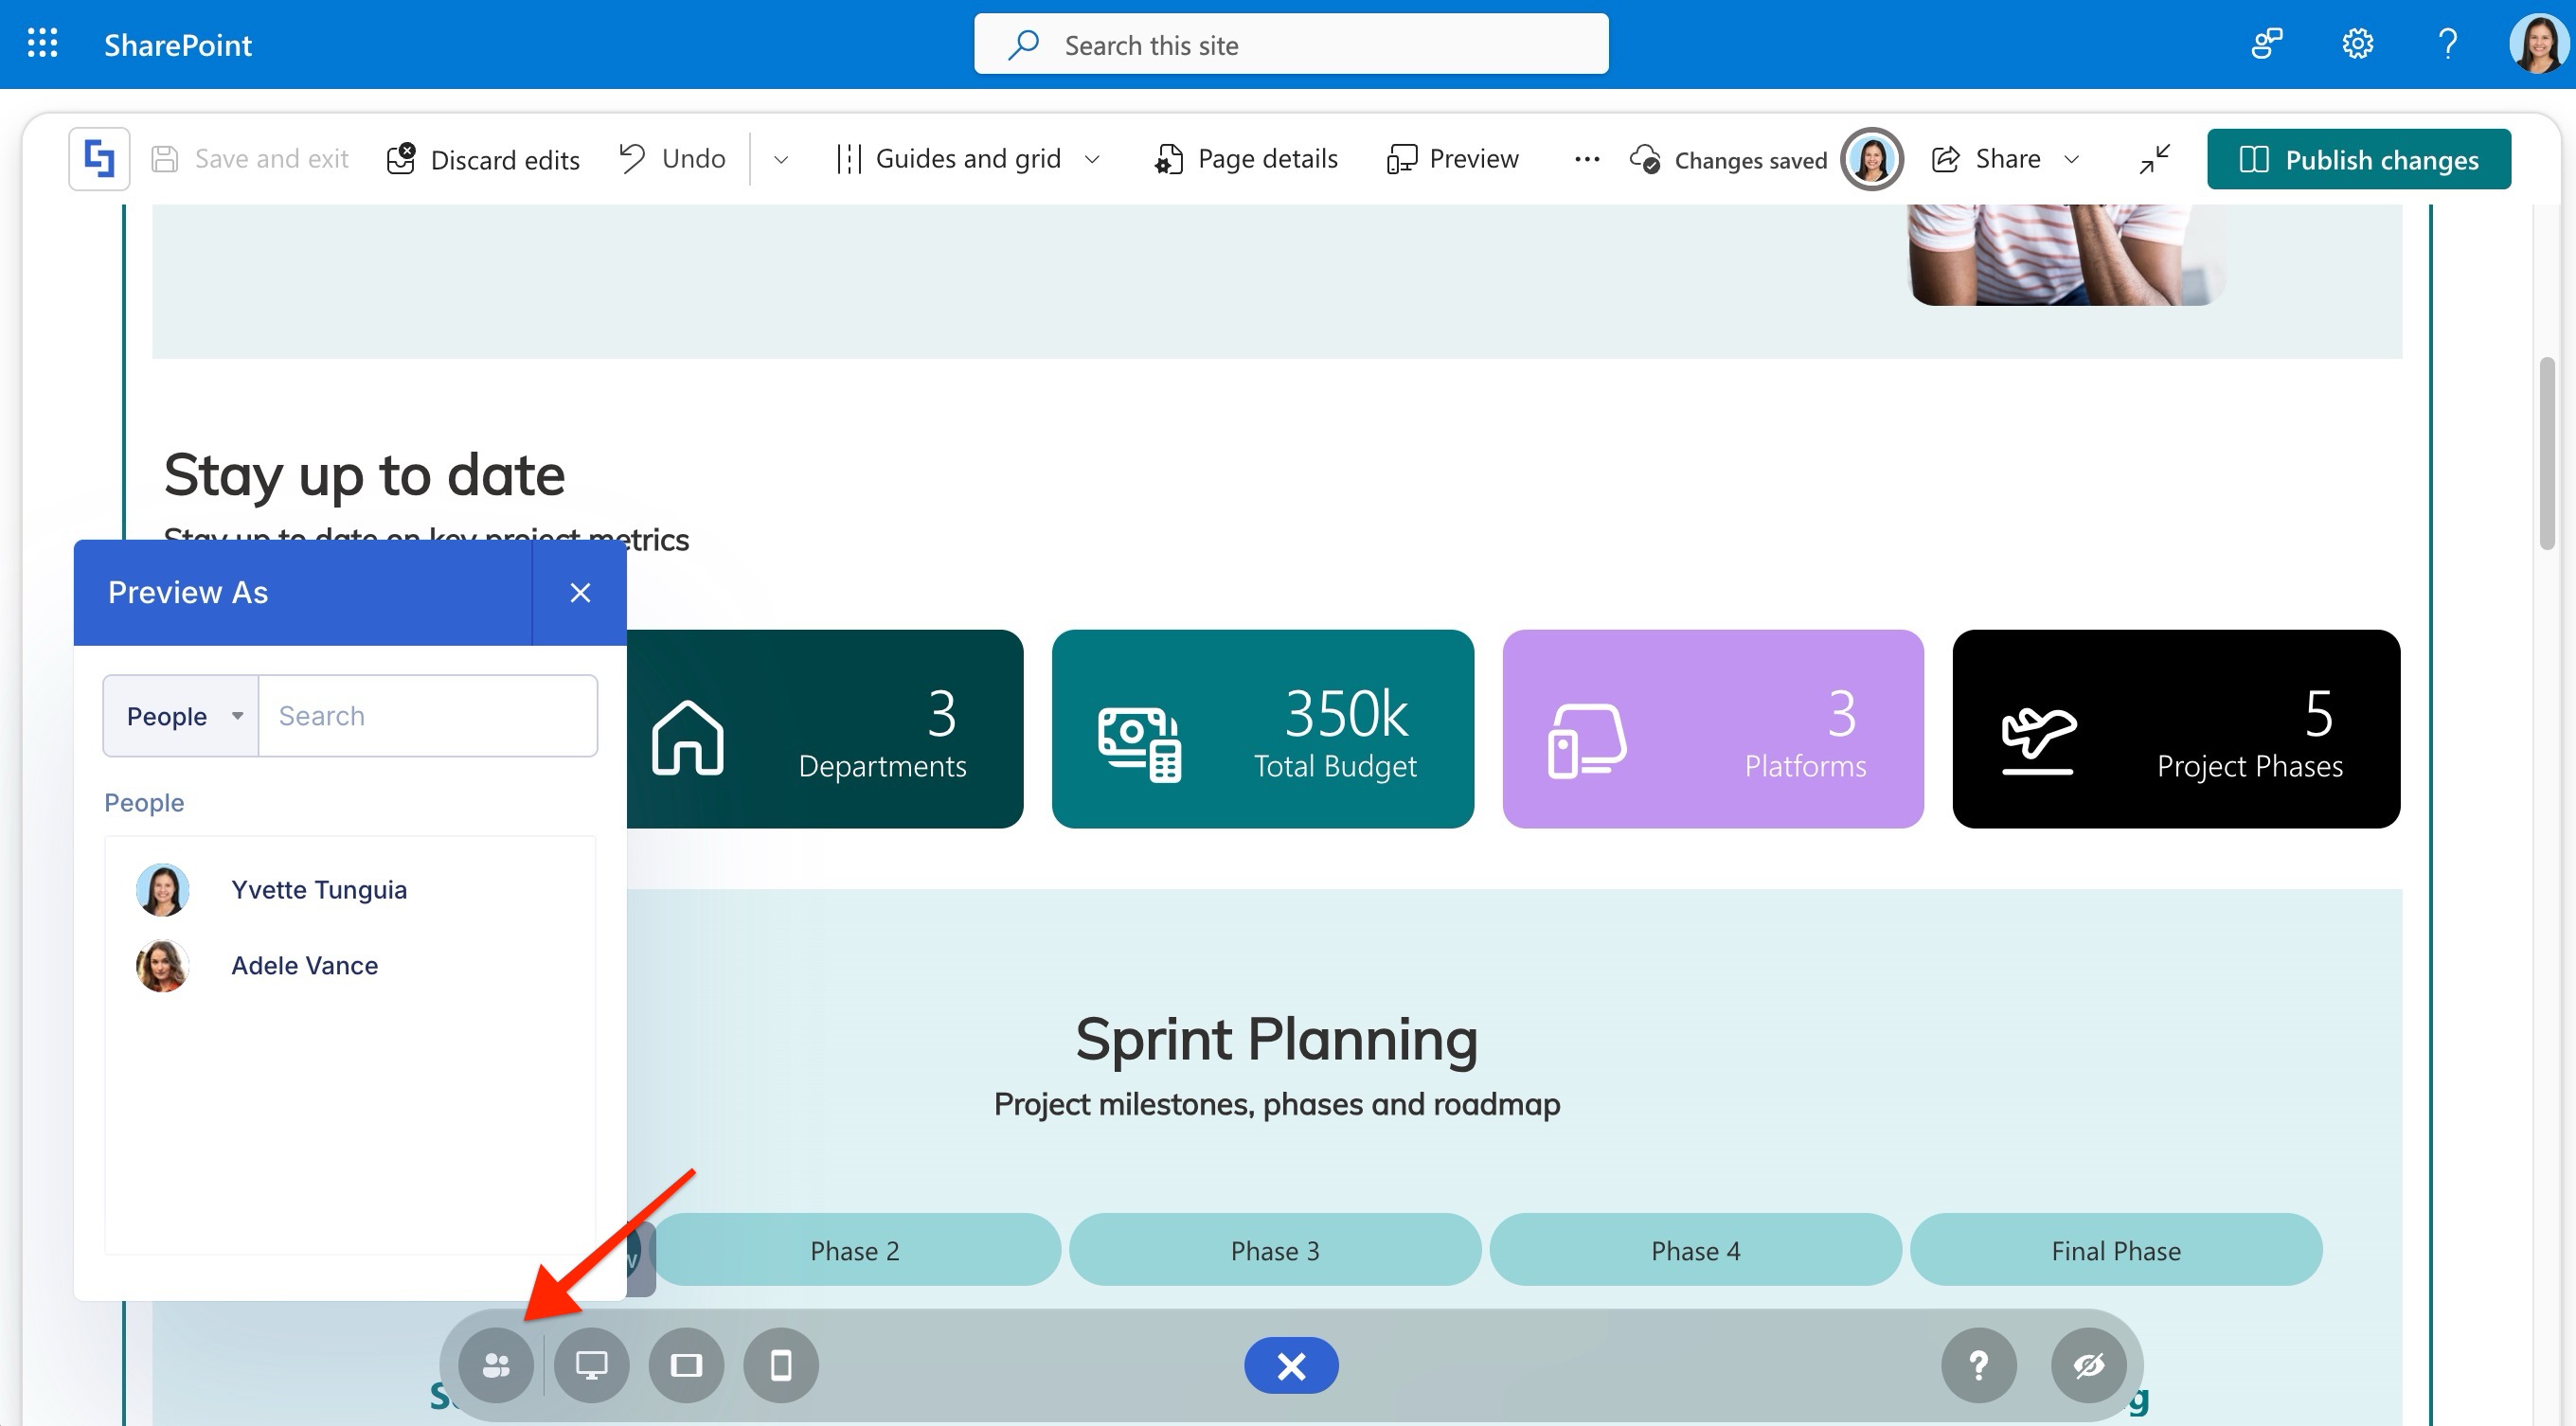
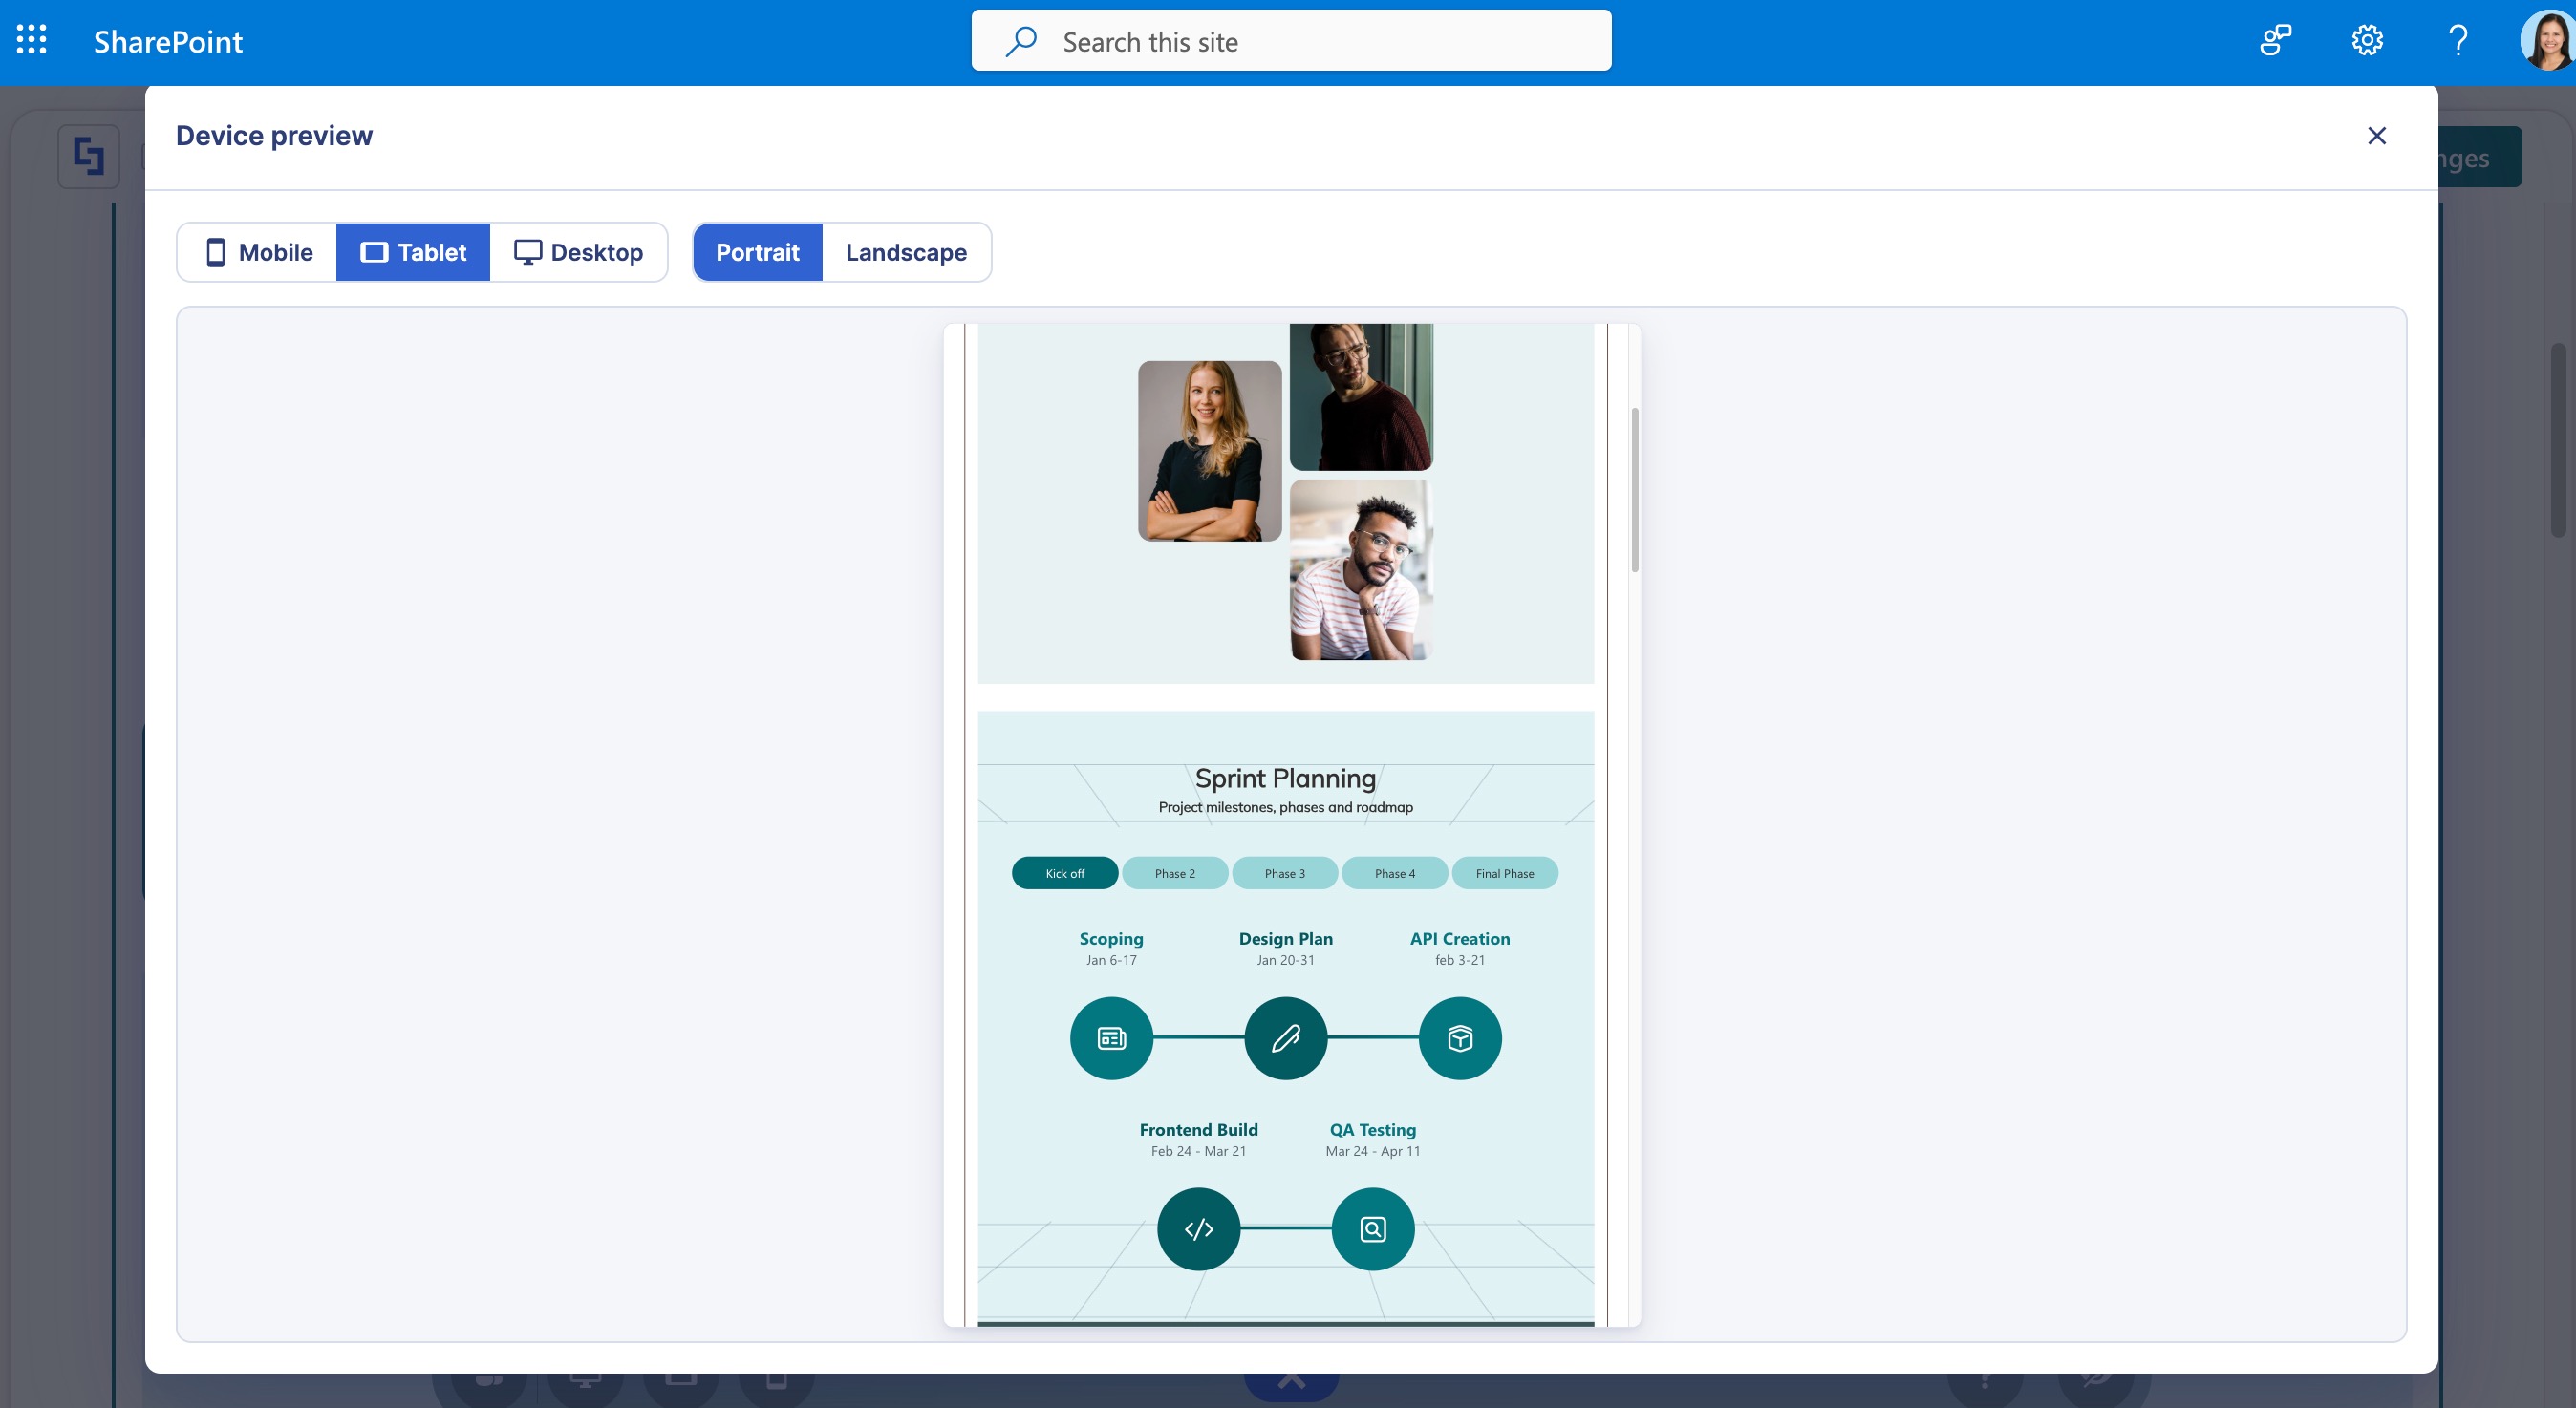
- Click any of the device icons to open the Device preview window where you can preview the page according to a specific device and its orientation,
- Once satisfied, Save your page edits and Publish.
For more detailed information on ShortPoint Visibility, please refer to our article How to Manage the Visibility of Design Elements.
Now, all visibility settings for a Design Element can be viewed and adjusted directly within the Visibility tab in Live Mode. No need to switch to Grid Mode or open a separate settings window.
Frequently Asked Questions
Do I still need to switch to Grid Mode to set Design Element visibility?
No. As of ShortPoint SPFx version 9.3.1.0, visibility settings are fully accessible within Live Mode's Visibility tab. You no longer need to leave Live Mode or open a separate settings window to configure who sees a Design Element.
Where do I find visibility settings for a Design Element in Live Mode?
Open the Design Element's cogwheel icon from the EasyPass tag, then switch to the Visibility tab. All visibility rules you can modify now appear directly within that tab, so you can review and adjust them without leaving Live Mode.
How do I save visibility changes to a Design Element?
Make your changes within the Visibility tab, then press the green checkmark button to apply them to the Design Element. Save your page edits and republish to make them live.
Related articles: