 Try ShortPoint now
While the SharePoint Document Library is an incredibly powerful document management tool, finding the best way to showcase those files on your pages can sometimes be a challenge. That’s where ShortPoint Connect comes in! It effortlessly pulls data directly from your modern SharePoint document library and displays it beautifully on your SharePoint sites.
In this article, you'll learn how to connect your new document library to ShortPoint Design Elements so you can start showcasing multiple files in style.

TABLE OF CONTENTS
- Prerequisites
- What is a SharePoint Document Library?
- How to Display Document Library in SharePoint Sites
- Part 1: Create a Document Library
- Part 2: Connect the Document Library
- Step 1: Edit the ShortPoint Web Part
- Step 2: Add a Document Template
- Step 3: Edit the Design Element
- Step 4: Choose Connection Type
- Step 5: Connect
- Step 6: Map Properties
- Step 7 (Optional): Modify Design
- Step 8 (Optional): Activate Toolbar Widgets
- Step 9 (Optional): Change other Template Elements
- Step 10: Save
- Why Have a SharePoint Document Library in SharePoint Sites?
- Frequently Asked Questions
Prerequisites
- You must have the latest version of ShortPoint SPFx installed.
- You must be a ShortPoint Designer with an active license.
What is a SharePoint Document Library?
A SharePoint Document Library is a secure location on a SharePoint site where you and your co-workers can create, find, update, and collaborate on files. Instead of just storing files on a local server or a messy desktop, a document library in SharePoint moves your files to the cloud and supercharges them with metadata (tags), automation, and advanced security rules.
Within a library, you can store a wide variety of file types (Word documents, Excel, PDFs, images, etc.), co-author documents in real-time with your teammates, and track the entire history of a file from creation to its current state.
But here comes the challenge: displaying your files on SharePoint pages. While SharePoint offers out-of-the-box web parts to showcase your Document Libraries, they can sometimes feel a bit rigid. Because design options are limited, it can be tough to make them match your organization’s unique branding.
To give you more flexibility, ShortPoint has created a collection of ready-to-use library templates. Crafted by our design experts, these templates make it easy to present your files beautifully while keeping your site's look and feel entirely on-brand. Amazing right?!
And to make things even better, you can connect these incredible templates to your SharePoint Document Library, making it dynamic. This means any update you make to the actual Document Library will automatically reflect the templates.
How to Display Document Library in SharePoint Sites
Here's an easy-to-follow guide you can use to start featuring your document library in SharePoint team sites. Follow the steps closely for a seamless document library display experience.
Here's the code used in Part 2 of the interactive tutorial:
var resultsWithType = data.d.results.map(function(item) {
    if(item.Name != null) {
        var lastDotPosition = item.Name.lastIndexOf('.');
        item['Type'] = item.Name.substring(lastDotPosition + 1, item.Name.length);
    }
    return item;
});

return resultsWithType;
Part 1: Create a Document Library
This section will show you how to create a SharePoint Document Library.
Step 1: Create a Blank Document Library
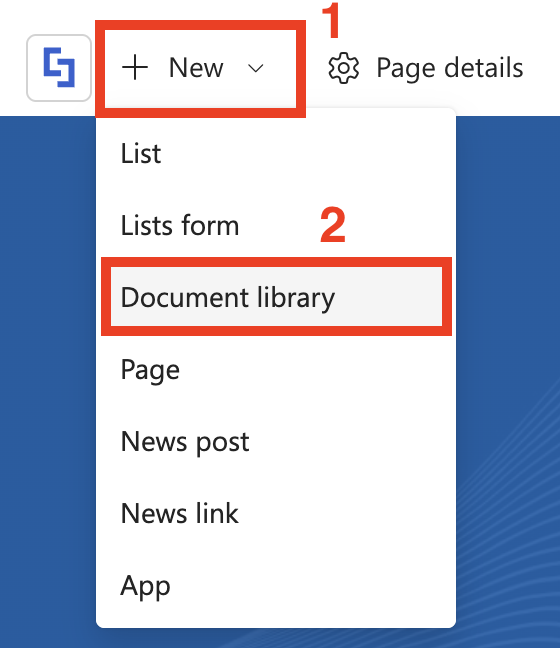
- Go to the SharePoint page you want to use, click [1] New, and select [2] Document Library:
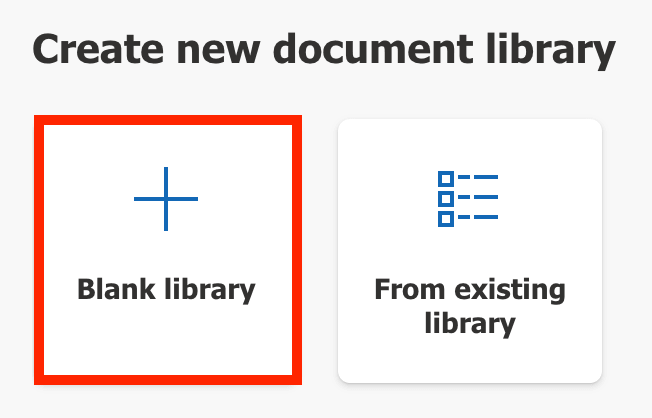
- From the choices, choose Blank Library:
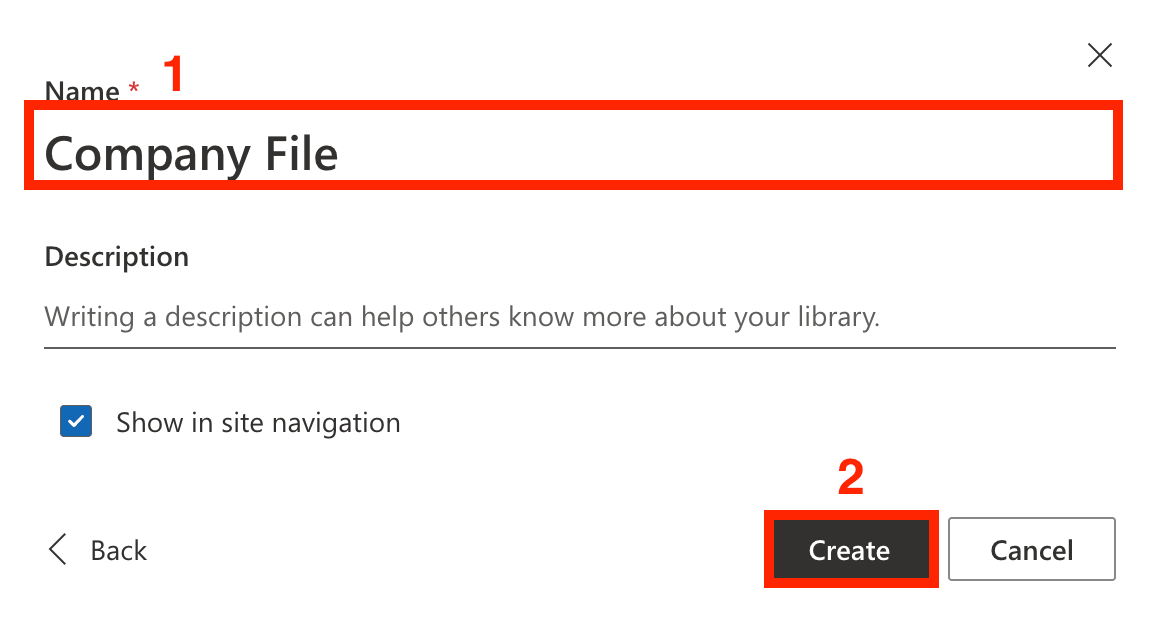
- [1] Name your Document Library and click [2] Create:
Step 2: Upload Files
- Click the Create or Upload button to add files. You can also drag and drop files inside the Document Library.

Step 3 (Optional): Add Columns
- If you wish to add more details about your files, you can add additional columns. To do that, click Add Column:

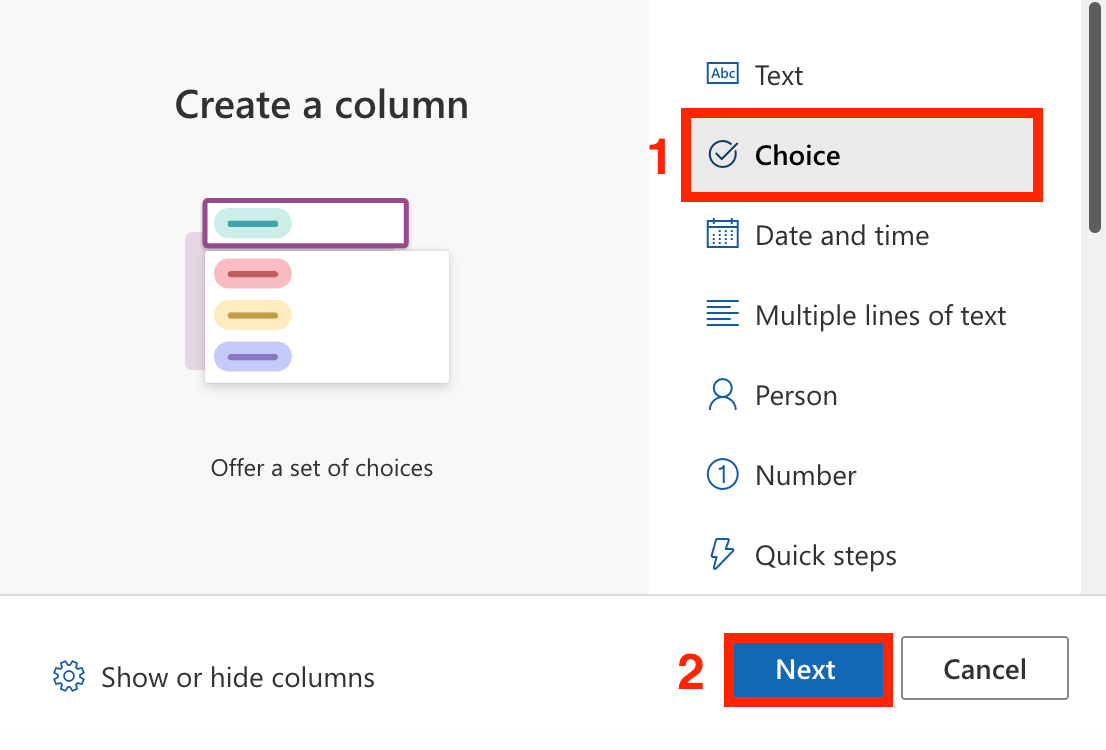
- Choose the [1] type of content you want to have inside the column and select [2] Next:
- Add the necessary details.
- Click Save.
- Repeat Steps for every column you need to add.
Step 4 (optional): Fill in the Columns
- Once you have all the columns you need, click Edit in grid view.

- Fill in the details.
- Click Exit Grid view.

Great work! You now have a Document Library. You can now proceed to Part 2, where you will connect this library to a ShortPoint Design Element.
Part 2: Connect the Document Library
This section will cover the connection aspect of the tutorial. Follow the steps closely to get started.
Step 1: Edit the ShortPoint Web Part
- Go back to your SharePoint page and click Edit:

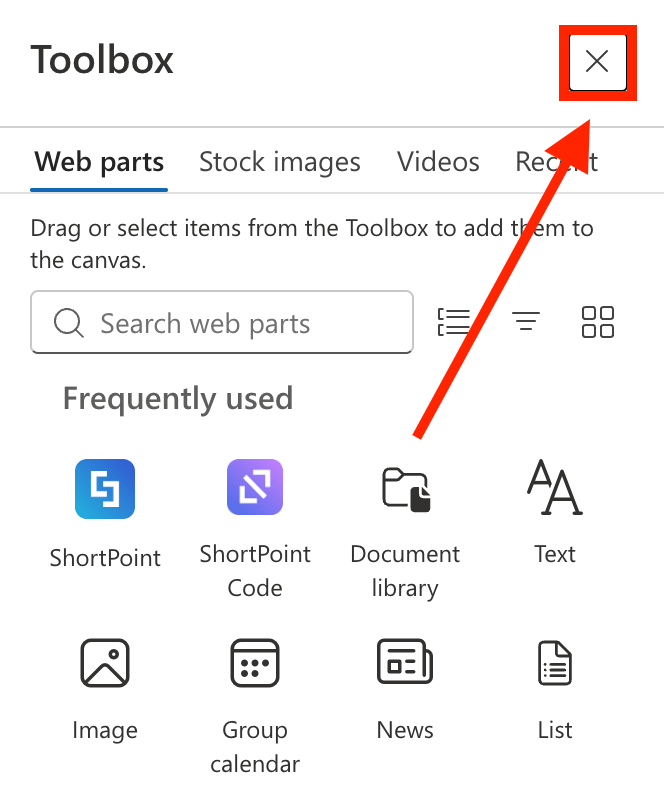
- Close the Toolbox:
- Click the Edit properties icon:

Step 2: Add a Document Template
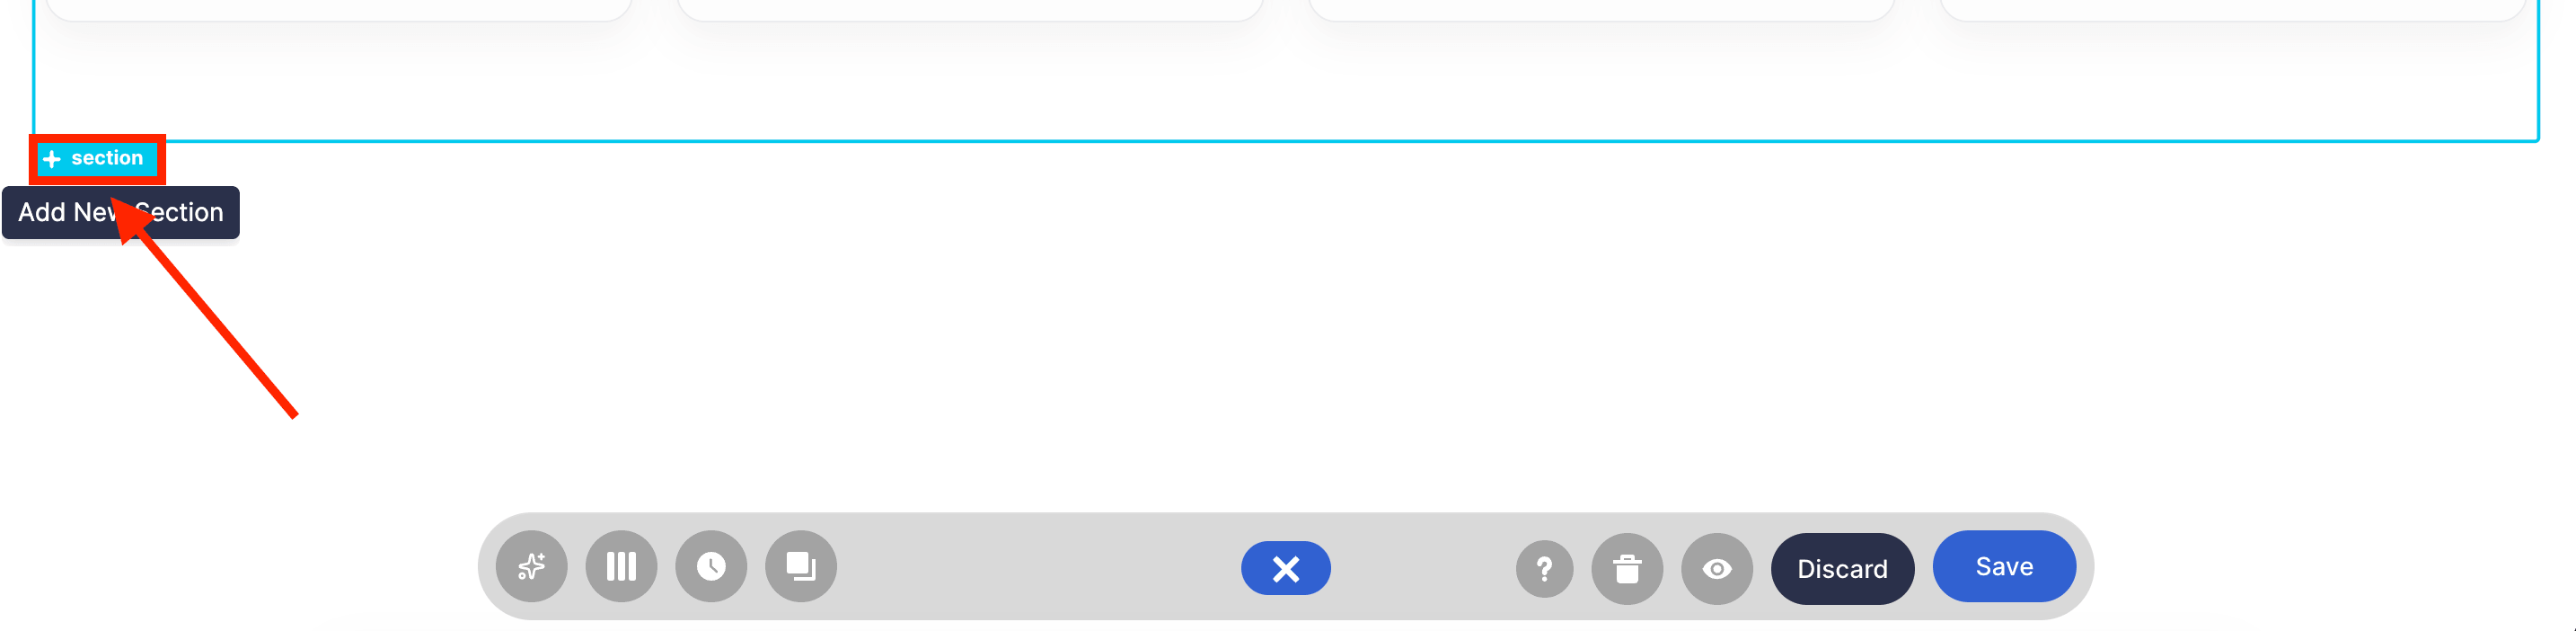
- Determine where you want to add the Document section and click the blue plus icon to add a Section:
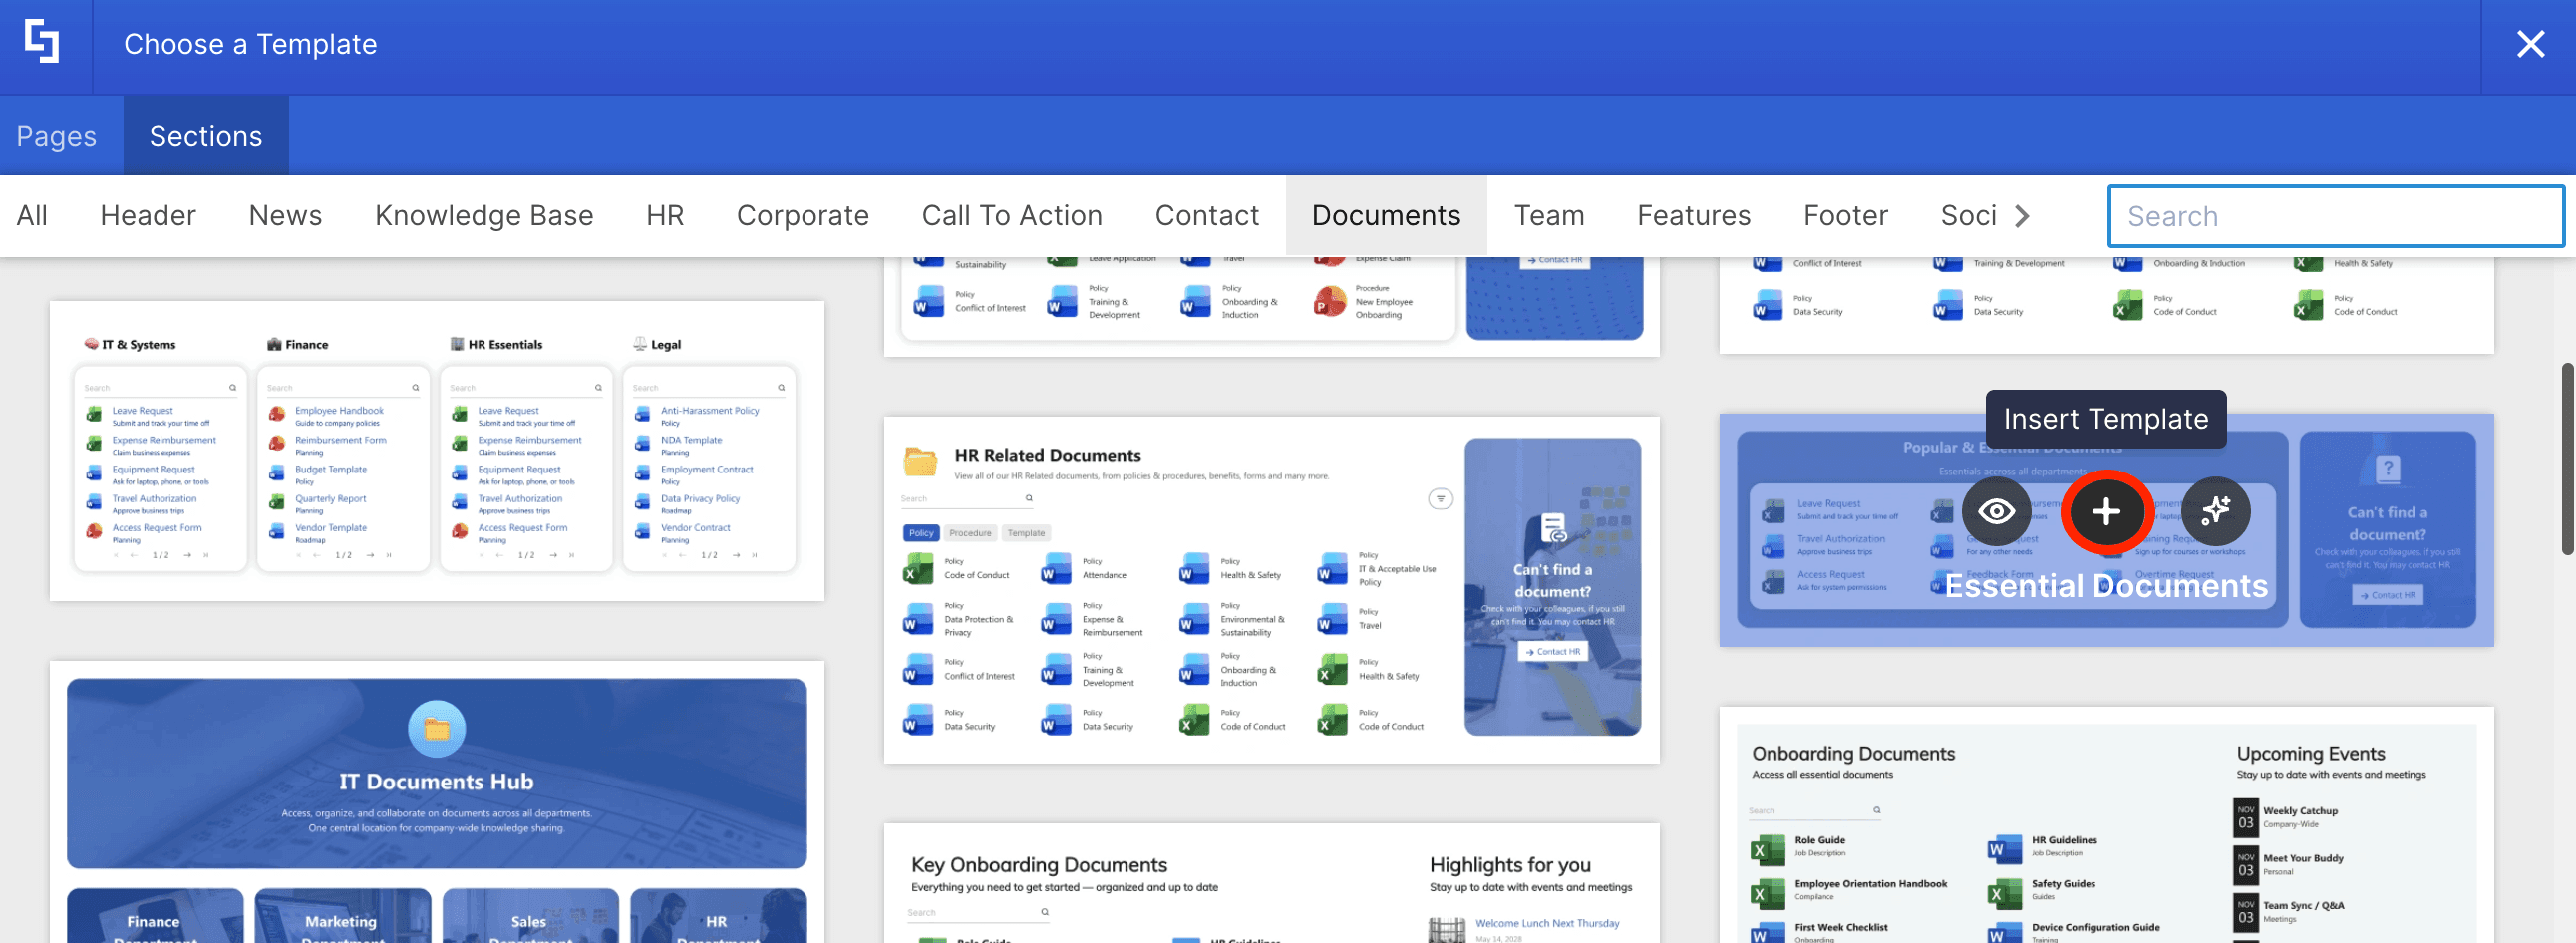
- Choose the Open Templates icon:

- Go to the Sections tab:

- Navigate to the Documents tab.

- Hover over the Document template you want to use and click the plus icon:
Step 3: Edit the Design Element
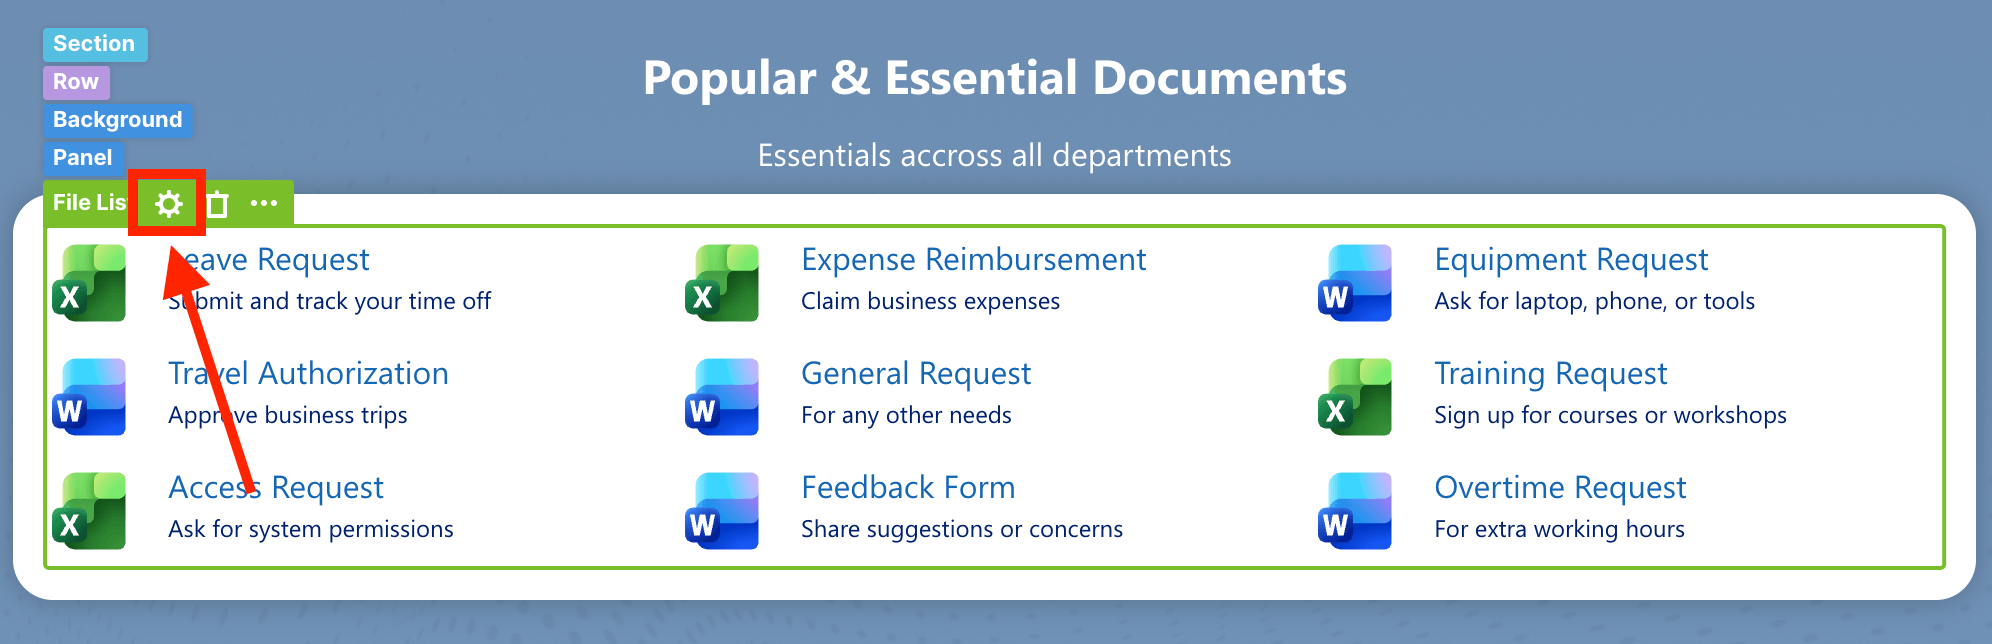
- Click the EasyPass tag of the File List Design Element:

- Select the cogwheel icon:
Step 4: Choose Connection Type
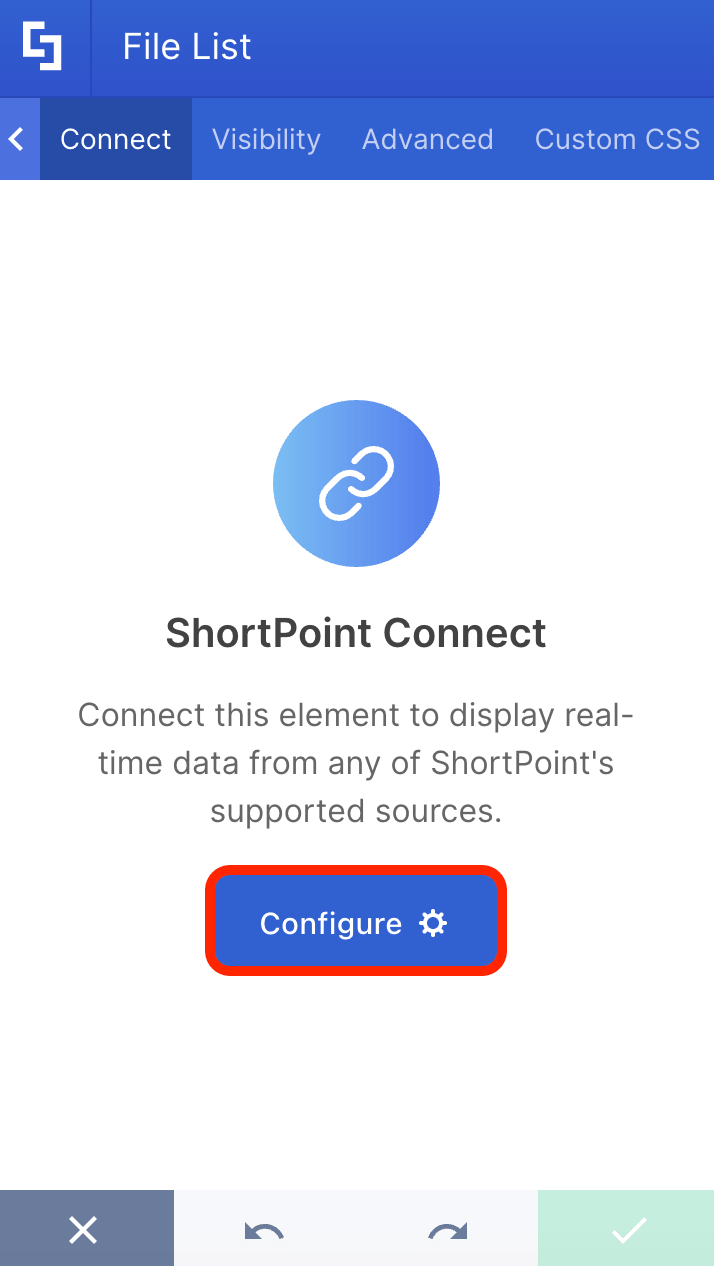
- Go to the Connect tab.
- Click Configure:
- Choose the connection type you want to use. You can choose from:
- Current Site: choose this option if the Document Library you created in Part 1 is in the site you're using.
- Other Sites: choose this option if the Document Library you created in Part 1 is in another site.
- SharePoint Site URL: choose this option if you know the SharePoint URL of the site where your Document Library is located.

Step 5: Connect
NOTEDepending on the connection type you chose, the fields you need to fill in will differ. As an example, we'll use the Current Site connection.
- Find the name of your FAQ SharePoint List from the drop-down:

- Choose the View you want to use.

- Copy the code below. This code will allow the connection to determine the file type of each document in your Document Library:
var resultsWithType = data.d.results.map(function(item) {
    if(item.Name != null) {
        var lastDotPosition = item.Name.lastIndexOf('.');
        item['Type'] = item.Name.substring(lastDotPosition + 1, item.Name.length);
    }
    return item;
});
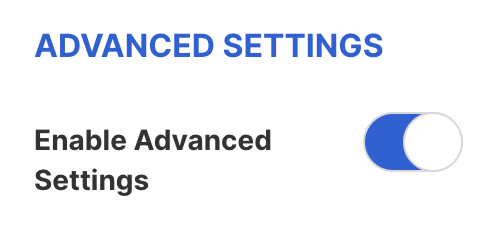
return resultsWithType;- Expand Advanced Settings.
- Toggle on Enable Advanced Settings:
- Scroll down to Map Results and paste the code:
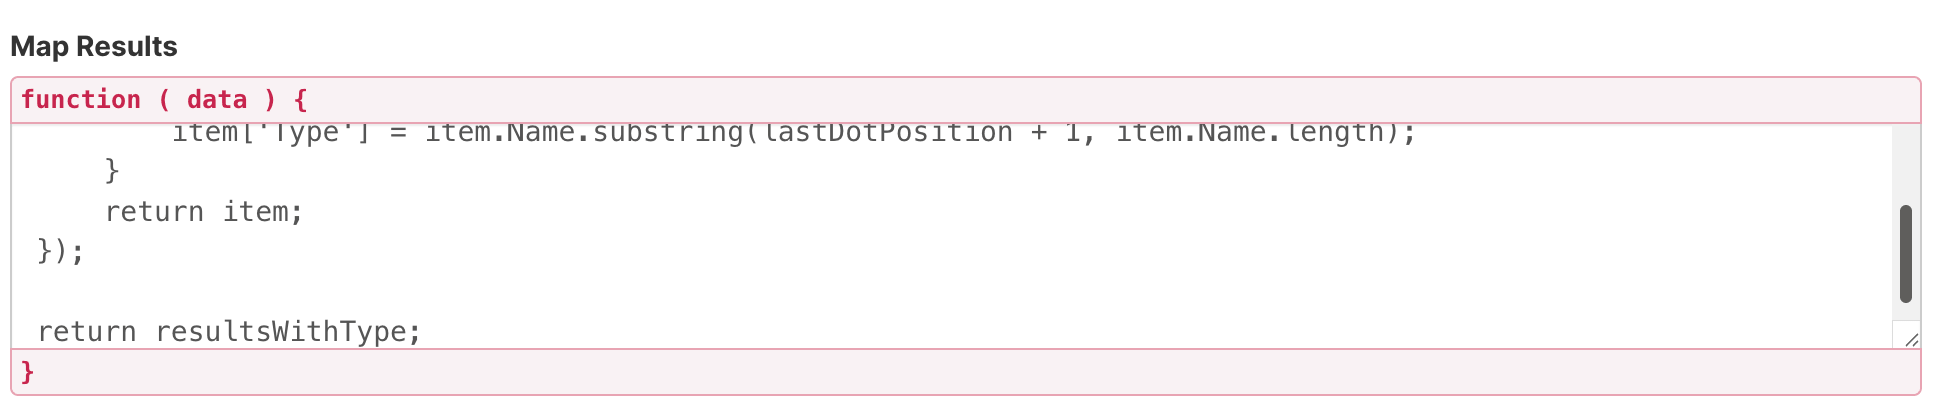
- Once done, click Connect.
Step 6: Map Properties
- Go to the Items tab.
- Delete all default content.
- Use the link icon to map the properties you want to showcase:
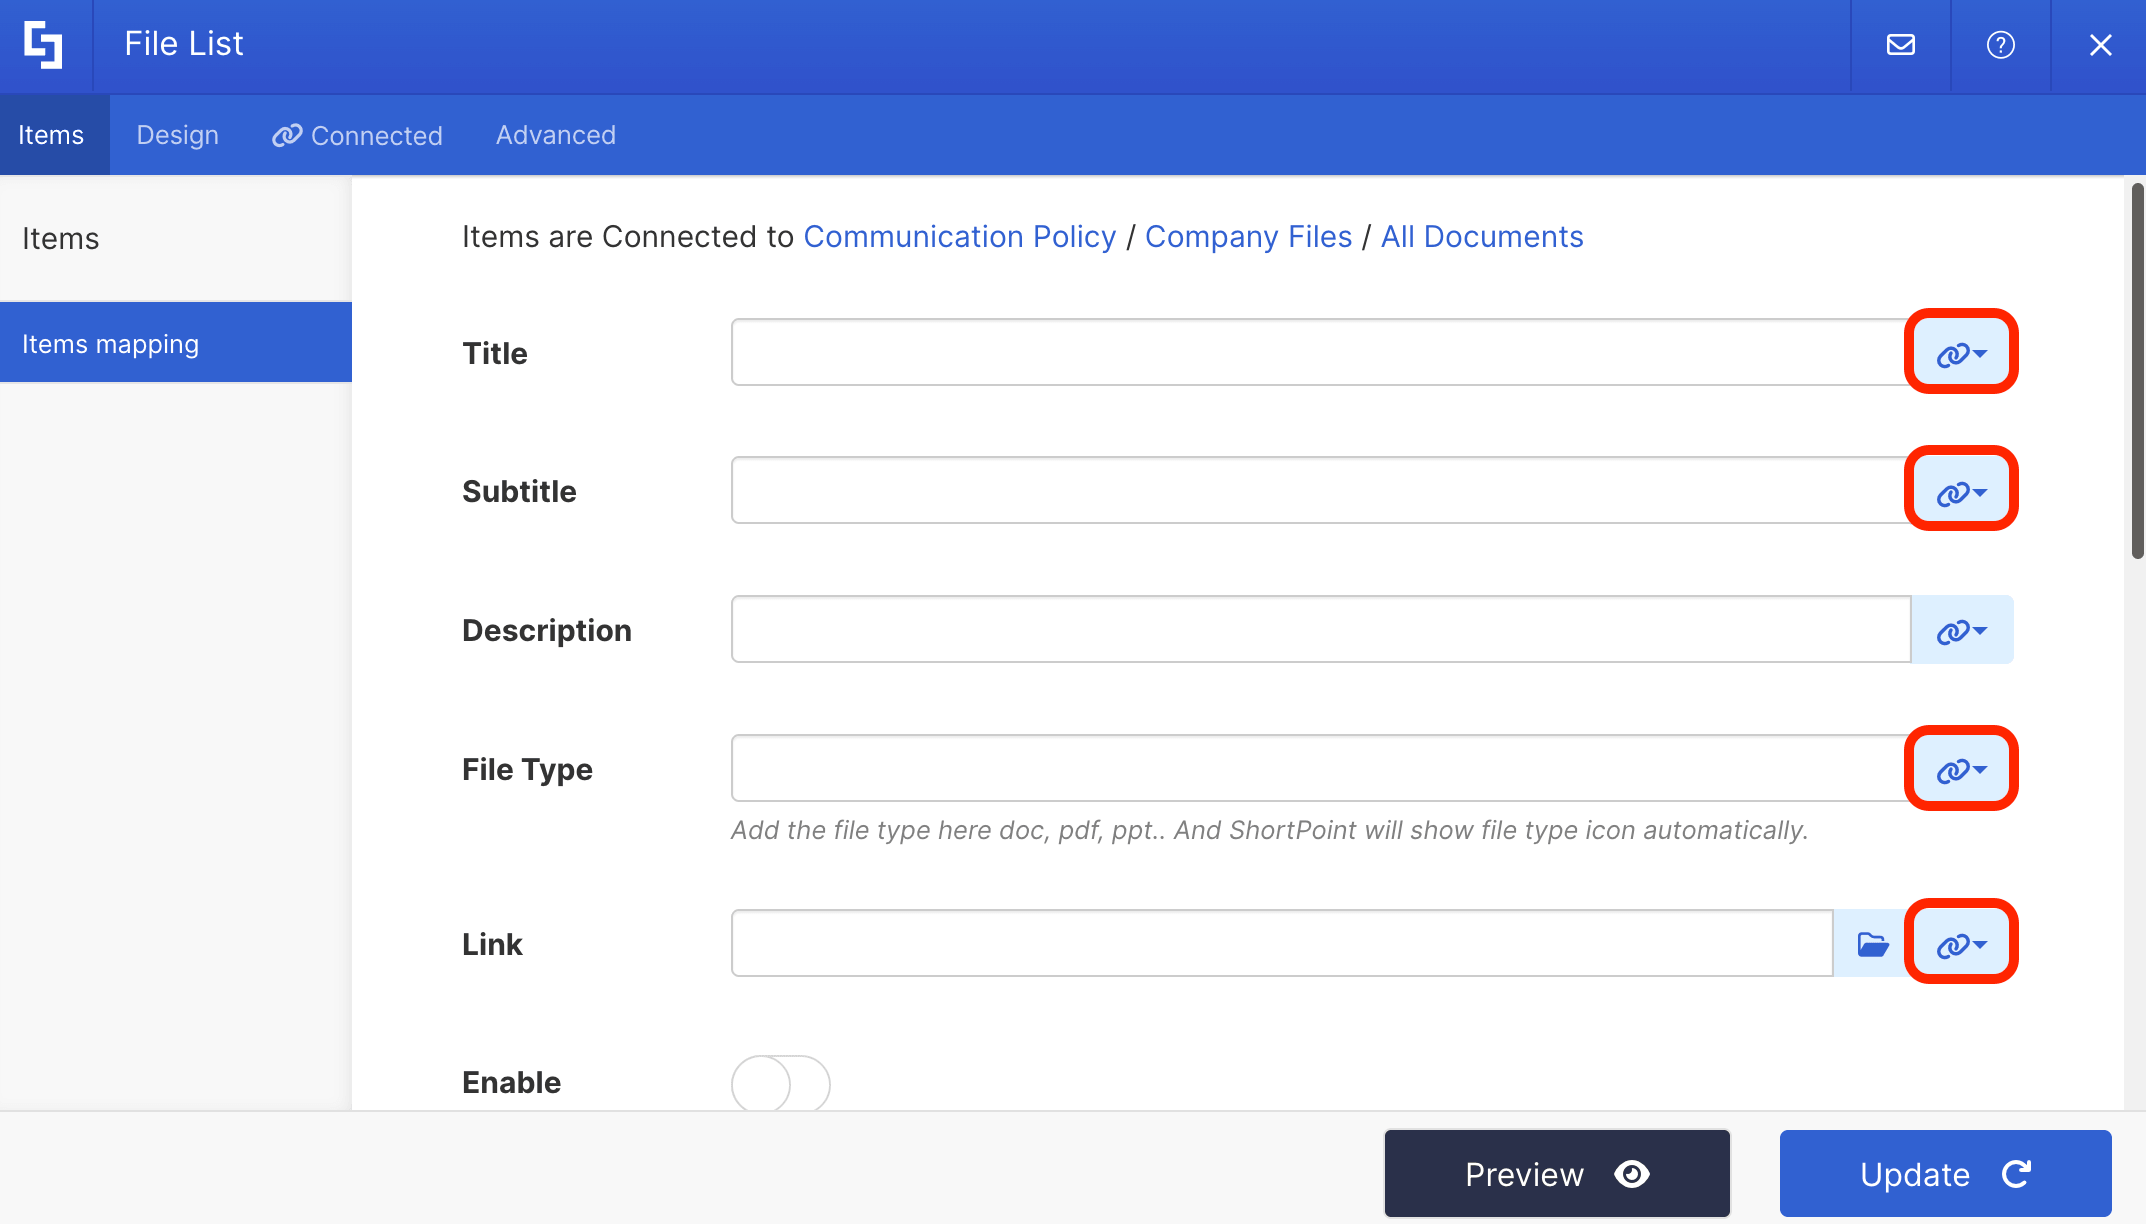
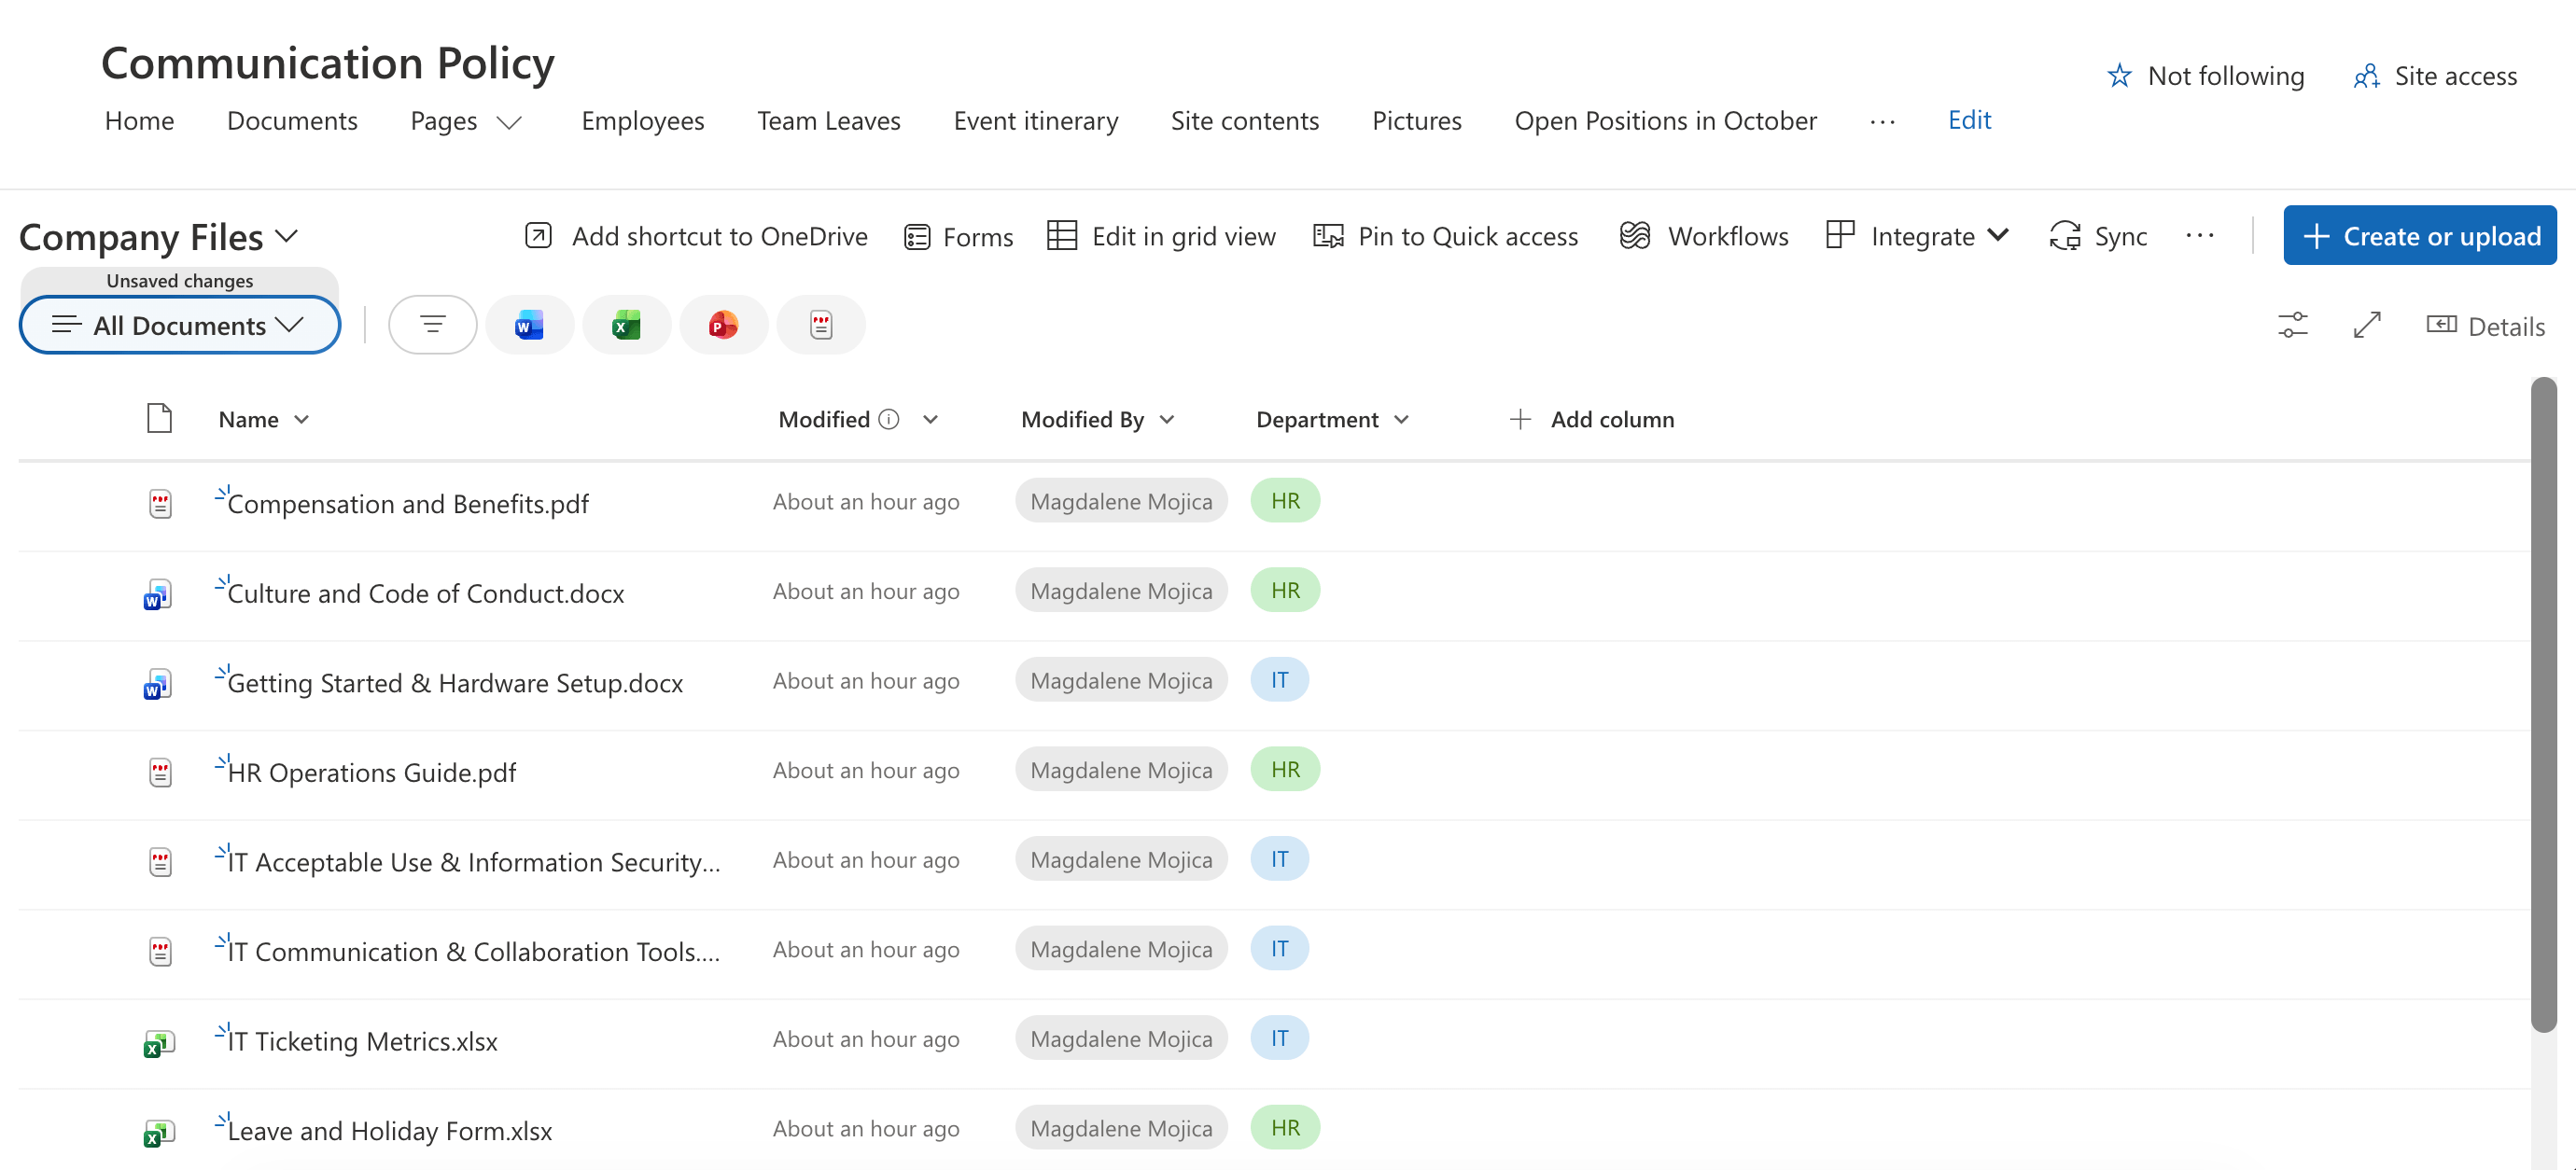
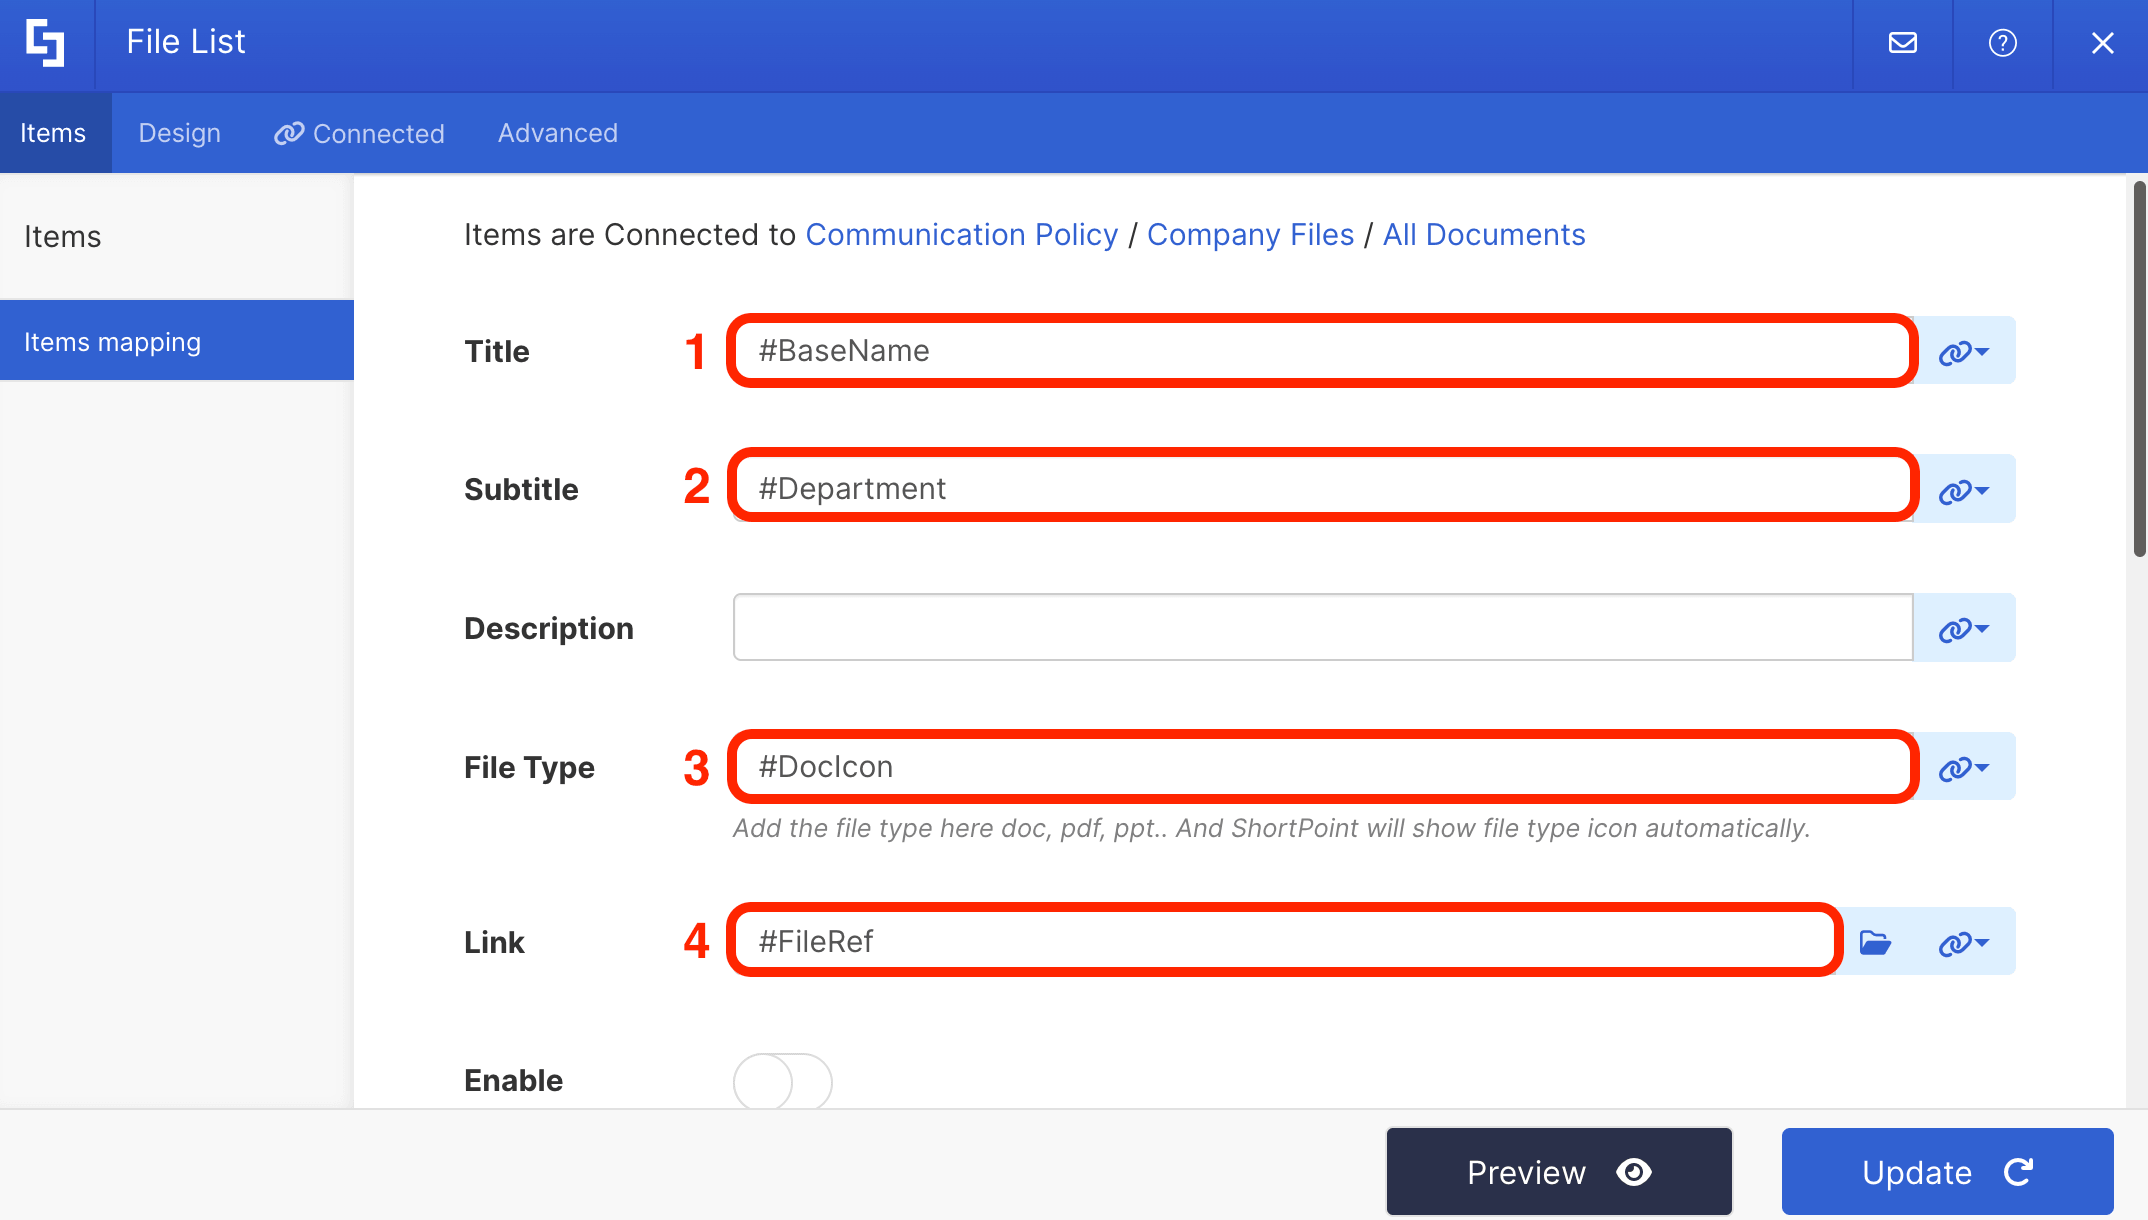
- We recommend using the mapped properties below. However, if you have any other requirements, you can map properties as you see fit:
- #BaseName - showcase the name of the file.
- #Department - showcase the content inside the Department column created in Part 1.
- #DocIcon - showcase the file type of the document.
- #FileRef - redirects to the actual file when clicked.
NOTEFor more information on Items Mapping, check out ShortPoint Connect: How Items Mapping Works.
- Click Update.
Step 7 (Optional): Modify Design
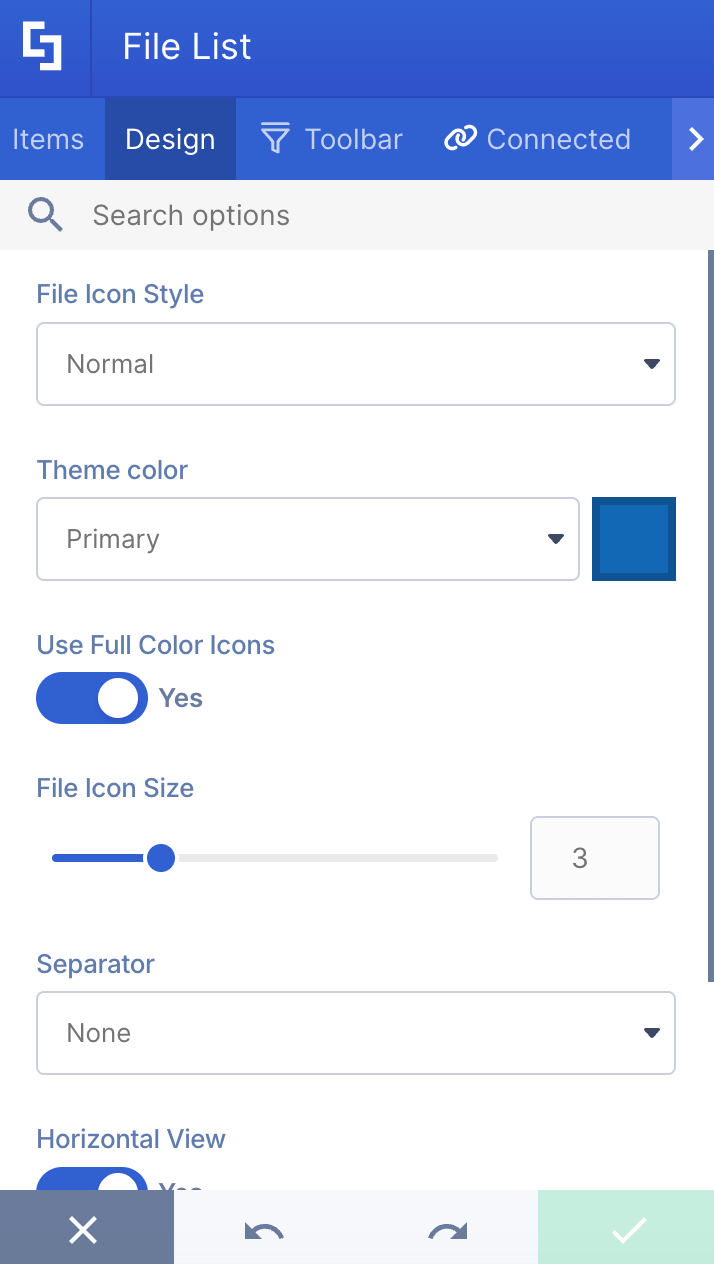
- Go to the Design tab.
- Customize the look of the Design Element to your liking:
Step 8 (Optional): Activate Toolbar Widgets
- If you have a lot of files, we recommend activating toolbar widgets. To do that, go to the Toolbar tab.
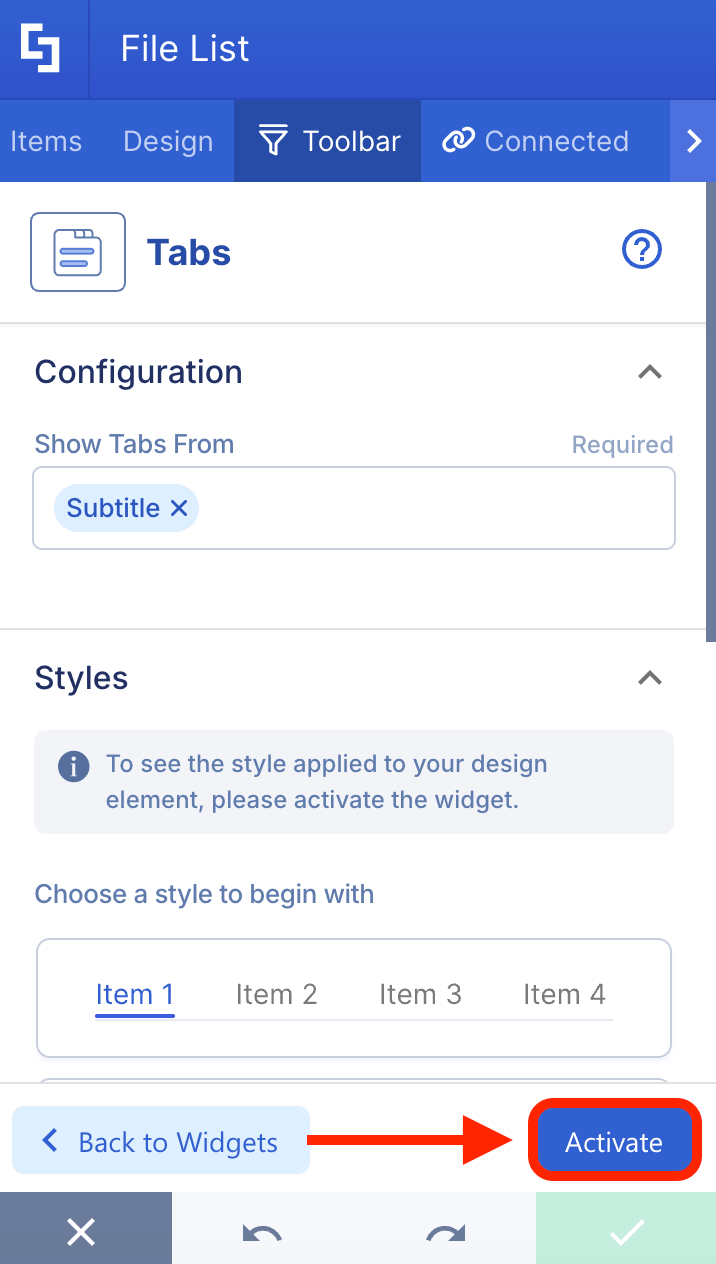
- Select the widget you want to activate. Take note that you can activate multiple widgets.
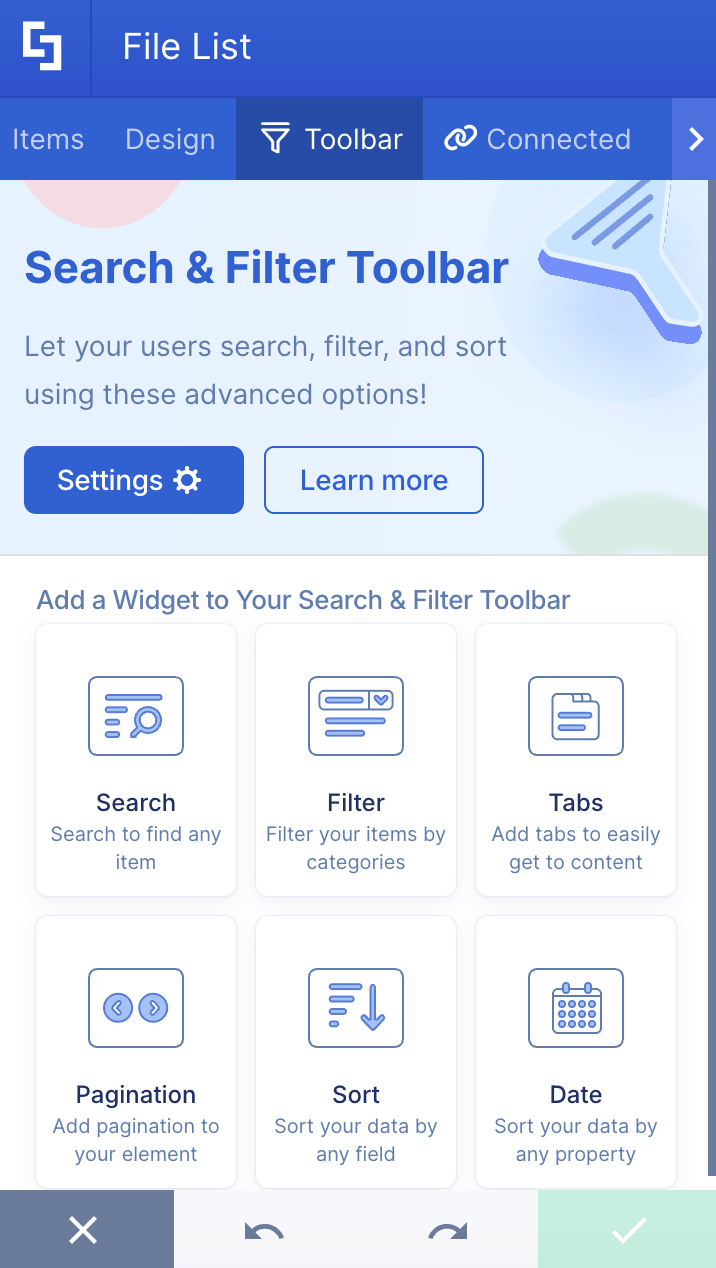
- Modify the widget to your liking.
- Click Activate:
NOTEFor more information on the Search & Filter Toolbar widgets, checkout Getting Started: The Basics of the Search & Filter Toolbar.
- Once done, apply your changes:

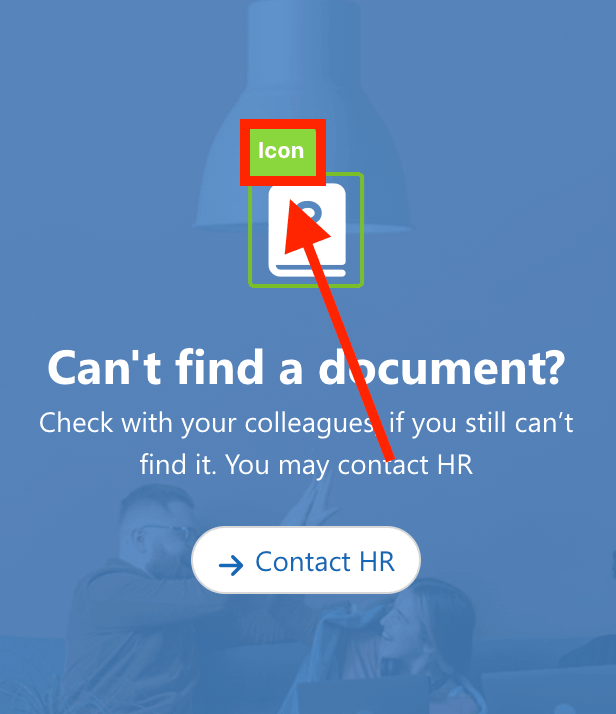
Step 9 (Optional): Change other Template Elements
- You can also modify the other Design Elements found in the Document template. Simply click the EasyPass tag of the Design Element:
- Select the cogwheel icon:
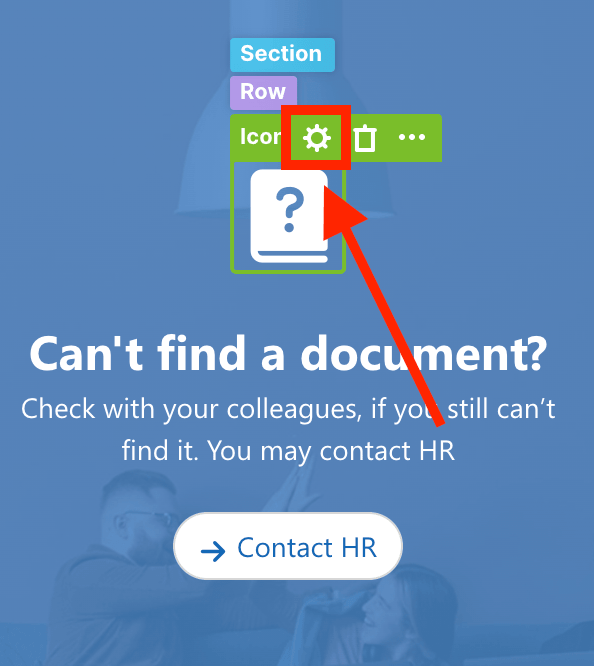
- And customize the content as you like.
- Click the green check mark to apply changes.
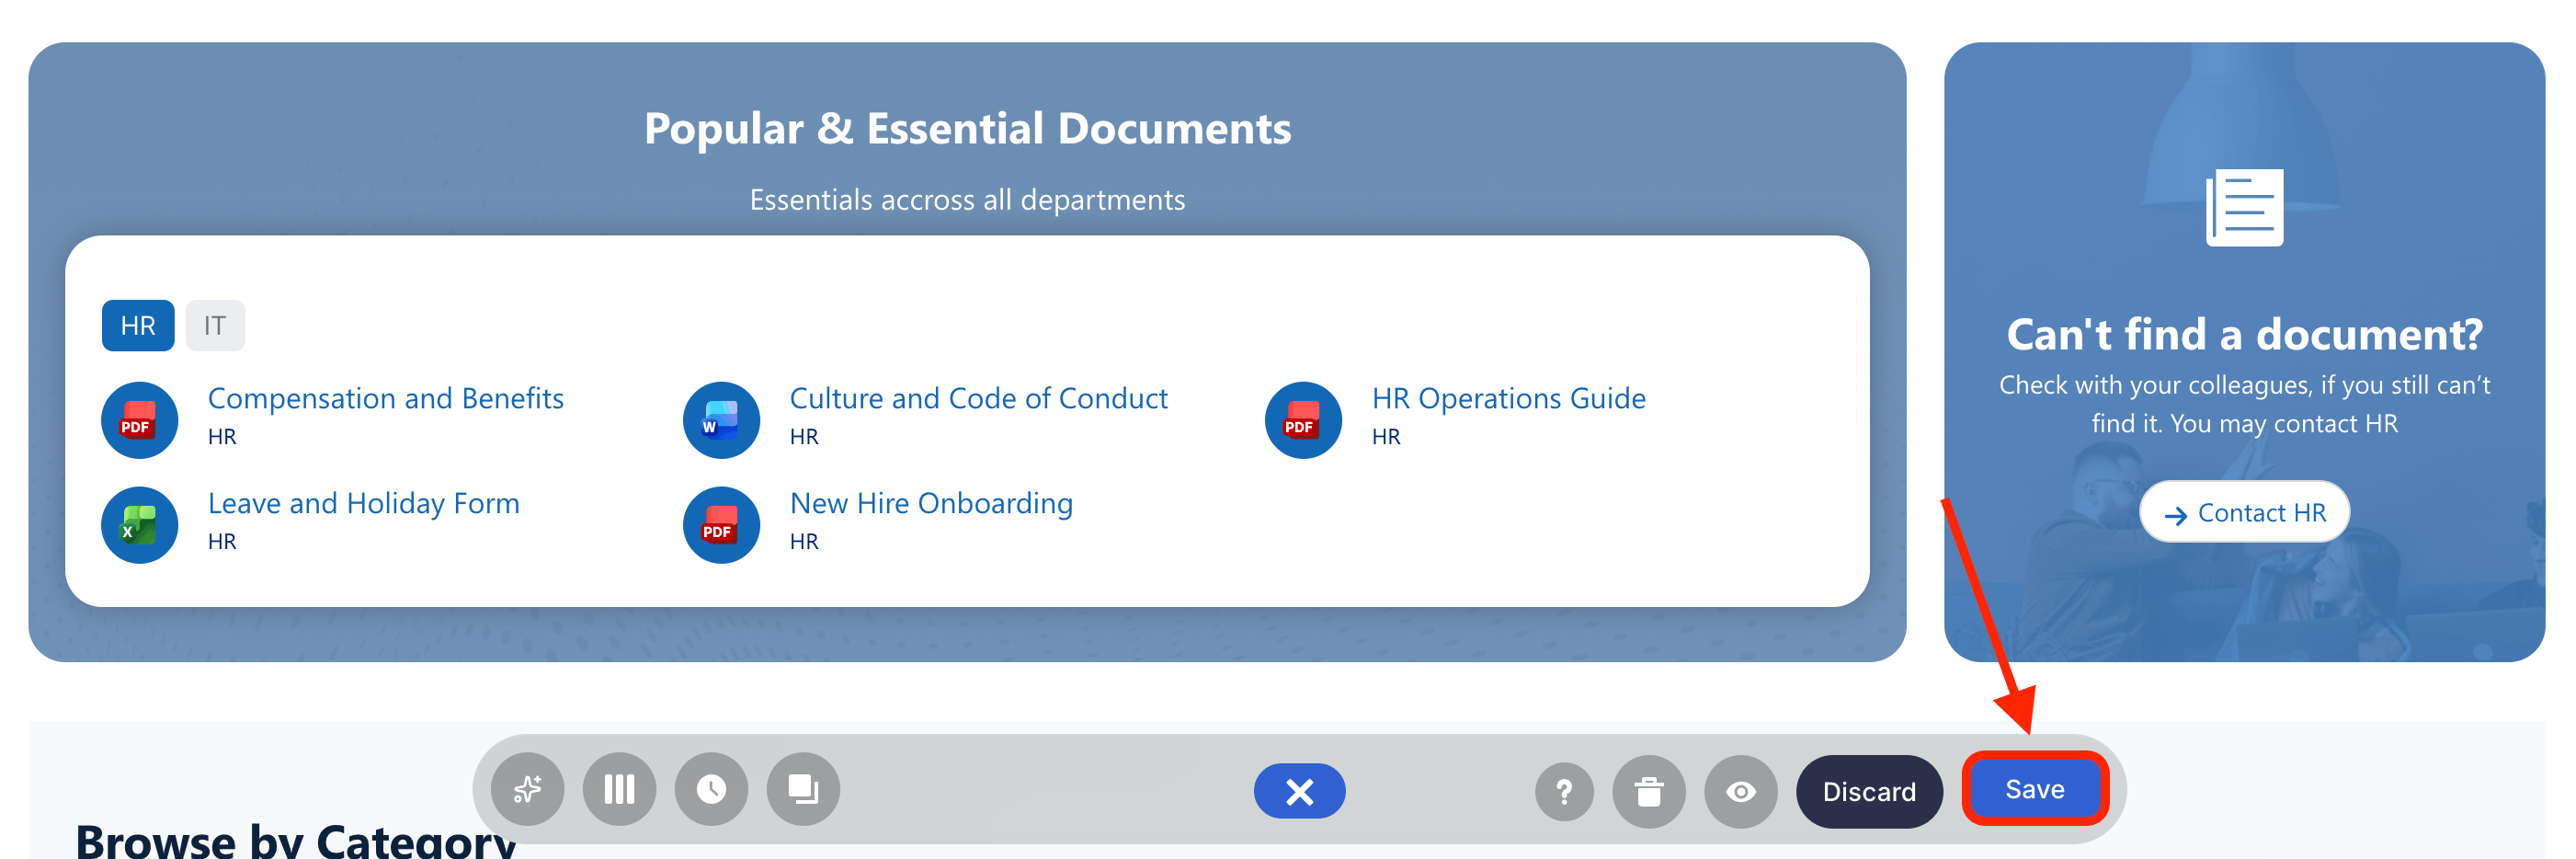
Step 10: Save
- Save your changes:
- Publish your page:

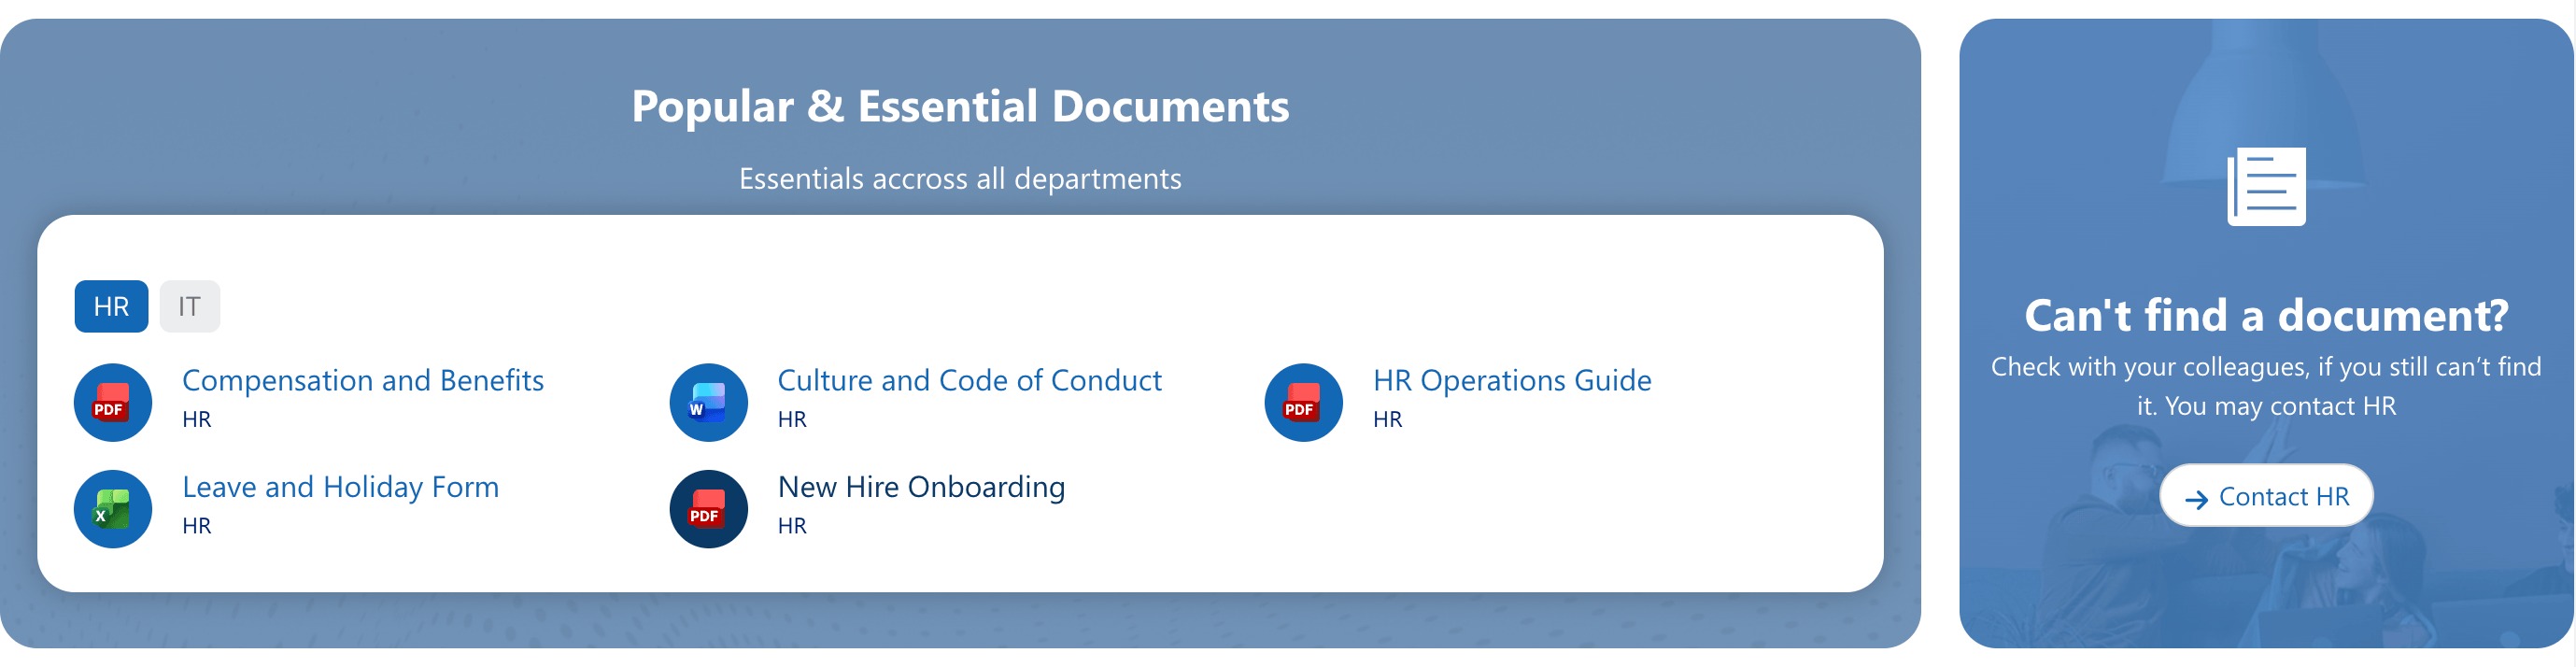
Congratulations! You now have a dynamic document library on your SharePoint page, showcasing all the documents with style and ease. This central repository allows multiple team members to access, collaborate, and manage files efficiently.
Why Have a SharePoint Document Library in SharePoint Sites?
Showing your document library in SharePoint team sites completely transforms how your organization handles information. Here's why they are an essential asset for your digital workspace:
- Improves Accessibility and Efficiency
When team members land on a SharePoint team site, they usually have a specific task in mind. By showcasing a document library on the homepage or a relevant sub-page, you eliminate unnecessary clicks.
- Drives Better Collaboration and Version Control
When documents are hidden away, people tend to download local copies or email attachments back and forth, which wreaks havoc on version control. Showcasing the document library reminds the team that a central, single source of truth exists. Because SharePoint allows for real-time co-authoring, team members can work together simultaneously on the showcased files without leaving the site.
- Boosts User Adoption
A team site that looks empty will quickly be abandoned by users. Showcasing active document libraries makes the site feel alive, organized, and immediately valuable. When people see a clean, well-structured library display, they are much more likely to adopt SharePoint as their primary collaboration tool.
Frequently Asked Questions
What are SharePoint libraries, and how do they help in storing documents?
SharePoint libraries are secure locations on a SharePoint site designed for storing documents and other file types. They provide advanced features like metadata tagging, version tracking, and document approval workflows, making the process of storing documents more efficient and organized
Is there a limit to how many files I can store?
A single SharePoint document library can hold up to 30 million items. However, for optimal performance and ease of use, Microsoft recommends breaking large collections of files into multiple libraries or sites once you start reaching hundreds of thousands of files.
How do I create a new Document Library in SharePoint?
To create a new Document Library, go to your SharePoint site, click New, select Document Library, choose Blank, name your library, and click Create. You can then upload files and add columns to organize your content.
Can I display a Document Library on my SharePoint page?
Yes! You can showcase your Document Library on SharePoint pages using ShortPoint Connect, which allows you to connect your library to customizable templates that update dynamically with any changes in your library.
Related articles:
